Industrial style is an interesting thing. It can be an all-encompassing aesthetic, what with exposed brick walls and duct pipes in the ceiling and galvanized everything and all. Industrial style can also be simple and singular, which is what this DIY rolling kitchen/bar cart claims to be. The wood stain brings out a bit of organic feel, while the “iron” side supports and casters give it that industrial vibe that’s both chic and edgy and approachable, all at the same time.
The greatest part about this industrial rolling kitchen cart is that it’s easier to build than it might seem. Truly. With just some basic tools and supplies, you’ll be able to build your own in very little time (the most time-consuming part is letting the finish on your shelves dry). So let’s get you moving toward building your own gorgeous DIY industrial rolling cart.
DIY Level: Intermediate
Materials you’ll need for this rolling kitchen cart:
- Six (6) 1×8 pine or white boards, cut to 26” lengths
- Three (3) 1×3 pine or white boards, cut to 26” lengths
- Six (6) 1×3 pine or white boards, cut to 15-1/4” lengths
- Four (4) 1” aluminum angle iron, 36” lengths
- 1-1/4” kreg screws
- 3/4″ wood screws
- Four (4) casters
- 220-grit sandpaper
- Pocket hole plugs (optional)
- Rustoleum paint + primer spray paint in Flat Soft Iron
- Kreg right-angle clamp (optional but highly recommended)
- Stain/paint/finish of your choice (not shown)
- Kreg jig, impact drill screwdriver, power drill
How to build a rolling kitchen cart from metal and wood:
Step 1: Drilling the holes
Pair up your six 1×8 pieces into three pairings of two-board shelves. Determine, based upon knots and the appearance of the boards, the tops/bottoms of the shelves and also which sides of the boards will be the joints. Drill four pocket holes along the long side of one board per pair.
You can eyeball this or measure it. Try to keep the two outside pocket holes about 2” from the ends, then evenly space the other two holes in between. They’ll end up being about 7”-” apart.
Do the same for the other side of that same board. Drill two pocket holes along each short end as well, about 2” from the sides. When you’re done with one board, you should have 12 pocket holes. Repeat for two other 1×8 boards, for a total of three 1×8 pocket-holed boards (one for each shelf pairing).
Take the other (non-pocket-holed) 1×8 boards and, on what will become the bottom side, drill two pocket holes on each short end, for a total of four pocket holes on these boards.
Step 2: Creating the shelf
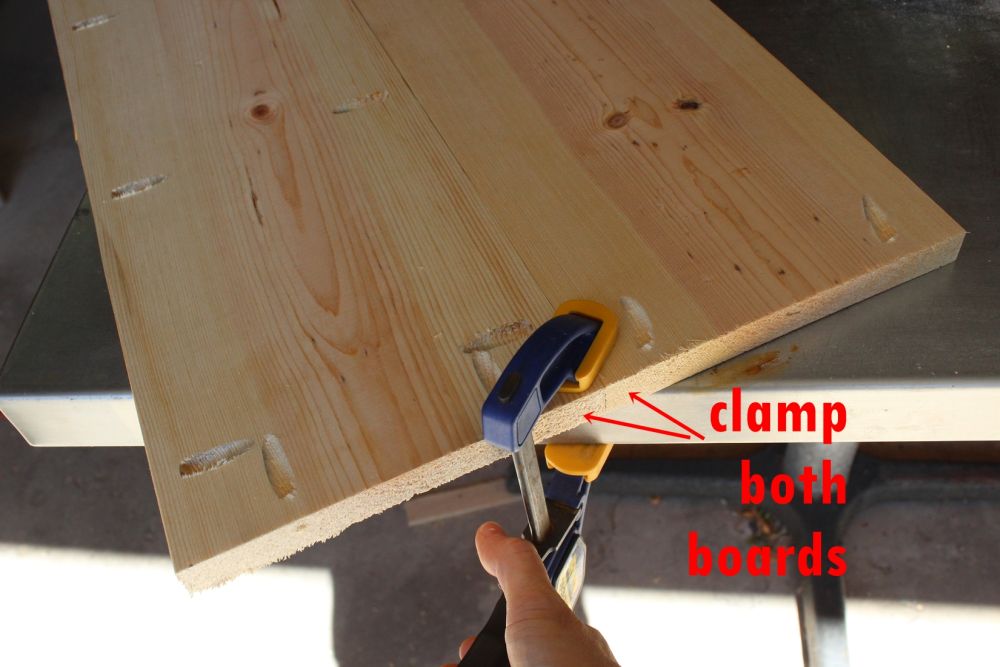
With the pocket holes facing upward, clamp the two boards together onto your work surface. You’ll be creating the shelf at this point by joining them together. Make sure both ends are precisely aligned.
To keep the boards flush and together, clamp both boards together with one clamp on each end. This will hold them together vertically and horizontally.
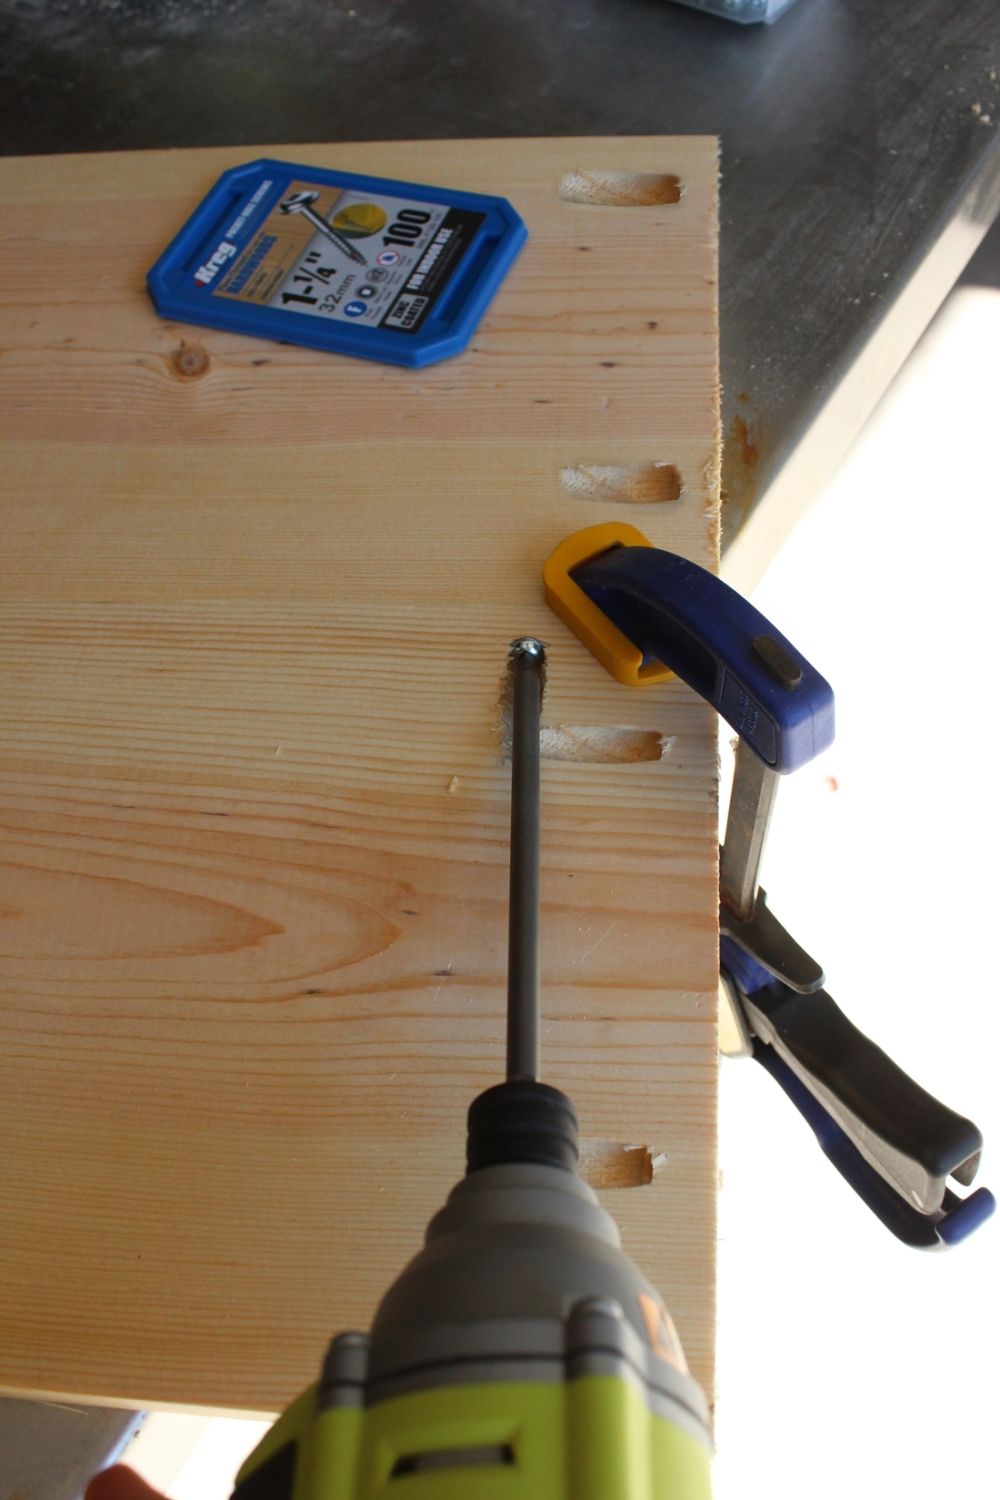
Grab your 1-1/4” screws (I recommend Kreg screws over regular wood screws).
Step 3: Screwing the four holes
Holding the boards along with the clamps, screw in your screws through the four pocket holes.
Turn your shelf over; it should look great! Repeat for other two shelves, for a total of three shelves.
Take your longer 1×3 boards and drill two pocket holes (one on each short end) slightly off-center.
Make sure the holes are slightly off-center toward the same long side of your board. These pocket holes will be placed on the back side of the cart. Repeat for other two longer 1×3 boards, for a total of three 1×3 boards with pocket holes.
It’s time to take these longer 1×3 boards anduse them to create the back shelf “wall” of each shelf. Lay a longer 1×3 board, pocket holes down, on your work space. Position the long side of one of your shelves (pocket holes away from the 1×3) on the edge of the 1×3.
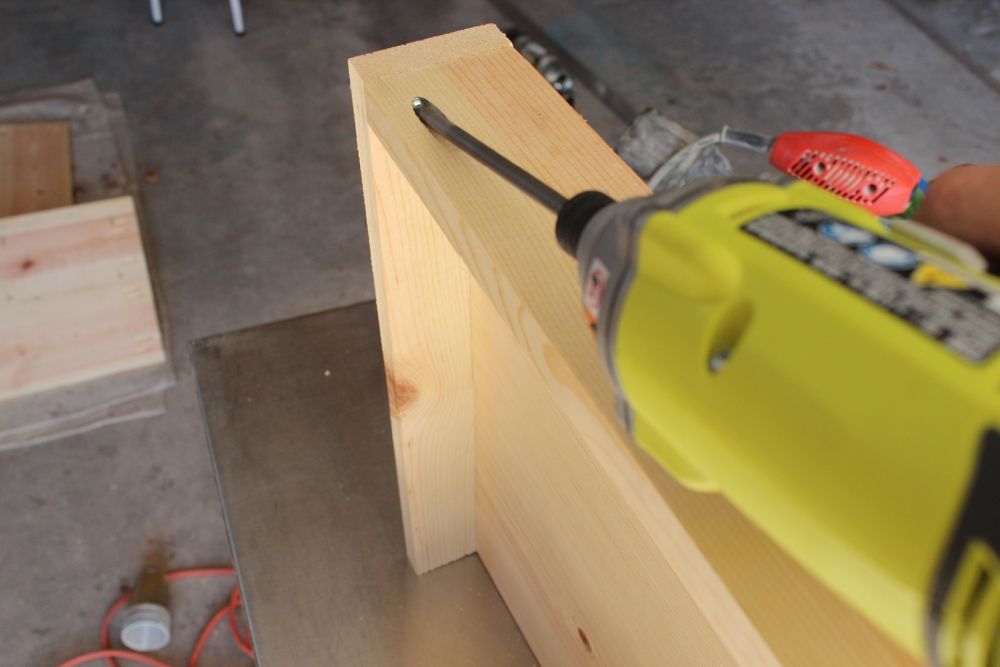
Clamp into place using a your right-angle clamp. Attach the boards together using your 1-1/4” screws. (Don’t forget to remove the right-angle clamp and screw in the final screw in that pocket hole as well.)
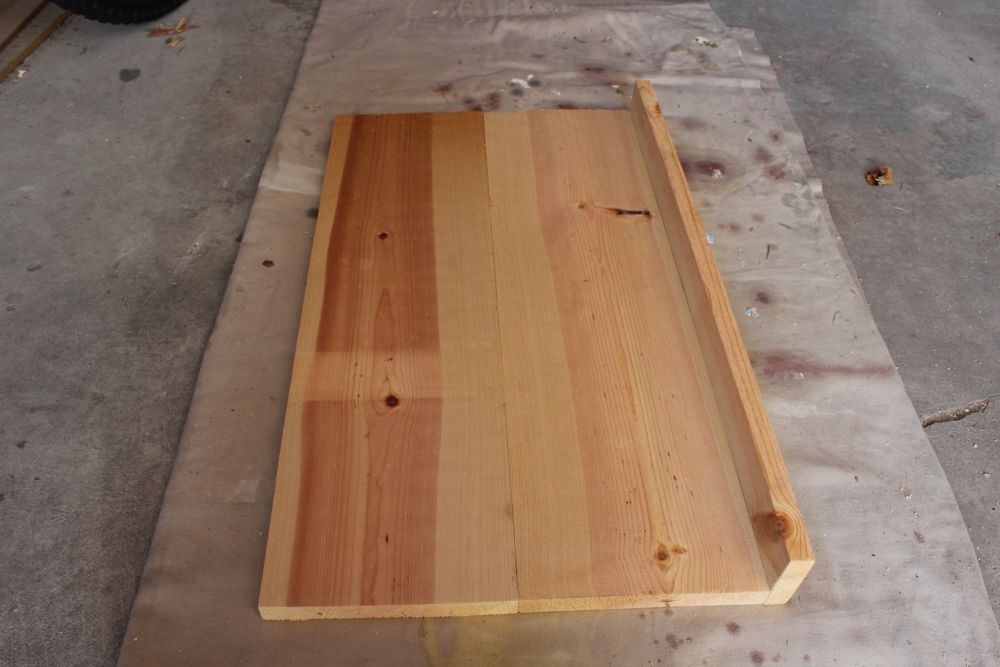
Here’s what you’re looking at at this point. Pocket holes on the back wall aren’t visible from the shelf side. Repeat for the other two shelves and back “walls.”
Step 4: The shorter edges
Next, take one of your shorter 1×3 boards and place it on your work surface. Turn your shelf sideways and position it onto the edge of your shorter 1×3 so that the back wall and all connecting edges align. Clamp into place with your right-angle clamp.
Screw the 1-1/4” screws into your pocket holes to connect the side wall. Remove right-angle clamp and screw into this pocket hole.
It looks good, doesn’t it? Repeat for other side wall on this shelf.
Repeat side wall steps for the other two shelves. You’re almost done with this part.
Remember those pocket holes you drilled on your back wall 1×3 boards? It’s time to use those to secure the side and back walls together for added stability. Use 1-1/4” screws to do this now.
Step 6: Add the wood plugs
Insert your pocket hole plugs into the back wall pocket holes, if you want. (Use a little wood glue.)
There you have it. Three well-constructed shelves to be completed with the finish of your choosing.
Step 7: Sandin process
In order to finish your shelves, you’re going to need to sand them smooth. Use fine-grit sandpaper (220-grit recommended).
Step 8: Spray paint protection
Sand all surfaces of your shelves and walls. Wipe them clean and dry, then finish with the finish of your choice. (Example uses dark walnut wood stain and polyurethane.)
While your shelf finish is drying, you can work on your rolling cart posts. Grab a can of spray paint in the metallic finish of your choice. (Example uses Rustoleum metallic paint + primer in Flat Soft Iron.)
Lay your angle iron out on a drop cloth, and spray paint two or three light coats, with timing and drying according to your spray paint instructions. When it’s safe, flip the angle irons over and spray paint the other sides.
Step 8: Metallic holes
With the angle irons painted and completely dry, it’s time to drill some holes so we can mount our shelves easily.
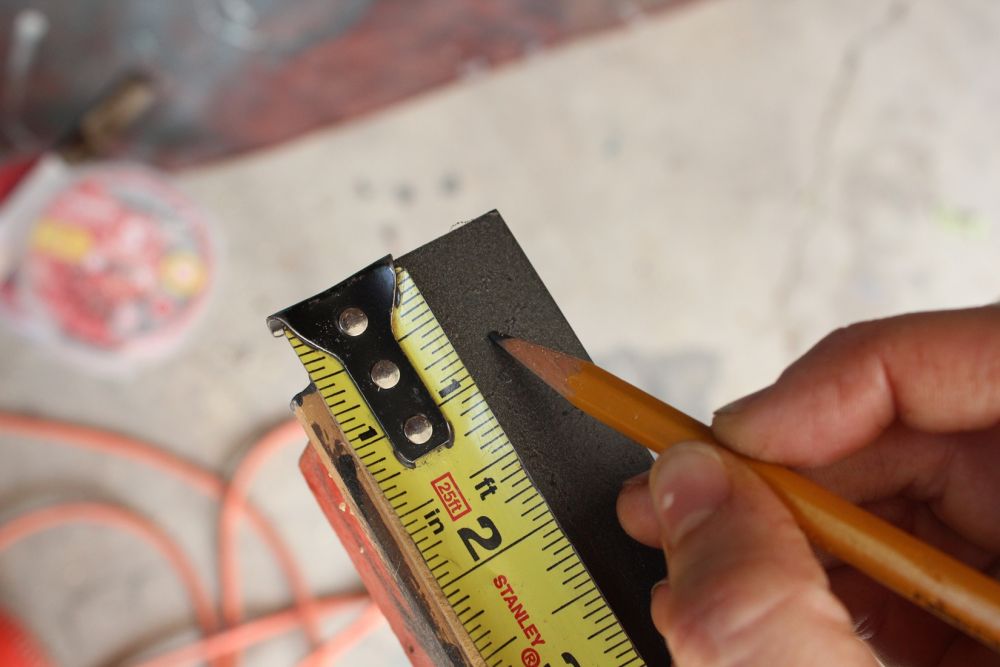
Measuring from one end, I drilled holes at these measurements. (Note: You’ll notice that, at each of the three shelf positions in this photo, there is one additional hole drilled between the two measurements shown; this might be overkill for you, but I wanted the extra support.)
You’ll want two identical angle irons and two other mirror image angle irons (in other words, two sets of identical angle irons that are mirror images of each other). In order to accomplish this quite easily, I simply clamped the four angle iron pieces to some scrap wood, aligning the ends precisely. I measured on only one piece of angle iron, then used those holes as guides for the other three angle irons. Note that you’ll need to rotate each of the irons to do the other angle side, so take care to measure correctly from the same end as before.
A simple wood drill bit worked fine for this because the aluminum was thin, although you can use a metal drill bit if you’d feel better about that.
Place the now-drilled angle irons back onto your drop cloth, and fill the drill holes with 3/4” wood screws.
Lightly skim the tops of your screws (and the angle irons, why not?) with your spray paint, so they don’t stand out quite so much when you attach the angle iron pieces to your shelves.
Step 9: Ready to assemble the cart
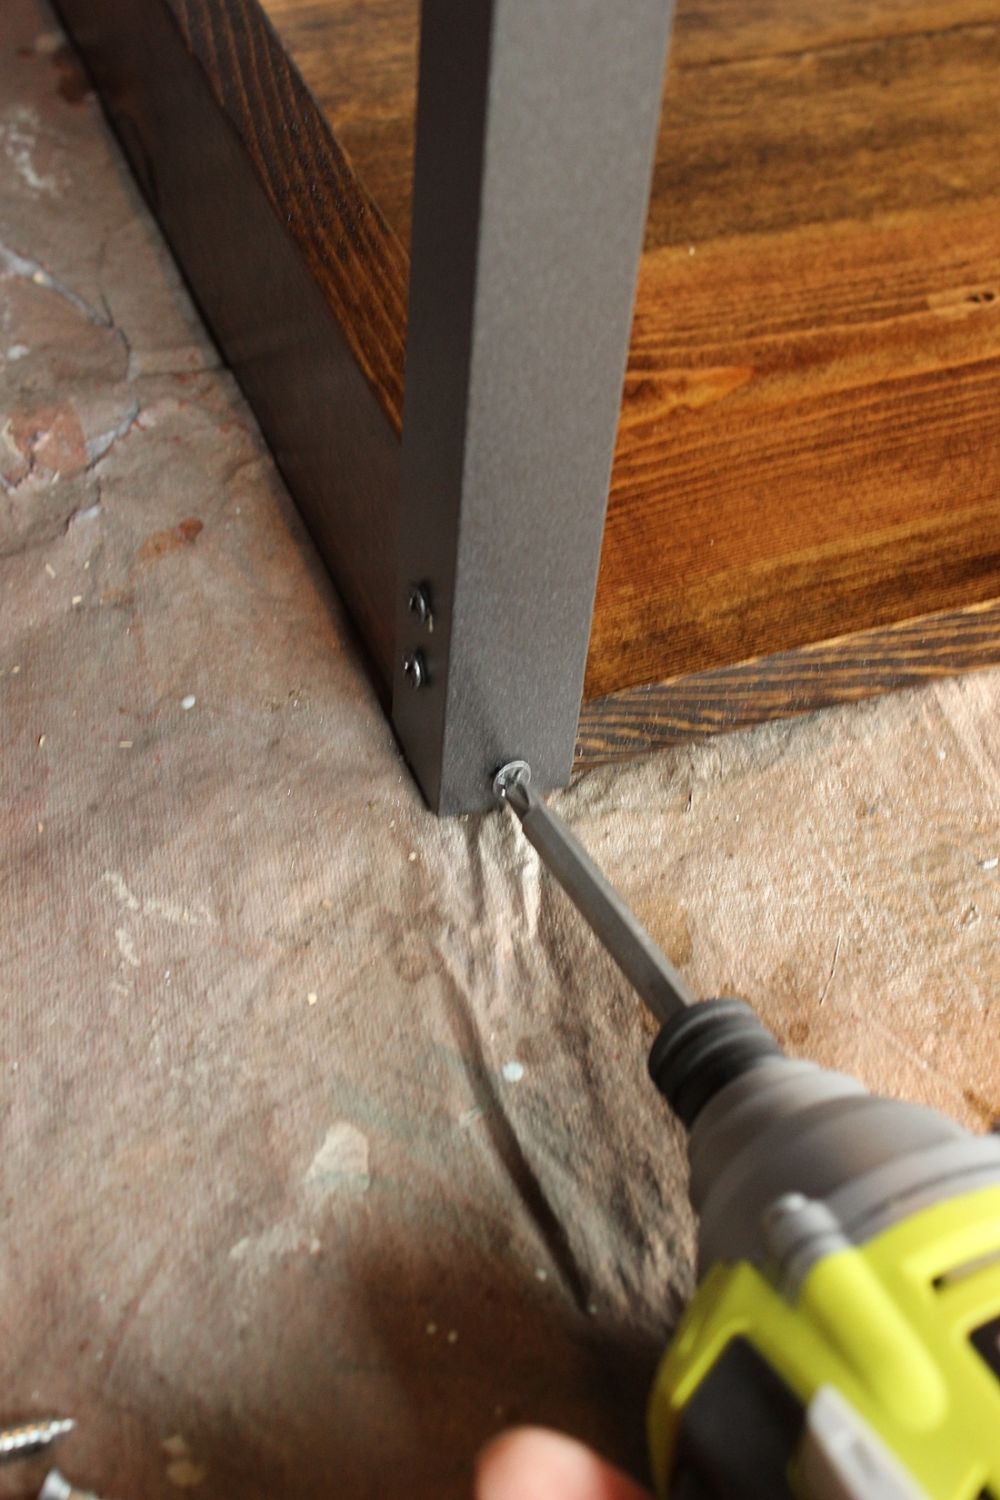
When everything’s completely dry and thoroughly cured (the finish on your shelves as well as the paint on your angle irons), it’s time to assemble the rolling cart. Begin by attaching the bottom shelf to the bottoms of your four angle irons. Pay attention to screw hole placement on the angle irons; the single-hole side should align with the front/back of your cart (not the sides) and should align with the bottom shelf boards.
After screwing in the first single screw on a front corner piece of the second shelf, use a level across the front of that shelf to determine placement of the single screw on the other front corner.
Step 9: Use a level
When the shelf is level, attach the first (front) screw of the second corner.
Use a level on the side walls on each side before attaching the third and fourth (back) single screws.
When all the single screws are attached, follow up with the two screws on the other side of your angle iron for each corner.
Repeat this process, with the level and the single screws, then the double screw holes, for the third/top shelf.
Step 10: Add the wheels
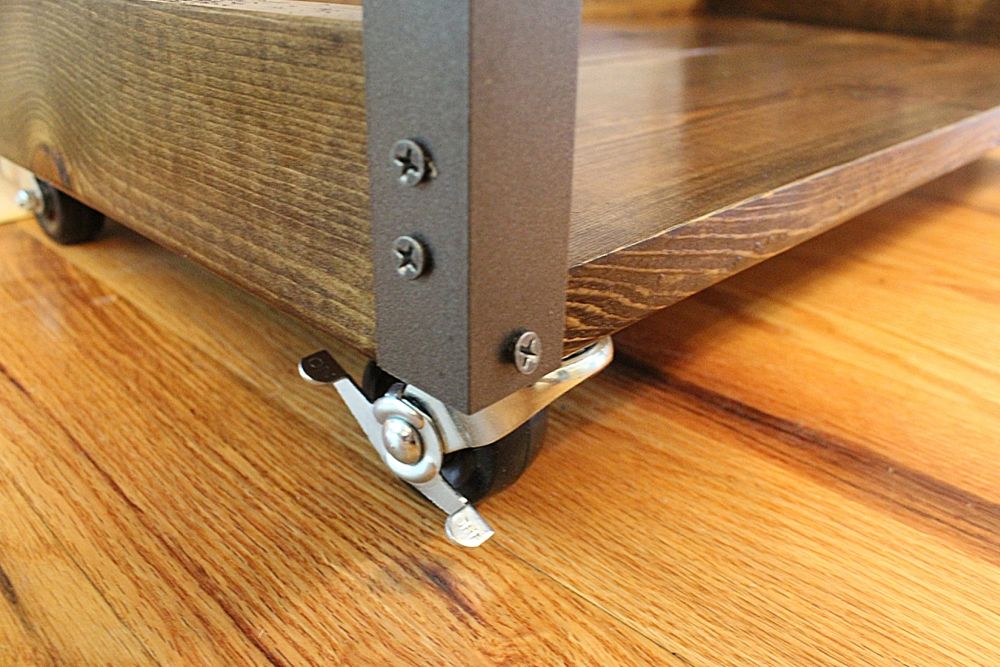
It’s now time to attach your casters. I highly recommend opting for casters with brakes. Take care to avoid hitting any of your pocket hole screws as you attach the casters.
Place your industrial rolling cart wherever it’s going to go, and place upon it whatever you’re going to place upon it.
This rolling cart is actually going to become an industrial rolling homework/craft supply cart (stay tuned for that transformation), but in the meantime, it’ll hang out near our dining room and house the fall harvest apples.
I love the subtle depth that the spray painted angle iron gives this industrial-feeling piece.
Dark walnut wood stain (plus two coats of clear polyurethane) is one of my favorite finishes, because it turns even inexpensive white pine boards into something luxe and rich-looking. Such a beautiful aesthetic.
Of course, you can opt for no casters on your unit and create an industrial cart that’s still gorgeous and functional. However, the casters really make this unit more versatile – it can be a craft supply cart, a beverage cart, a dessert cart, a blanket cart…whatever you need, this cart can carry those things inside or out, wherever you need them. I recommend casters wholeheartedly (as long as they have a braking option).
You can also increase the depth of your industrial wood rolling kitchen cart by opting for shelf pieces wider than 1×8. A 1×10 or even 1×12 will provide more surface area on each of your shelves. Just be sure to recalculate the length of your sidewall pieces if you opt to change this measurement based upon your space and your needs.
This DIY industrial rolling cart looks more impressive than it actually is to build. Shh. Don’t tell.
We hope you enjoy creating your own industrial rolling cart, but we hope even more that you love it and use it after it’s created. Happy DIYing!
The post DIY Industrial Wood and Metal Rolling Kitchen Cart appeared first on Home Decorating Trends - Homedit.















0 Commentaires