The patio is not something you replace or even repair often in most cases. It’s usually a sturdy and durable structure that, once built, can last for many years to come. You still have to tend to it every once in a while, but that’s just maintenance.


The hard part is removing and replacing a paver patio or basically any other type of patio for that matter, but even this task can be successfully completed by just about anyone that is given a proper tutorial with detailed instructions and, of course, the right tools and materials. Check out these tips to make your DIY paver patio project a success!
DIY Paver Patio Tips for Your Home Garden Makeover This Year
1. Use a Sledge Hammer to Remove Old Concrete Slabs

Before you get to plan and install your new and beautiful paver patio you might have to remove some concrete slabs first in order to make room and to be able to prepare the foundation for the new structure. The best way to remove old concrete slabs is, from our experience, with a sedge hammer. It’s lighter than a jackhammer and a lot easier to operate as well. It’s also very effective if you’re dealing with a standard patio.
2. Lay a Flagstone Pathway
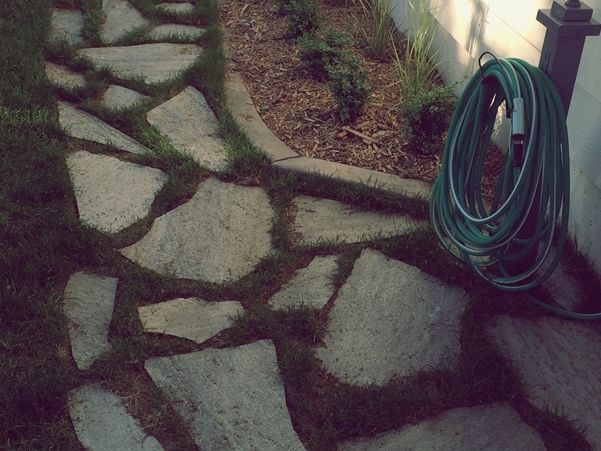
It’s entirely possible to not have to deal with old concrete slabs and already existing patios and that’s great, especially if you’re planning to lay a flagstone pathway in your backyard. That’s pretty easy to do and you don’t need much for the project. Well, you obviously require flagstone slabs and you might need the help of a professional to decide the amount you’ll actually have to buy. In addition to that, you’ll also need some sand and shovels plus plenty of time.
3. How to Build a Pavers Patio
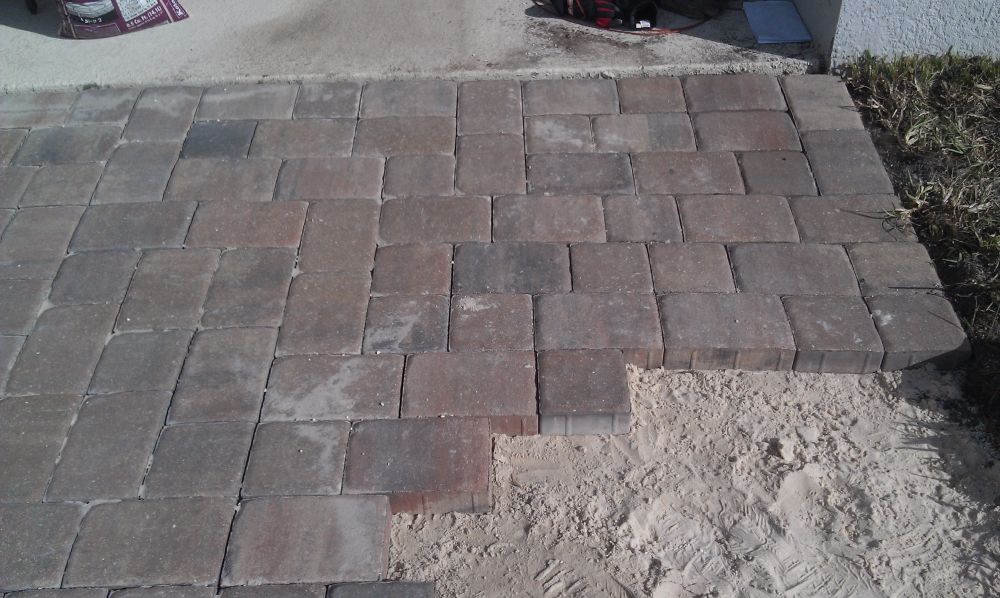
Not really sold on the idea of a flagstone patio? If you prefer something somewhat similar but a bit more organized, perhaps you’d like to lay some pavers instead. Patio pavers can be arranged in all sorts of different patterns, some of which look quite interesting. The tutorial from creativeunravelings comes with a complete list of materials and tools needed for this whole project. It includes things like brick pavers (obviously), gravel, fine sand, wood stakes, a shovel, and several other items.
4. Working with a Larger Space

The bigger the patio is, the more time-consuming and costly the project gets. There’s a detailed description of all the steps and requirements which you can find on younghouselove. It teaches you how to create your own DIY paver patio from scratch and it reveals some of the less-known things related to such a big project. Sure, it’s all pretty easy when you simplify everything but that leaves you with plenty of details to figure out on the way.
5. A Challenging Project That’s Well Worth the Effort

If you’re already familiar with what it takes to install a paver pathway then you should be able to use that knowledge when installing a patio as well, provided you’re using the same technique. The project would be challenging but also rewarding. You can check out thediyvillage if you’re curious to see how everything progresses and how the new pathway (or in your case patio) starts to take shape, little by little.
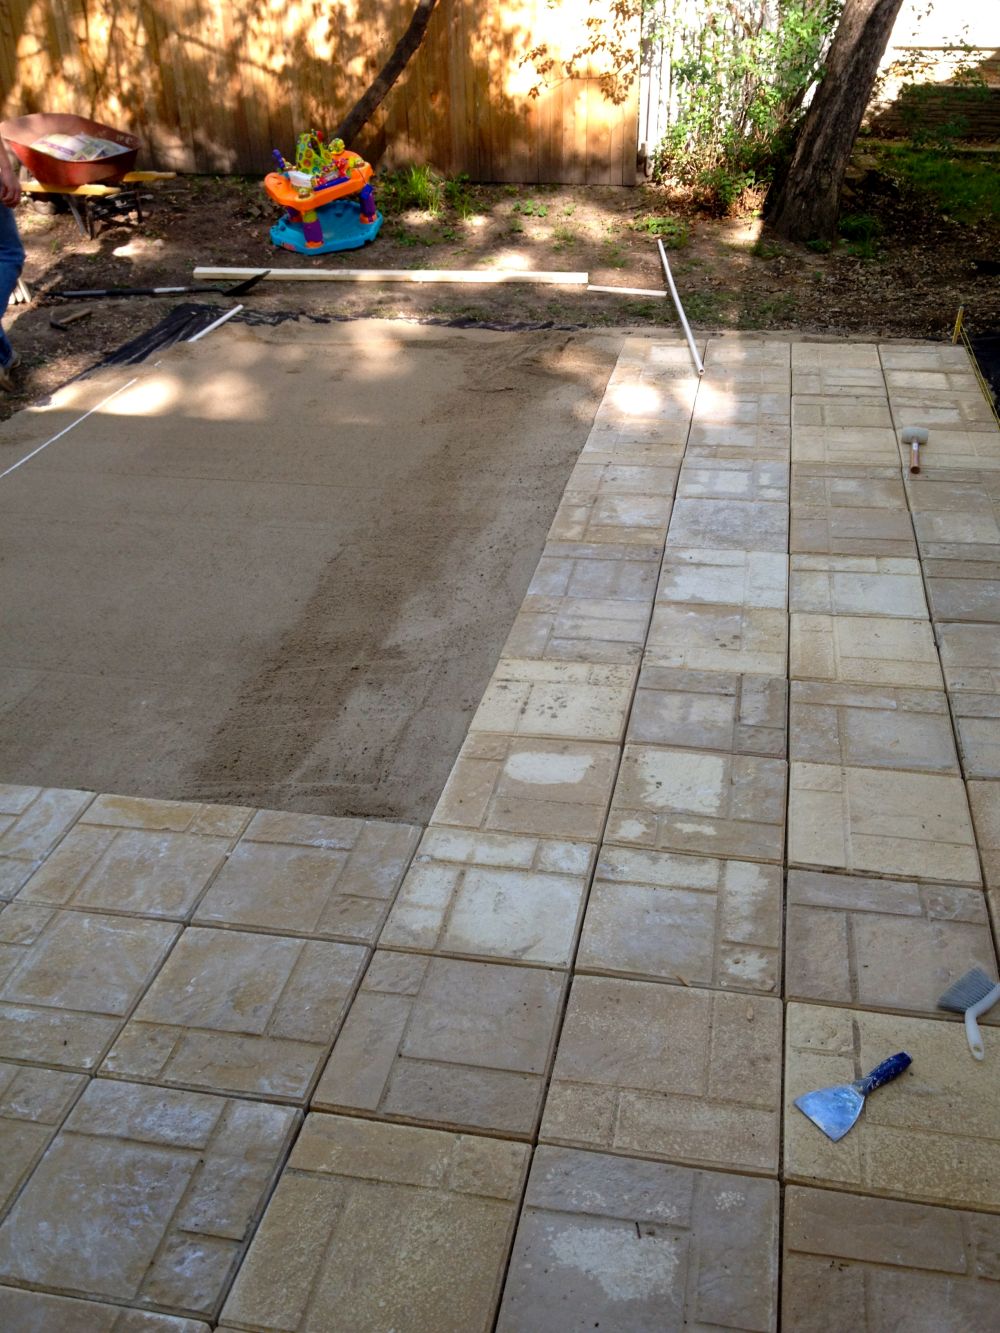
Using large paver bricks can be a practical decision as it means you’ll probably be able to install all of them quicker and that you’ll have an easier time creating a flat surface. Of course, that will influence the design and the structure of your new paver patio so be sure to take all the details into account before you make a purchase. Keep in mind that every DIY project is different. For example, the project featured on jhalvorson had to take into account the lack of grass in the shady areas of the patio and that meant a whole lot of mulch was needed.
7. DIY Front Path Makeover

As you can see, a lot of inspiration regarding DIY paver patio installation comes from projects focused on pathways. Another example comes from zenshmen where you can witness the transformation of what used to plain and boring concrete path into one that features stepping stones and gravel and has a more zen and overall beautiful look. Check out the full article to find out all the ups and downs of this project.
8. Create Patio Pavers Using A Mold And Concrete Mix
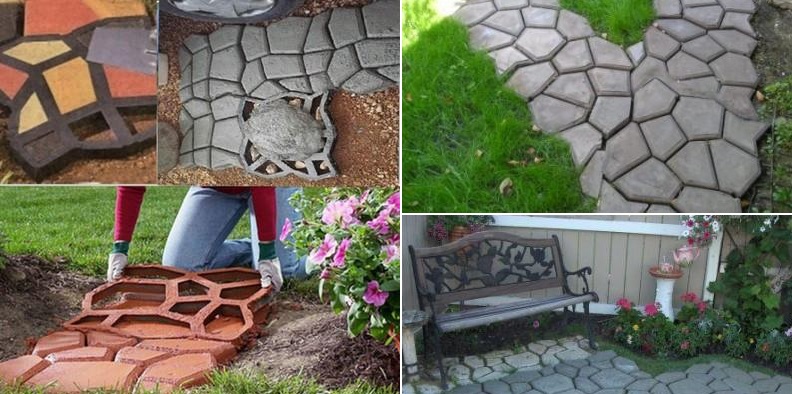
Have you ever seen paver patios or garden paths that look like perfectly matching puzzle pieces? It’s no coincidence that the pieces complement each other so well. The pavers or flagstones have either been chosen very carefully or they’ve been created to fit a particular pattern right from the start. Some patio pavers and stepping stones are actually quite deceiving in this sense as they’re actually created using a mold and concrete mix. Curious how that works? Check out this mold from luxberra.
9. Pouring Your Own Concrete Pavers

Pouring your own concrete pavers can turn out to be a great solution, especially if you’re looking to create a custom design for your patio or garden pathway. You can use custom molds which you can build yourself out of wood or you can get some predefined mold designs if you prefer a more standardized look. If you decide to follow the custom route, check out this great tutorial from overondover. It describes all the steps you need to take if you want to pour your own concrete pavers.
10. Preparing The Site Is The First Step To Success

A lot of patio projects start out with nothing but an empty piece of land, usually with some less than beautiful grass growing on it. Preparing the site is the first step. It’s a very important process that ensures a good foundation on which to build the paver patio of your dreams. This applies to other similar types of landscaping projects as well. to get rid of the weeds, if any, you can use a combination of landscaping fabric, sand, and small rocks or gravel. You can also spray a combination of vinegar and hot water on the more stubborn ones if need be. Check out more useful tips about DIY paver patio covers and other projects on hometalk.
11. How to Create a Rock Patio

The thing about a rock patio (or a paver patio) is that it has to be practical so using the exact same strategy from a garden pathway project is not always the best idea, especially if it means placing a bunch of flagstone pieces or stepping stones on a bed of gravel. The alternative would be using a special type of sand which is sort of the equivalent of the grout used on backsplashes and counters. Find out more about this on gingersnapcrafts.
12. DIY Concrete Pavers

There are a lot of advantages to using DIY concrete pavers in landscaping projects, the most important of all being that you can have these custom-made to any size and shape you want. To make concrete pavers you need the following: a mixing pan or wheelbarrow, regular concrete, wood, a mixing shovel, water, a trowel, a drill, screws, and a level. Check out lovelyimperfections for more details.
13. Manufactured Concrete Cobbles That Come In Mats

Paver patios are definitely practical but laying each paver (or cobble) by hand, one by one gets really annoying quickly. You can make things easier by opting for the more time-saving and practical alternative: manufactured concrete cobbles that come in the form of mats, very much like mosaic backsplash tiles. They’re super easy to install. Once you’ve arranged all the mats and filled all the gaps, you just pour grout over everything and you spread it evenly. You’ll probably need a few more details so be sure to check out thisoldhouse.
14. A Simple DIY Paver Patio Tutorial
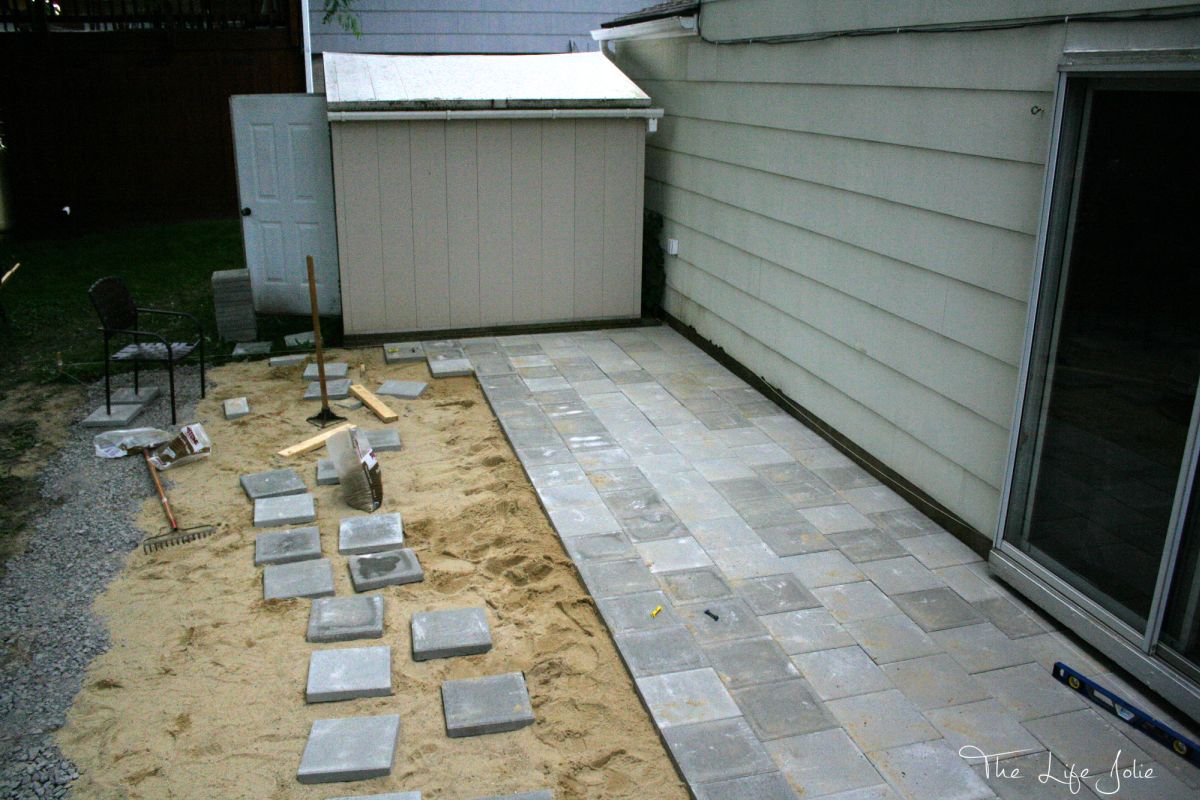
Regardless of the type of stones, you decide to use when building your paver patio, the steps are usually the same ones. First, you prep the space, then you lay down the base which is usually a two-layer process, the first one involving small chunks of rock and the second one a bunch of sand. Once the base is in place, you start to place the paver stones, either one by one or using mats. Once these are in place too, add a layer of jointing sand and then hose down the patio. What we just described to you is a simplified version of the DIY paver patio tutorial from thelifejolie.
15. Make the Most of a Small Space by Planning Your Paver Patio

Even a small patio can take a lot of time to plan and then to build. Naturally, the cost of the project varies depending on all sorts of things, like the materials involved, the tools required, the overall proportions of the patio, etc. You’re already saving quite a bit by taking care of this project yourself so that’s a big plus right there. To make the project even more cost-efficient, stick with a simple design and avoid complicating things more than necessary. The project featured on diychatroom is a good example in this sense.
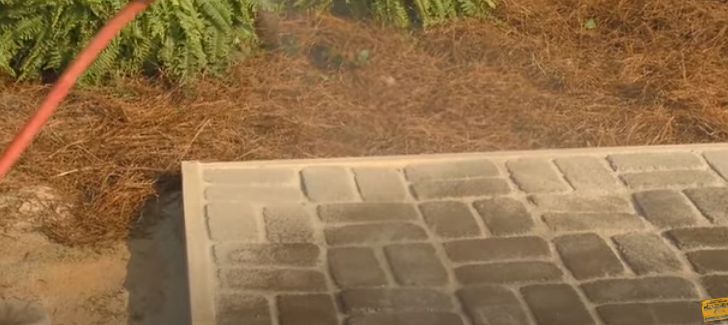
16. Create A Cobblestone-Inspired Look

If you don’t like the look of plain concrete slabs but you don’t want to use patio pavers either, you can choose something in between, something that blends these two looks and saves you money in the process. You can use concrete forms to cast the pavers in their final location and get this cobblestone-inspired look but at the same time having the benefit on a flat surface. If you want to find out how this is done, check out the tutorial offered on instructables.
17. A Simple Stone Paver Patio
A simple stone paver patio may not stand out much but beneath the surface, there’s a lot of work to be done. First, there’s digging to be done, then you need to layout the landscaping fabric, to level the gravel on top, then to add a layer of sand, and only after all of this you can actually start laying the pavers. All the effort is of course worth it. If you want to find out more about what each of these steps entails, check out the complete tutorial on instructables.
18. A Curved Paver Patio For A More Organic Shape

If you want your patio to look natural and to have a more organic shape, it would be nice to make it curve and give it a less geometric shape. That of course presents a challenge on its own and means you’ll need to add a border around your patio. Check out this youtube tutorial to learn how to prep the area and make your patio look amazing with curves and a border.
19. Build A Patio Like A Pro So It Will Last For Years To Come

It’s important to be prepared for all the hard work and effort required to build a paver patio but to not allow it to overwhelm you. If you follow all the steps and do everything right, this can be a very satisfying project, and what better time to do it than now? With that in mind, we think you’re really going to enjoy this tutorial on youtube which explains everything you need to know to be able to install pavers like a pro so you can build a patio that will last for years to come.
19. Build A Patio Like A Pro So It Will Last For Years To Come

In case you already have a patio and you’d like to add to it or transform it, taking some time to research the area and make a plan would be best. Make sure there are no pipes or cables underneath the area that you plan to dig out and pick the right type of concrete pavers for your particular project. Go ahead and do the measurements and mark the area before you proceed any further. There are some really great tips that you can learn from this video posted by The Home Depot on youtube.
21. Build a Patio From Scratch

The finished project only shows a small portion of what the patio is actually made of. The brick or pavers that you see are only added at the very end and there’s actually the least important part of the project. The base beneath is pretty complex and it’s important to have a basic understanding of all the layers and the prep work that go into it in order for this to be a successful project. Check out this video on youtube to learn from professionals how to build a patio from scratch.
22. A Simple Rectangle Paver Patio

Since you can basically build your backyard patio in any size or shape you want to, it’s easy to get distracted by all the different possibilities. However, the best option is most often the simplest and most obvious one. A simple rectangle might not seem very exciting but can end up looking amazing once all the pavers are in place. We really like how this design turned out and if you want to find out more about the process there’s a video on youtube that you can check out.
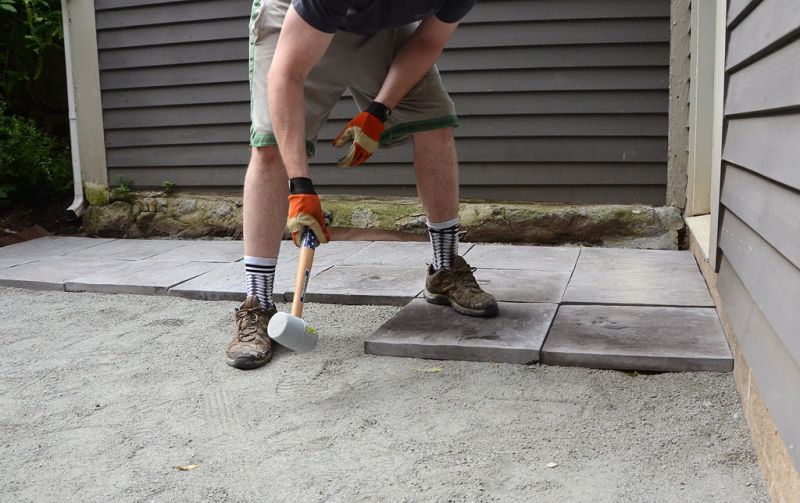
23. Pay Attention To All The Details

Once you’re done digging out the area and preparing the base for your patio, it’s time to actually add the pavers and make everything come together. Although this sounds pretty simple, it’s important to pay attention to all the details and to do everything right from the first try so you don’t have to redo any of the work. If you’re using concrete interlocking pavers, this youtube tutorial might give you some extra tips and pointers on how to install them.
24. Mark Out The Outside Dimensions
You can build an amazing-looking and long-lasting paver patio even if you don’t have any experience with this sort of project. Follow these steps and you should be able to pull it off without any complications: mark out the outside dimensions of the project area and then dig out the area to a depth of 4 to 7 inches. Install edge restraints, add a layer of gravel, compact it, then a layer of patio paver sand, and level it. It’s then time to install the pavers. We found this particular youtube tutorial to be very helpful and informative.
25. Take Some Time To Decide Which Pattern You Prefer

You should also take some time to decide which pattern you prefer before you actually start to install your paver patio. Two of time simplest ones are jack-on-jack and running bond, as mentioned in this video that you can find on youtube. More advanced patterns include the herringbone and pinwheel and if you want something extra special and eye-catching you can also consider using stamped pavers that look like stone.
26. Get Your Tools Prepared in Advance

When it comes to building your DIY paver patio, we recommend assessing the tools and materials you’ll need well ahead of time. There’s nothing worse than starting a project, only to realize you don’t have something crucial. This could make or break the whole project and leave you in a very tricky situation this summer. Paver Search shares this very detailed tool guide to building a DIY paver patio. You’ll find a comprehensive list of everything you need for your project, so you won’t miss anything during your preparation phase. They also share tips on how you can make this project more budget-friendly. You don’t have to spend a fortune to make your own paver patio. To save money, stick to a simple design and use high-quality yet affordable materials.
27. Create Stunning Patterns with Pavers and Grass
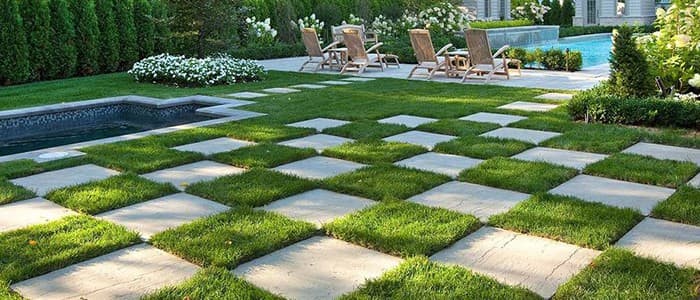
While many of the projects featured here focus on the paver patio, we love these pretty patterns created by Stonewood Products. They share some excellent tips for building a paver patio, and they encourage you to consider the design and location of your paver patio before starting the process. Places you could place a patio or walkway include a path leading across your garden, a patio near a pool, or an outdoor kitchen. Wherever you place your new patio, you’ll find it’s the perfect spot to enjoy spending time this summer. We always recommend keeping your construction work away from large trees with deep roots or any underground utilities you may have in your garden. The planning of this project is half of the fun, and you’ll enjoy considering different colors and designs for your new patio before getting started.
28. DIY Paver Patio Project on a Budget

Regardless of your garden makeover budget, we still believe adding a paver patio is achievable for anyone. While we know it will take a good amount of time and effort to create a larger paver patio, it still doesn’t have to break the bank. We always recommend trying to take the project at a leisurely pace, and you’ll enjoy the process far more than trying to get it done in a rush. Plan your paver patio out a few months before you hope to use it, and it will be ready well in time for your summer gatherings this year. Gardening Channel reminds you to always consider any plumbing and electric lines in your yard before you start digging up the ground. That would certainly be a costly mistake!
29. Create a Custom Paver Patio

One of the best things about DIY projects is that you can let your creativity go wild. Room For Tuesday shares how to install a custom paver patio, and you can simply adjust the instructions to fit the size and design of your garden. One of their top tips is to try this project in cooler temperatures or in the evening. Otherwise, you’ll find this project to be a lot more challenging and unenjoyable. Remember, though, you can save yourself thousands of dollars by tackling this project yourself, so it’s certainly worth the hard work.
30. Enjoy Relaxing On Your Paver Patio

After following our thirty tips to ensure the success of your DIY paver patio, it’s time to sit back and relax. Bob Vila shares how to create an outdoor patio that even a completely inexperienced DIYer will enjoy creating. You’ll create professional results that will make the perfect space that you’ll enjoy spending time with your family and friends in this summer. Whether you just want a sun-soaked spot to read a book or somewhere to entertain your family and friends, it’s the perfect option for your next garden makeover.
Conclusion
We hope these DIY paver patio tips and ideas we’ve shared today will help make your next garden project much simpler. While building your own paver patio may seem like a daunting task, you can save thousands of dollars on the project, depending on the size of your installation. Ensure you plan everything out in advance of your project, so you know you have the materials and tools you need to lead you towards success. A paver patio is a perfect spot for the upcoming summer months to spend time with your family, or to enjoy sunbathing and relaxing by a swimming pool. Regardless of the shape and size of your new paver patio, we know it will transform any garden into somewhere you love spending time with your family and friends.
The post How To Ensure The Success Of a DIY Paver Patio Project – 30 Inspirational Ideas appeared first on Home Decorating Trends - Homedit.


1 Commentaires
تنظيف مكيفات
RépondreSupprimerالمثالية للتنظيف
تنظيف سجاد
مكافحة الحمام
تنظيف خزانات
مكافحة النمل الابيض
مكافحة حشرات
تعقيم
تنظيف مسابح