This summer, make your home’s exterior fresh and gorgeous by planting those window boxes! (If you don’t have window boxes yet, check out this tutorial on how to make your own for an easy DIY!) If you’ve always wondered how to achieve that professional and luscious look in a window box but aren’t quite sure how, this tutorial is for you. We’ll show you step-by-step photos and give you tips to help you on your way to creating the most beautiful window box planters on the block.


This photo represents only a week or two after planting – similar to what the box will look like when you plant.

Top Tips for Planting a Window Box
Before we get started, we want to share with you a few of our top tips regarding the soil in your window box. As you’ll see below, we use potting mix for this project today. You’ll want to avoid just using potting soil in your window box, as this soil will quickly lose the needed water and nutrients for your plants. One thing to keep in mind is to never add organic material into your soil, such as wood chips or straw. You can add it onto the top if you really want, but it shouldn’t go into the soil itself.
How to Create a Beautiful Window Box for Your Home
Step 1 – Empty Out Your Window Box from the Past Season
If you have used your window box during the past season, now is the time to empty it out. Get rid of all the soil (you don’t have to throw it out, though – toss it into the garden or a flower bed) so you’re starting fresh. It’s important to use fresh soil each season for optimal flower growth.

Step 2 – Get Your Potting Mix
Grab your sack of potting mix. Note that this isn’t the same as potting soil. Potting soil is specifically designed for areas such as flower beds, while the potting mix is designed for things such as planters, hanging baskets, and window boxes. You can research why this is true, but for this tutorial, just take my word for it.

Step 3 – Fill Your Window Box with Potting Mix
Fill your window box to 1”-2” from the top edge with the potting mix.

Smooth out the potting mix, pressing gently to remove air pockets. Ensure it’s nice and evenly spread throughout the window box, to give your plants the best environment to grow.

Step 4 – Decide on the Arrangement of Your Plants
For spacing purposes, arrange your plants (still in their pots) in the order you think is most attractive. Don’t be afraid to move things around, group them together, spread them apart…whatever looks balanced and appealing. This is part of the fun!

Step 5 – Transfer the Arrangement onto the Ground
Transfer this arrangement onto the ground, in the order that you determined looks the best. For your reference, this tutorial’s window box is about 4’ long, 5” wide, and 6” deep. We planted four wave petunias, four geraniums, one creeping Jenny, and one sweet potato vine, all in 4” pots, for a total of ten plants. This may seem like a lot, but the trick to a beautiful, luscious window box is packing them in.

Step 6 – Begin Planting Your Flowers and Plants
Start on one end of your box and begin planting, following the layout you’ve created on the ground nearby.

When you pull a plant or flower out of its pot, it’s helpful to gently break apart the bottom of the root base. It’ll probably make a ripping sound, and you might feel like you’re damaging the plant. But the truth is, you’re actually liberating the roots so they will grow and expand faster in their new home than they otherwise would.

Step 7 – Stagger the Plants Throughout Your Window Box
Stagger the positioning of your plants’ placement of front-to-back. By this, I mean if you want your taller flowers to fill in the back of the window box (in this case, geraniums), don’t be afraid to plant them closer to the back of the window box. The plants don’t need to be exactly evenly spaced apart.

As you can see, we planted the “back” row (geraniums) first, leaving enough space in the “front” row for the other plants.

Step 8 – Fill in the Front Spaces of Your Window Box
Fill in the front spaces. The order we used (staggered front-to-back in the window box) from left to right was: wave petunia, sweet potato vine, geranium, wave petunia, geranium, wave petunia, geranium, creeping Jenny, geranium, wave petunia.

Step 9 – Weave Your Soaker Hose Through the Plants
Carefully weave your soaker hose among all the plants, taking care that each plant has water access. This detail is key to thriving window boxes – if they are not on an automatic watering system (soaker hose connected to a drip sprinkler, for example), by mid-summer your plants will likely be drying out and struggling. Why? Because you’re on vacation and busy and forget to water! It’s only natural.

Stake the end of your soaker hose down with a landscape staple.

Step 10 – Make Any Final Adjustments to Your Window Box Display
Make any adjustments you think you need at this point, either to the soaker hose or the plants themselves.

Step 11 – Add Extra Potting Mix as Needed
Add in the extra potting mix where needed. We try to aim for the dry potting mix level hitting about 1/2″-1” from the top of the box because when water is added, the potting mix will compact a bit.

You’re close to being done (we’re sure your window box looks beautiful at this point!), but there’s one final step to help your professional-looking box flourish.

Step 12 – Add Fertilizer to Your Window Box
Get your hands on a fertilizer that focuses on root growth and blooming. We use this Fertilome Blooming & Rooting fertilizer with great success – it helps with root growth, water retention in the potting mix, and slow-release fertilization over several months.
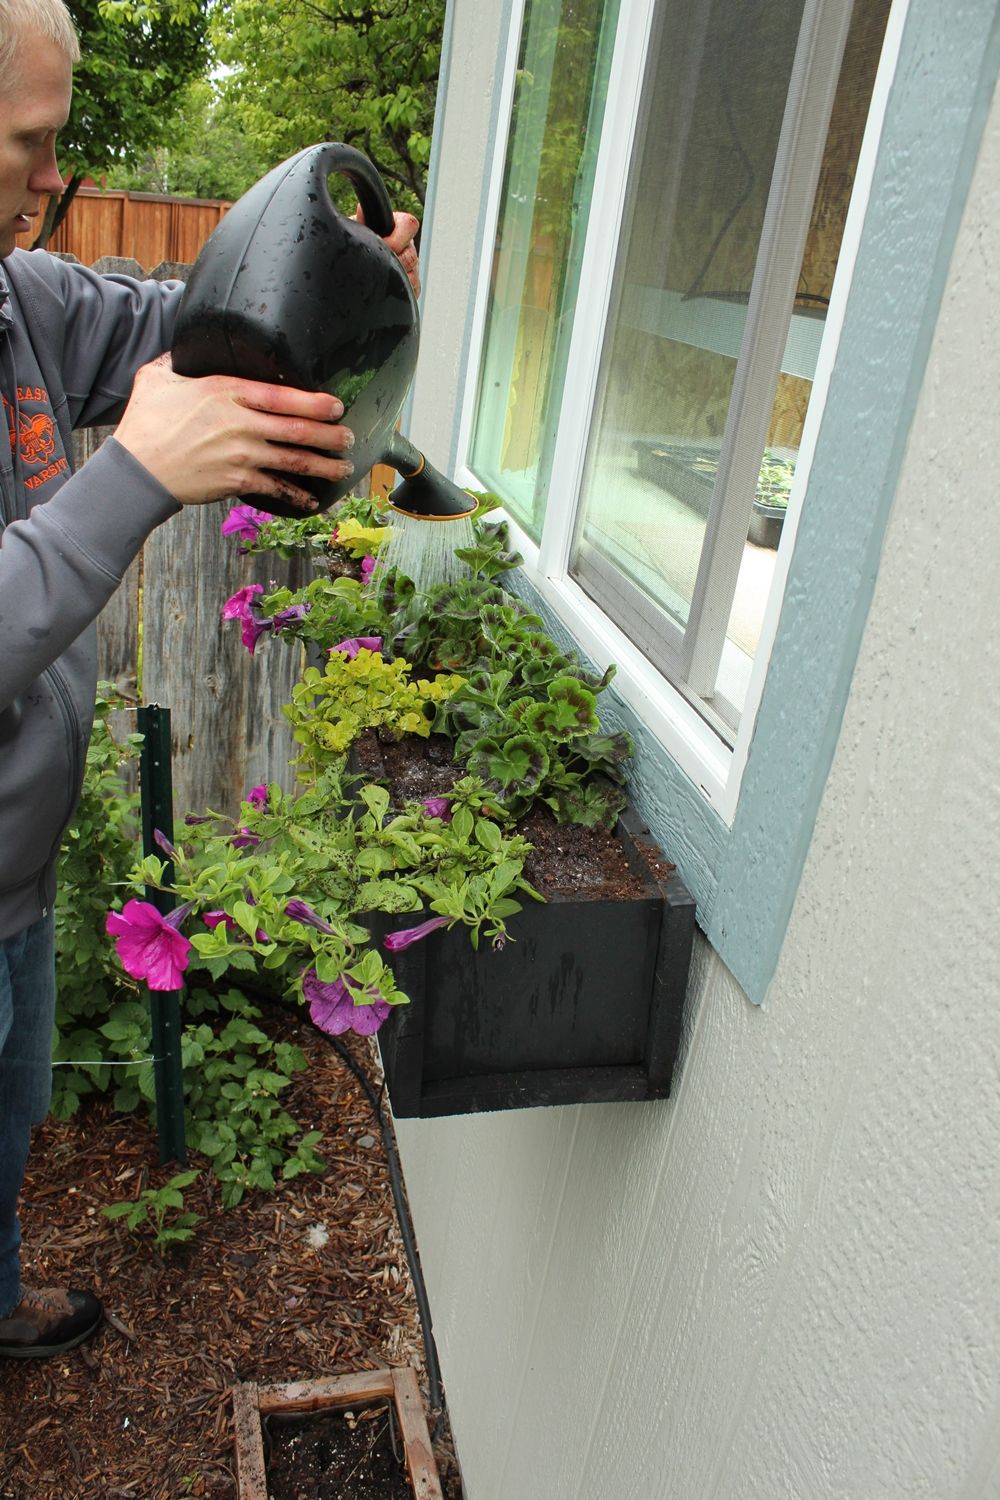
Dilute it with water as per instructions and pour the fertilizer thoroughly over the plants in your window box. Now just water regularly (every day or two, hopefully via your automatic system) and fertilize with regular flower fertilizer a couple of times a week. A good rule of thumb for sufficient watering in a window box is water until you see water dripping through the holes in the bottom of your window box, so you know the potting mix is sufficiently saturated for that day.

This photo shows the window box about 1.5 weeks after planting. Sunshine and warm temperatures had been scarce during that time, so the plants are maintaining but not expanding.

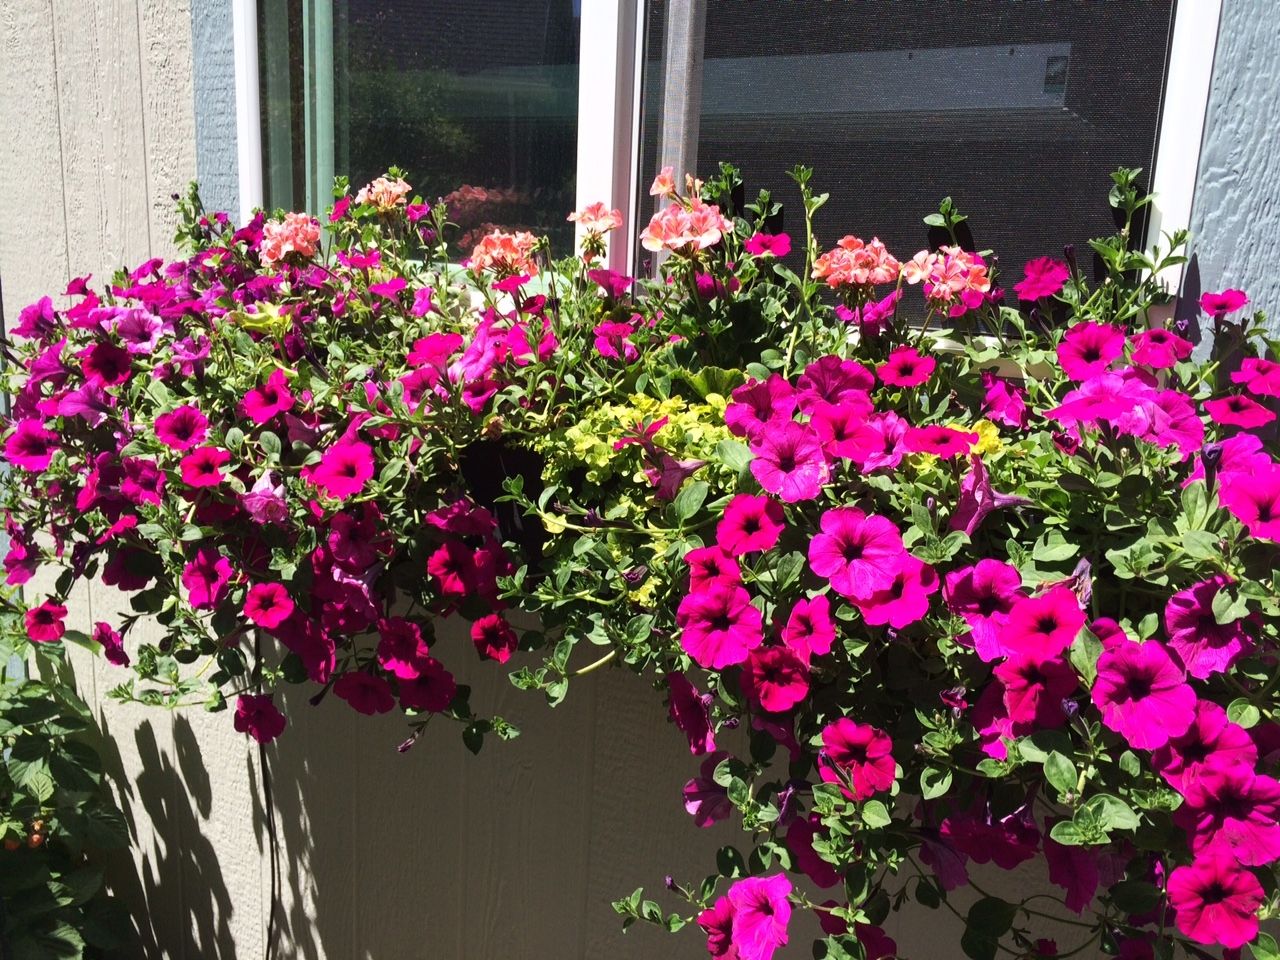
This photo shows the window box about four weeks after planting. Warmer temperatures helped the geraniums bloom and the petunias explode. The creeping Jenny and sweet potato vine should follow suit.
We were so pleased with how this window box turned out, and we love the pop of color it adds to the exterior of the home. It’s such a simple project, and creating your own window box is very easy to do as well. A window box is so easy to refresh each season, and you can add new flowers and plants to keep up with the changing colors. For anyone with only a small garden space, you’ll still be able to add extra flowers to your home this year without taking up much room at all.
Colorful blooms make any space a pretty one, and a window box is no exception. (Want more? Check out our tutorial for planting bloom hanging baskets! Happy planting!
The post Step-by-Step Guide to Planting a Window Box appeared first on Home Decorating Trends - Homedit.


0 Commentaires