The beauty of doing all sorts of crafts and DIY projects is that you have such a vast array of materials and supplies that you can work with. There’s tons of cool things that can be made from paper, clay, wood or in this case resin. If you’ve never done resin crafts before this would be the perfect project to start with. These resin coasters are really easy to make and they look absolutely gorgeous.

Materials needed for a pair of resin coasters:
- 2 wood slices
- 2 part resin mixture
- green and blue acrylic paints
- wood popsicle stick
- 2 plastic cups
- silver glitter

How to make the resin coasters:


Step 1: Mix the resin and the hardener in a cup
Start by preparing the resin mixture. First, pour 1 measure of resin into one of the plastic cups, then pour 1 measure of hardener on top of that. This is the classic 2-part resin mixture that is usually used for a lot of DIY projects and crafts.


Use a popsicle stick to get all the resin into the cup. It’s important to measure the doses precisely in order for the consistency to be right and the resin to harden properly.


Make sure you pour the same amount of hardener into the cup. Use the popsicle stick to get it all into the cup, just as before. Then stir the two substances using the stick so they combine.

Step 2: Divide the mixture between two cups
The next step is to pour half of the resin mixture you’ve just made into a different cup. Basically divide the mixture in two and try to make the portions even if possible.


Step 3: Put a bit of green paint into one of the cups
Take a little bit of green acrylic paint with the tip of the popsicle stick and mix it with the resin in one of the cups. Make sure you mix it in well so color all the resin and to have consistent color.


Step 4: Put some light blue paint into the other cup
Repeat the same process and put a bit of blue acrylic paint into the other cup. Mix it with the resin just like you did before until the color is nice and even and it’s been distributed evenly.


Step 5: Put some glitter into the blue mixture
It’s then time to add a bit of glitter. Take some of the silver glitter you’ve prepared for this project and pour it into the light blue resin cup. Mix it in with the popsicle stick so it’s distributed nicely through the resin.


Step 6: Pour the colored resin onto the wood slices
Now that the resin mixtures are prepared and ready to go, take your wood slices and place them face up on a flat surface, preferably on top of a newspaper or a paper plate so you don’t make a mess. Pour some of the green resin mixture onto one of the wood slices, then pour some of the light blue mixture on top of that.


Step 7: Stir the colors together with a popsicle stick
Next, take a popsicle stick and use it to mix the two colors together. Just stir in a circle or use a different pattern, depending on what type of design you want to make. We went with something simple and abstract.


Step 8: Add a bit more green
Since you’ve added the light blue resin on top of the green one your design will probably look mostly blue at first. That’s ok because you should have a bit of leftover green resin mixture that you can mix in if you want to. Take a bit more green resin with your popsicle stick and use it to make your pattern more visible and to bring your design to life.


Step 9: Let the resin harden
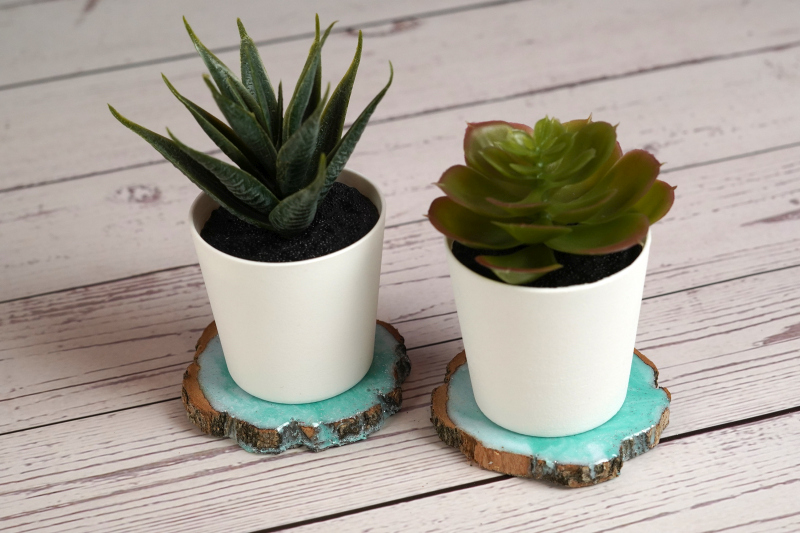
When you’re happy with how your design looks, set the wood slices aside and allow the resin to harden. After that you’ll be able to use these as coasters. You can make as many as you want to. Just repeat the same process we showed here and it should all go well. Have fun using more colors or trying new patterns and designs.

The post How To Make Wooden Coasters Decorated With Resin appeared first on Home Decorating Trends - Homedit.


0 Commentaires