This summer, make your home’s exterior fresh and gorgeous by planting those window boxes! (If you don’t have window boxes yet, check out this tutorial on how to make your own for an easy DIY!)
If you’ve always wondered how to achieve that professional and luscious look in a window box but aren’t quite sure how, this tutorial is for you. We’ll show you step-by-step photos and give you tips to help you on your way to creating the most beautiful window box planters on the block.


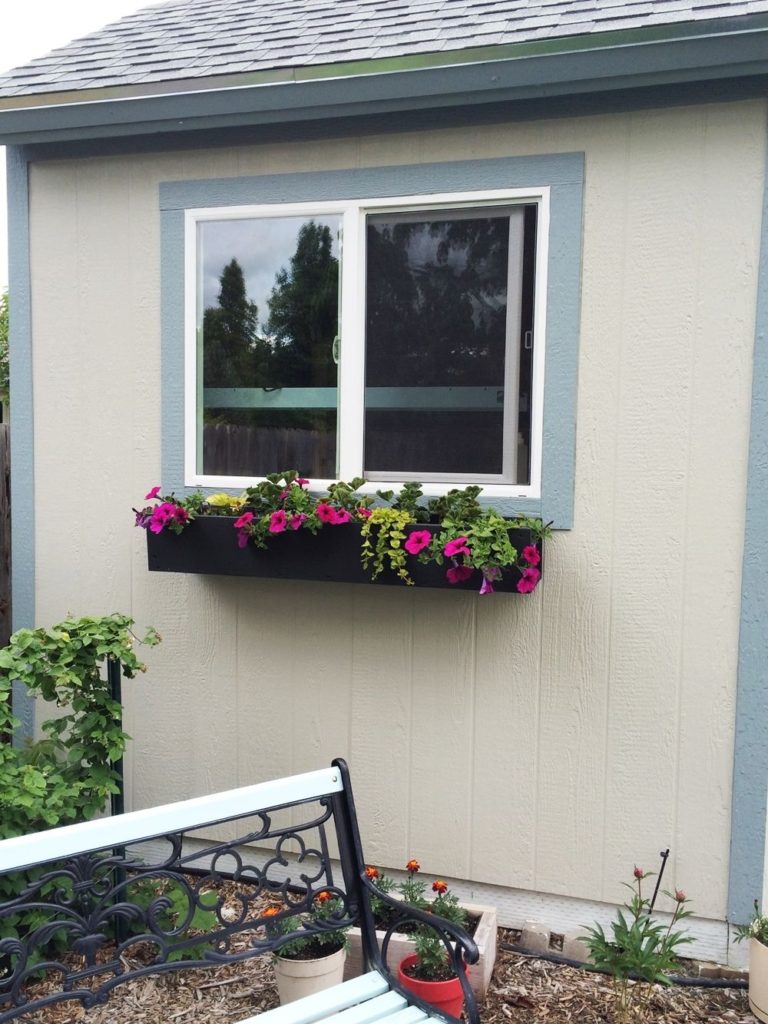
This photo represents only a week or two after planting – similar to what the box will look like when you plant.

Top Tips for Planting a Window Box
Before we get started, we want to share with you a few of our top tips regarding the soil in your window box. As you’ll see below, we use potting mix for this project today.
You’ll want to avoid just using potting soil in your window box, as this soil will quickly lose the needed water and nutrients for your plants.
One thing to keep in mind is to never add organic material into your soil, such as wood chips or straw. You can add it onto the top if you really want, but it shouldn’t go into the soil itself.
How to Create a Beautiful Window Box for Your Home
Step 1 – Empty Out Your Window Box from the Past Season
If you have used your window box during the past season, now is the time to empty it out. Get rid of all the soil (you don’t have to throw it out, though – toss it into the garden or a flower bed) so you’re starting fresh. It’s important to use fresh soil each season for optimal flower growth.

Step 2 – Get Your Potting Mix
Grab your sack of potting mix. Note that this isn’t the same as potting soil. Potting soil is specifically designed for areas such as flower beds, while the potting mix is designed for things such as planters, hanging baskets, and window boxes. You can research why this is true, but for this tutorial, just take my word for it.

Step 3 – Fill Your Window Box with Potting Mix
Fill your window box to 1”-2” from the top edge with the potting mix.

Smooth out the potting mix, pressing gently to remove air pockets. Ensure it’s nice and evenly spread throughout the window box, to give your plants the best environment to grow.

Step 4 – Decide on the Arrangement of Your Plants
For spacing purposes, arrange your plants (still in their pots) in the order you think is most attractive. Don’t be afraid to move things around, group them together, spread them apart…whatever looks balanced and appealing. This is part of the fun!

Step 5 – Transfer the Arrangement onto the Ground
Transfer this arrangement onto the ground, in the order that you determined looks the best. For your reference, this tutorial’s window box is about 4’ long, 5” wide, and 6” deep. We planted four wave petunias, four geraniums, one creeping Jenny, and one sweet potato vine, all in 4” pots, for a total of ten plants. This may seem like a lot, but the trick to a beautiful, luscious window box is packing them in.

Step 6 – Begin Planting Your Flowers and Plants
Start on one end of your box and begin planting, following the layout you’ve created on the ground nearby.

When you pull a plant or flower out of its pot, it’s helpful to gently break apart the bottom of the root base. It’ll probably make a ripping sound, and you might feel like you’re damaging the plant. But the truth is, you’re actually liberating the roots so they will grow and expand faster in their new home than they otherwise would.

Step 7 – Stagger the Plants Throughout Your Window Box
Stagger the positioning of your plants’ placement of front-to-back. By this, I mean if you want your taller flowers to fill in the back of the window box (in this case, geraniums), don’t be afraid to plant them closer to the back of the window box. The plants don’t need to be exactly evenly spaced apart.

As you can see, we planted the “back” row (geraniums) first, leaving enough space in the “front” row for the other plants.

Step 8 – Fill in the Front Spaces of Your Window Box
Fill in the front spaces. The order we used (staggered front-to-back in the window box) from left to right was: wave petunia, sweet potato vine, geranium, wave petunia, geranium, wave petunia, geranium, creeping Jenny, geranium, wave petunia.

Step 9 – Weave Your Soaker Hose Through the Plants
Carefully weave your soaker hose among all the plants, taking care that each plant has water access. This detail is key to thriving window boxes – if they are not on an automatic watering system (soaker hose connected to a drip sprinkler, for example), by mid-summer your plants will likely be drying out and struggling. Why? Because you’re on vacation and busy and forget to water! It’s only natural.

Stake the end of your soaker hose down with a landscape staple.

Step 10 – Make Any Final Adjustments to Your Window Box Display
Make any adjustments you think you need at this point, either to the soaker hose or the plants themselves.

Step 11 – Add Extra Potting Mix as Needed
Add in the extra potting mix where needed. We try to aim for the dry potting mix level hitting about 1/2″-1” from the top of the box because when water is added, the potting mix will compact a bit.

You’re close to being done (we’re sure your window box looks beautiful at this point!), but there’s one final step to help your professional-looking box flourish.

Step 12 – Add Fertilizer to Your Window Box
Get your hands on a fertilizer that focuses on root growth and blooming. We use this Fertilome Blooming & Rooting fertilizer with great success – it helps with root growth, water retention in the potting mix, and slow-release fertilization over several months.
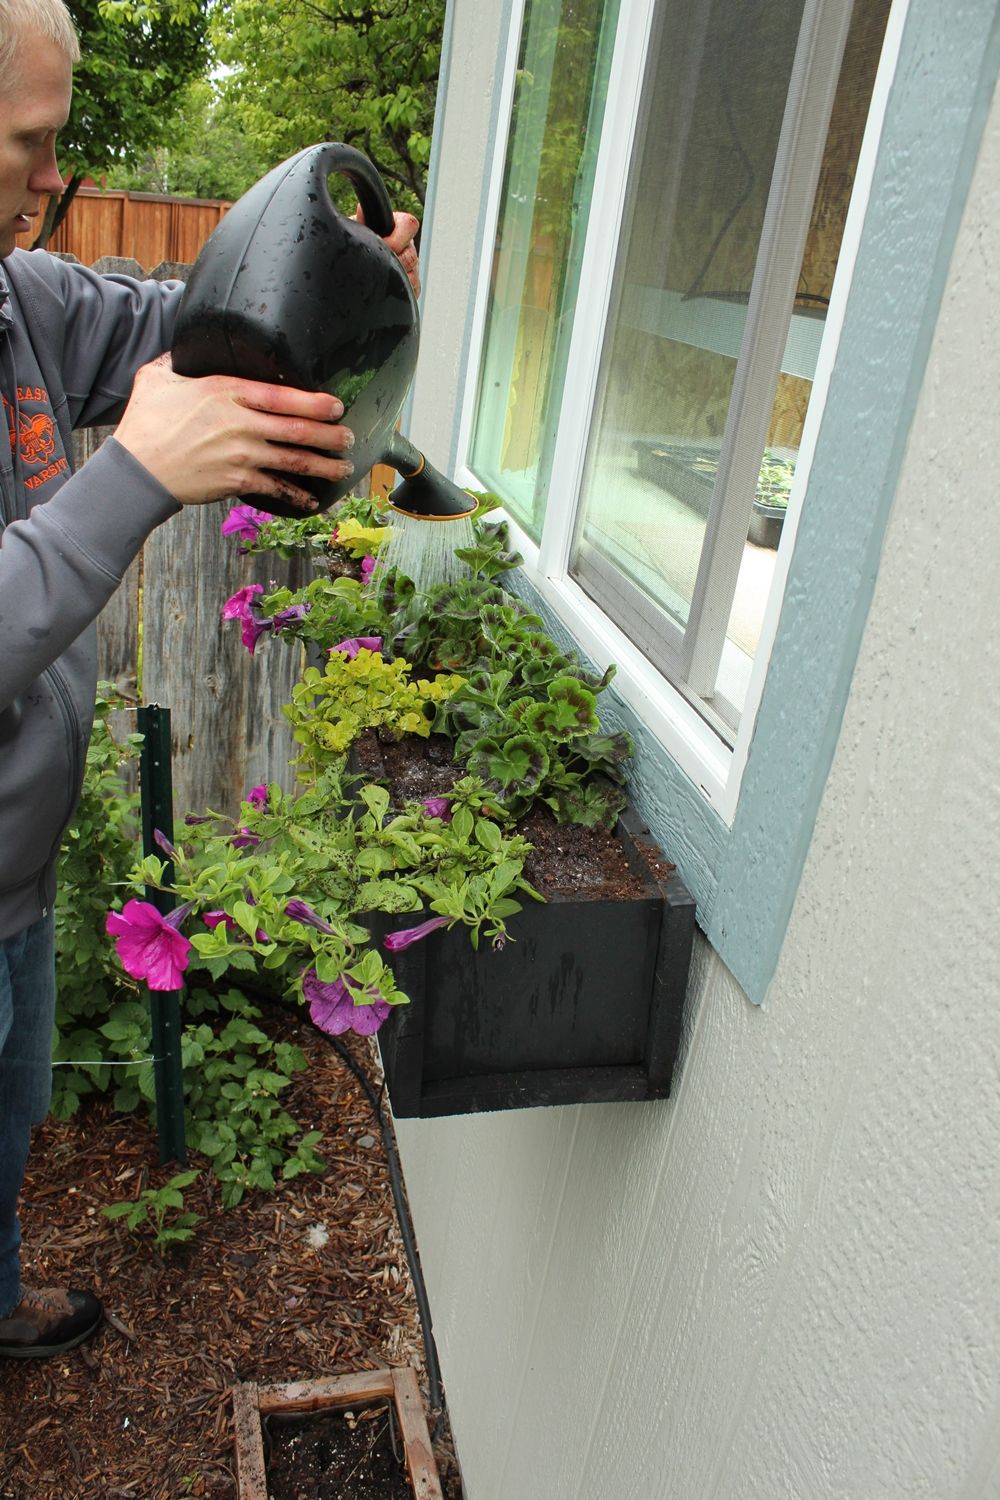
Dilute it with water as per instructions and pour the fertilizer thoroughly over the plants in your window box. Now just water regularly (every day or two, hopefully via your automatic system) and fertilize with regular flower fertilizer a couple of times a week. A good rule of thumb for sufficient watering in a window box is water until you see water dripping through the holes in the bottom of your window box, so you know the potting mix is sufficiently saturated for that day.

This photo shows the window box about 1.5 weeks after planting. Sunshine and warm temperatures had been scarce during that time, so the plants are maintaining but not expanding.

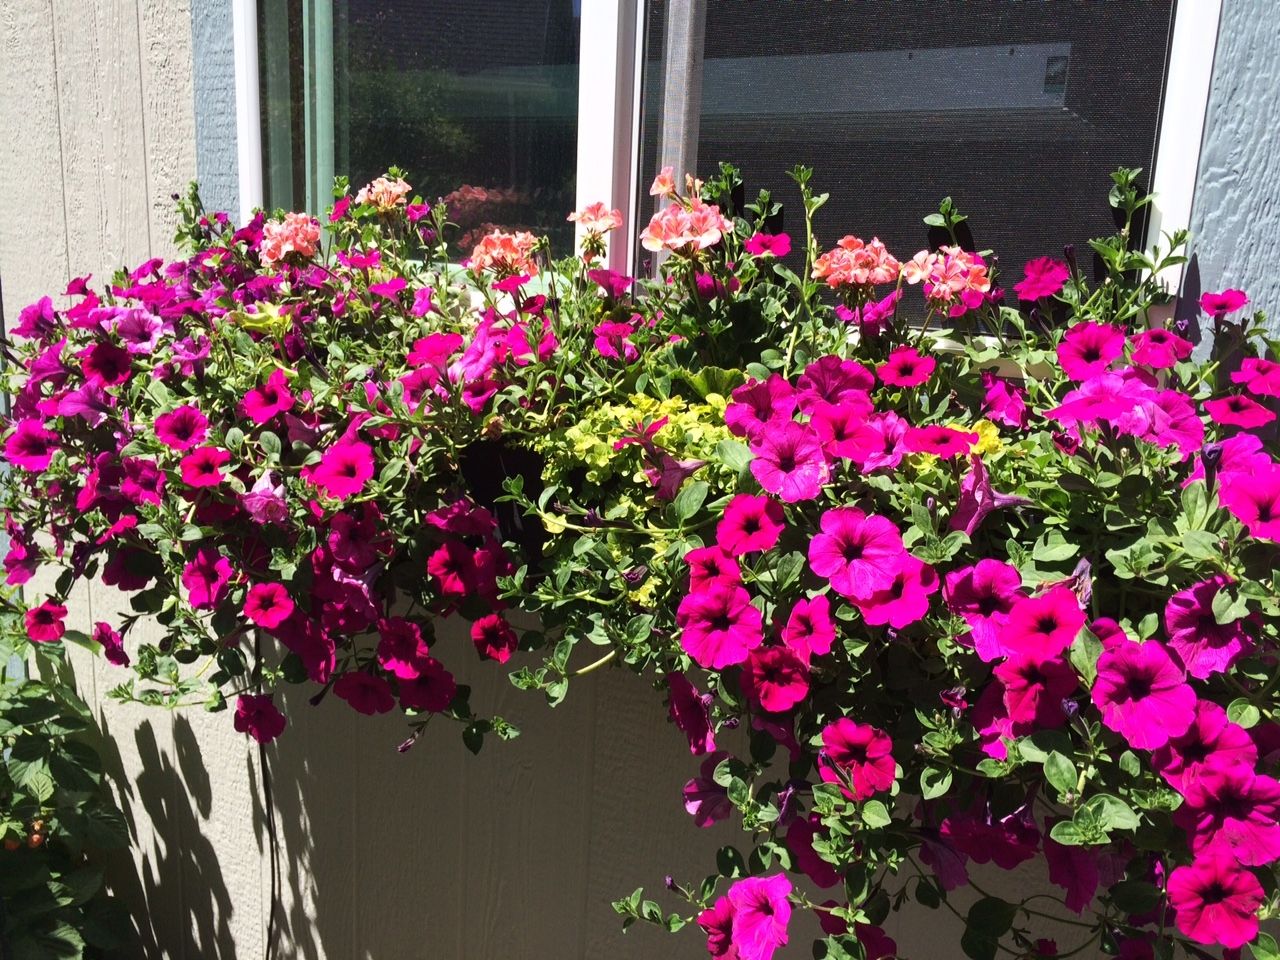
This photo shows the window box about four weeks after planting. Warmer temperatures helped the geraniums bloom and the petunias explode. The creeping Jenny and sweet potato vine should follow suit.
We were so pleased with how this window box turned out, and we love the pop of color it adds to the exterior of the home. It’s such a simple project, and creating your own window box is very easy to do as well. A window box is so easy to refresh each season, and you can add new flowers and plants to keep up with the changing colors. For anyone with only a small garden space, you’ll still be able to add extra flowers to your home this year without taking up much room at all.
Colorful blooms make any space a pretty one, and a window box is no exception. (Want more? Check out our tutorial for planting bloom hanging baskets!
Happy planting!
The best plants for window boxes
You’d think actually building the planter box is the hardest part of this sort of project but choosing what plants to fill it with is not an easy process either. To help you out we did some research and found out what the best plants for window boxes are.
Petunias
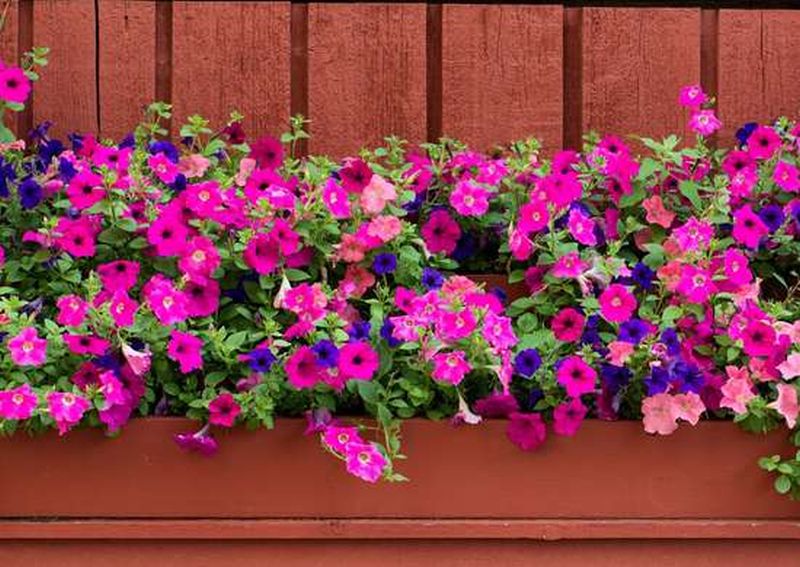
This is one of the most colorful and beautiful plants for the summer season. It makes these vibrant blooms which can be white, red, pink or purple and which you can combine if you want a multicolored display for your windows.
Coleus

The coleus plant is a lovely choice if you want some color but you’re not that fond of flowering plants. Its leaves look magnificent and are famous for their red and purple colors and their beautiful patterns. They look gorgeous in window boxes and they’re great filler plants if you want to combine them with something else.
Creeping Jenny

Speaking of filler plants and beautiful colors, the creeping jenny is absolutely magnificent. It cascades down from window boxes and planters and has these lovely penny-shaped leaves in a really vibrant shade of green.
Sweet potato vine
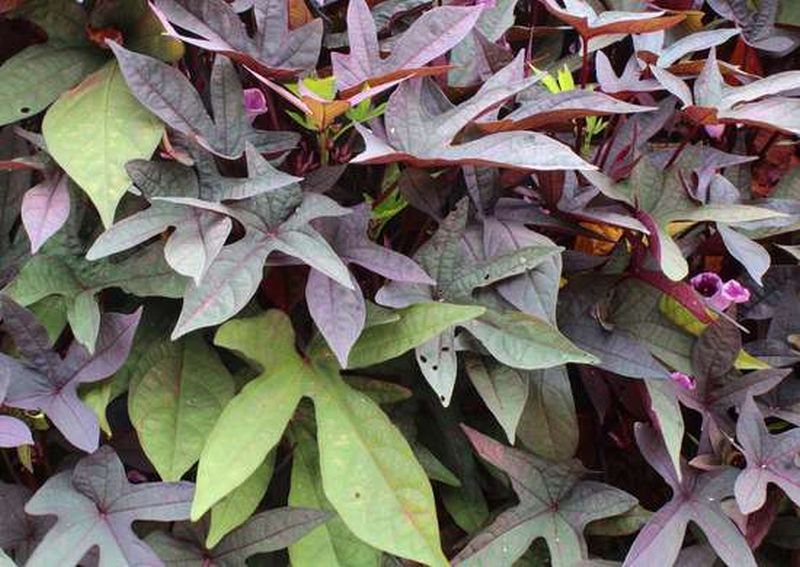
Another really great option for those who love foliage and interesting colors is the sweet potato vine which comes in several different varieties. The green and purple variants are really beautiful and stand out without being too bold about it.
Dusty Miller

The dusty miller plant is famous for its exquisite silver-colored leaves which look like they’re frosty but also have this soft and delicate look as well. They don’t grow very tall and they do well in the heat or with limited water which means keeping them healthy is not demanding at all.
Snapdragon

The Snapdragon flowers are vibrant and eye-catching and they grow quite tall so they’re a nice choice for window boxes because you can see them from inside. This is a summer plant so you might want to combine it with a few other ones if you want color all year round.
Fuchsia

The fuchsia plant, just like the color, is bold and eye-catching. Its flowers feature a magnificent combination of bright pink and purple which stand out in any context. It doesn’t really like to be exposed to full sunlight so avoid putting it in window boxes that don’t get shade throughout the day.
Impatiens

A lot of flowers and plants don’t enjoy being exposed to full sun which can be a problem in some cases. However, shade is not easy to deal with either. The impatiens plant is one of few which thrive in shaded areas and also make colorful flowers too.
Verbena

Another eye-catching plant is the verbena which makes these bright pink and purple flowers which stripes on the petals that make them look like little candy canes. They look delicious and they’re a great fit foe window boxes because they have a cascading appearance.
Licorice

The licorice plant may not be very colorful but it stands out in a different way. It’s famous for its felted leaves which look super soft and fuzzy and have this subtle white overlay that dims their green color. There’s also another version which has yellow tones.
Variegata

This plant is also known as variegated ivy and is a wonderful choice for window boxes especially if you want something that will cascade down and that’s also super easy to maintain. It’s not fussy about sunlight and it’s also drought-tolerant so you don’t really have to worry about it too much.
Ornamental grass

In addition to all these fancy and colorful window box plants and flowers, there’s also another type that might appeal to you in a different way: ornamental grass. You can use it as a filler plant or to add texture and color to a window box.
DIY window box planter ideas:
Off-the-shelf window boxes are definitely convenient but don’t really offer much in terms of originality and customization, not if you want something very specific. They’re also usually designed in standard sizes so you might have trouble finding one that fits. Luckily there’s always the DIY route.
A lattice window box
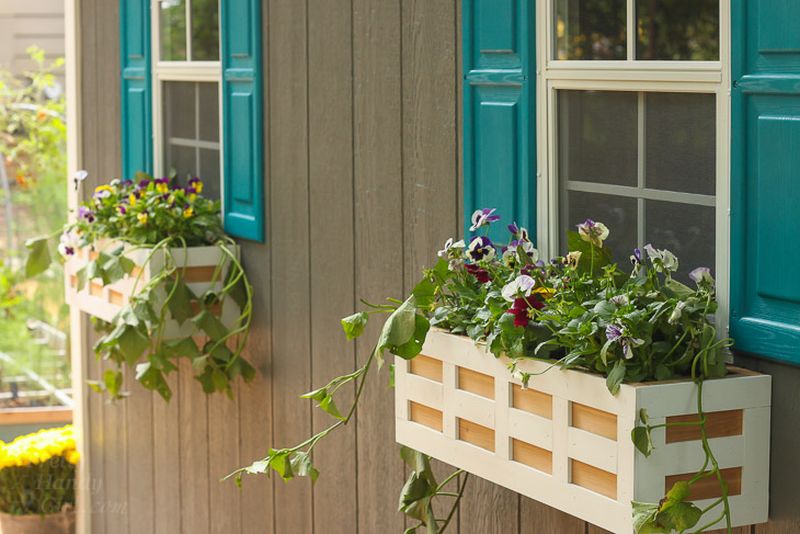
This is such a simple design but it’s also a beautiful beautiful one. The lattice window boxes featured on prettyhandygirl are deep enough to allow the plants lots of room to grow and simple enough to allow the focus to be on the greenery.
A simple wooden box

Wooden window boxes are perfect for giving the exterior of your house that homely and inviting look. If the windows have shutters that’s a wonderful opportunity to add planters that match those. A lovely example in that sense can be found on beneathmyheart.
Extra long window box
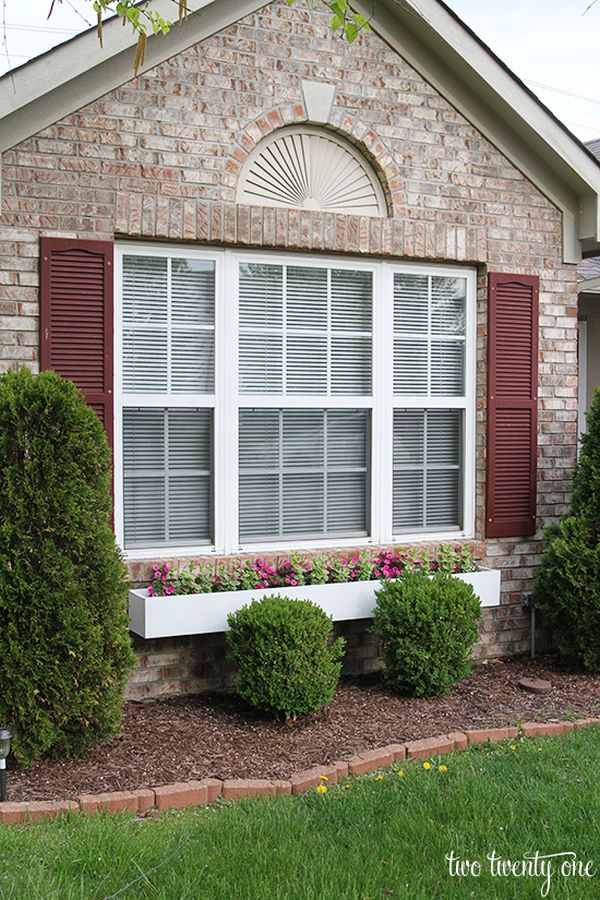
As mentioned before, off-the-shelf window boxes have certain standard dimensions which means if you want something super long you’ll probably have to built it yourself. This extra long box design from twotwentyone is great if you have double or triple windows and you want to unify them and to keep the décor simple on the outside.
Pallet boxes
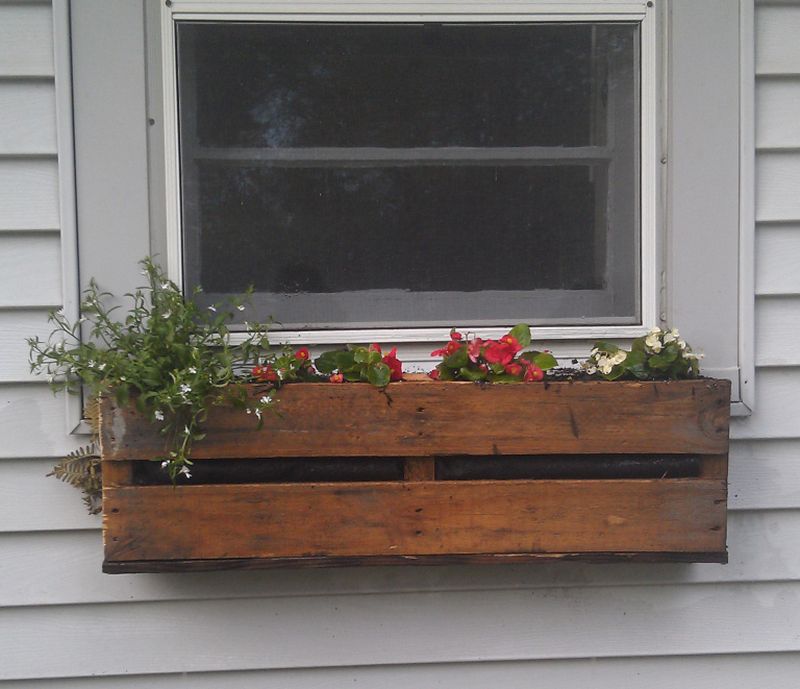
Reclaimed wooden pallets are an excellent resource for lots of DIY projects, including these lovely window boxes from paradiseperspectives. Use the pallet wood if you want to keep the cost of the project low but also if you want to give the boxes a rustic and worn look for more authenticity.
Simple stained box

Isn’t this window planter just charming? The one featured on shanty-2-chic is perfect for this old brick house because it almost blends in. That really helps the brightly-colored flowers and leaves to stand out more and to look absolutely dreamy.
A design to match the window

Window boxes are not necessarily designed to be placed under the windows but if you do choose to do it this way perhaps it would be nice to go with a matching design. You can make your window boxed match the windows in color and style, like this one from remodelaholic does.
Mini fence planter

Does this window box from makeit-loveit remind you of picket fences? Well that’s because it was actually made from cedar fence planks. If you don’t want to build it from scratch you could choose instead to decorate an existing planter with some cut fence boards.
Chevron boxes
![]()
If you already have some window boxes that are still in good shape there’s no reason to replace them yet. You can instead just give them a makeover. How about this cool chevron pattern idea from addicted2decorating? It’s pretty easy to get right and you can have a lot of fun combining colors and creating an interesting design for it.
Scrap wood planter

Scrap wood, whether it’s from a pallet, some old fence boards or leftover pieces from previous projects, is a great resource for window boxes and planter in general. This simple design from instructables shows you how to can really emphasize its beauty and uniqueness. First you make a simple box, then you decorate the front with boards of different sizes, shapes and colors.
A design that blends in

The window boxes themselves don’t need to stand out too much. It’s actually the contents that get that privilege. With that in mind, you might want to come up with a design for your DIY window boxes that allows them to blend in and to look natural underneath your windows. The design featured on this tutorial on construction2style seems just right.
The post Step-by-Step Guide to Planting a Window Box appeared first on Home Decorating Trends - Homedit.


0 Commentaires