Decks are one of the greatest luxuries of outdoor spaces that we’ve been given. They give a great space for us to gather, cook, and enjoy each others’ company. But when you look at a deck, do you really consider how it was made?
Decks always begin with footings. These footings are made to support the fence posts that are put into place to secure the deck. Without the footings, the deck couldn’t exist without collapsing upon use.
What Are Concrete Fence Posts?

Concrete fence posts aren’t exactly fence posts that are made of concrete but rather fence posts that are installed in concrete. This is probably the most secure way to install fence posts as it gives a very solid base.
It involves placing the posts or brackets into a bucket of concrete. The bucket is buried under the ground and packed tightly. Today, this is the most common way to secure fence posts for decks in private yards.
The Two Methods – Concrete Fence Posts

There are two ways to use concrete fence posts for your deck. Both of them involve securing the posts in concrete but each with a different method. They are each used for different reasons and oftentimes, they are both used.
For our project, we used the deck footings method for our deck footings and the pergola posts method below for the posts for the pergola. Both work well and it’s best to consult a professional to find out which ones you should use.
Deck Footings
This method involves submerging the posts into the concrete to secure them. It is often used for the posts that will hold the deck up. It isn’t as common for the posts that will be tall as the pergola posts.
This is an old method that doesn’t really require anything but a post and concrete. It works for short posts because the tall posts will all over with no way to support them while the concrete dries.
Pergola Posts
This method involves using brackets that are submerged into the concrete. The brackets are then attached to the fence post or pergola post. This method is the one we used for the taller posts that will support a roof.
This can also work for short posts but isn’t really necessary. It does however save on lumber as you won’t have a foot or two of post that isn’t being used for anything but supporting the rest of the post.
How To Install Concrete Fence Post Footings

Now here we have a simple step-by-step method for installing concrete deck footings. It’s an easy method if you have any experience building decks and it is more commonly used for low-lying decks rather than high ones like those built over pools.
Both methods work and you may have to find someone to take a look at your project to let you know which method to use. Be careful using one you’re not familiar with because the deck will be supporting your weight.
Step 1: Measure Area

For our project, the deck was going to be 14’ x 25’ overall. The supports were placed about every 7’ which is fairly standard. So the short side will have three supports including the corner supports, which are necessary.
After you measure the area, go ahead and mark the holes, ensuring that they are in a straight line and at the correct angle with the other holes. This is a very important step and should be done multiple times.
Step 2: Dig Holes

Dig holes for your posts first. The exact dept varies but since this deck is short, we dug our holes 18” deep. As for width, no more than triple the width of the post is necessary. For example, our posts are 4×4 so the holes are 12″ wide.
Step 3: Start Forms/Buckets

Both buckets and round concrete forms work here. Just make sure that no matter what you use, that it is smaller than the hole. We used 10″ concrete forms which worked great. But you can customize this.
The best thing about forms is that you can cut them with a saw because they are thin enough to do so. They aren’t solid because they only need to hold the concrete until it dries, so it acts as a mold instead of a secure base alone.
Step 4: Set The Post

After you ensure everything is at a right angle and ready to go, you can place the forms into the holes. After you do so, let a couple of inches of water sit at the bottom of the holes then a little bit of the concrete mix.
The concrete must not need to be mixed, so get pre-mixed concrete. Then, put the post down into the hole. After you do, start leveling it as you pour the rest of the concrete into the form followed by water.
Step 5: Adjusting The Post
Since you should be using fast-setting concrete, you shouldn’t have to worry about the post falling over. But you should have to worry about it being level. As it dries, adjust the post accordingly to keep it level.
Go back every few minutes to ensure it stays level. You can never check too often but you can not check often enough. After it is set, then you can move onto burying the form and moving onto other posts.
How To Install Concrete Pergola Posts

This guide can be used not just for pergola posts, but any type of outdoor structure that will have a roof overhead. The point is that the posts are not supporting foot traffic but another structure instead.
For this part, we skipped the tutorial on how to get the right placement. That will take time and a lot of measuring. The placement is about the same distance as the footings with more room for leeway.
Step 1: Digging Holes
For this method, we used 6×6 posts rather than 4×4 posts and used 12” concrete forms instead of 10″ ones like before. We dug the holes 30” deep this time too as that was appropriate for our freeze depth.
The holes themselves were around 14″ wide, giving enough space for the forms to fit into comfortably. After we had the holes dug, we simply placed the concrete forms into them and ensured they would be covered.
Step 2: Mixing Concrete

Again, spray a couple of inches of water into the form and then add a little concrete mix. Only this time, you can slowly add one then the other until you fill the form. Because this time, the brackets can be placed afterward.
So mix the concrete in the form. The mix will be a little watery but the top should be fairly solid by the time you finish mixing. When it is, you have a good texture and can begin placing the brackets.
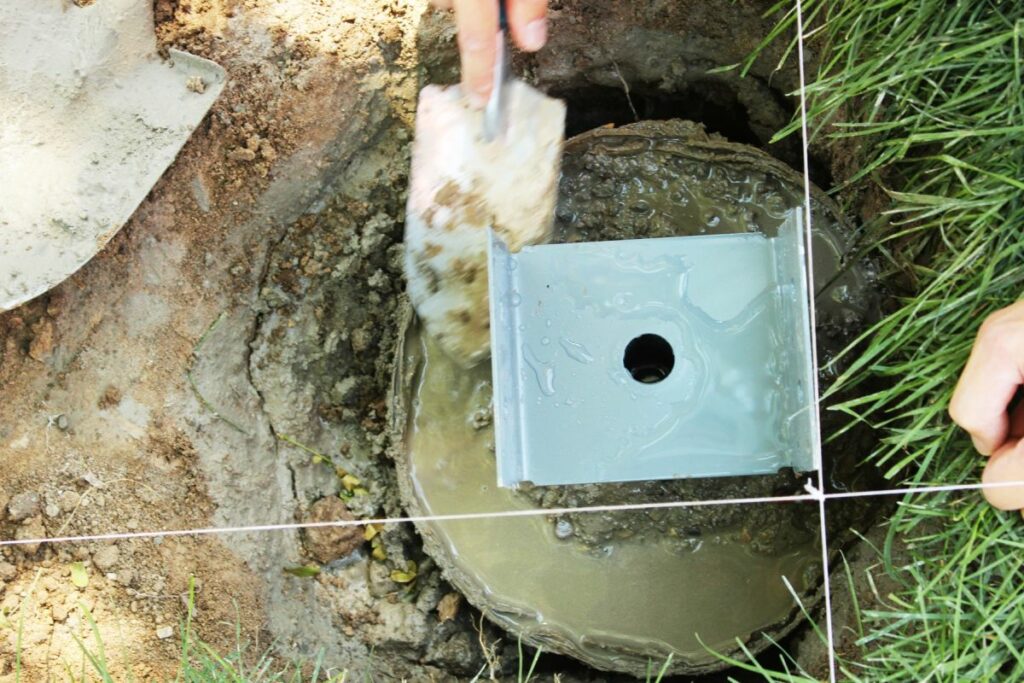
Step 3: Placing Brackets

For this method, you simply place the bracket in the concrete and let it sink. Help it down, with the bracket part always sticking out of the concrete. There will be a stake that will be placed inside the concrete.
Now, this is easier to keep level and should be done. Once it is dry then you can begin placing the posts on the brackets. But the concrete must be completely dry or the posts won’t hold up and nothing will be level.
Step 4: Prepare The Posts

Get your 6×6 posts and prepare them the way you like with planing, sanding, and more. It’s a good idea to keep the posts smooth or else you’ll end up with splinters or uneven posts when you’re finished.
It can also be helpful if the posts are too wide. For example, our posts were 6×6 but the brackets we used were only going to work for 5 1/2in bosts so we had to plane them down to that width, which worked out well.
Step 5: Install Posts

Now you can stain or finish the posts before or after installation. It’s easy to do so beforehand because tall posts are hard to finish when upright. That’s what we did. So after they dried, then we installed them.
Being careful with keeping them level, you can hold them in place while someone ensures that everything is centered. To do so, screw holes in your bracket to temporarily attach the post. They will be taken out later.
After you do this then you can install the posts for real. The initial screws are simply to keep the posts steady while you screw in the permanent screws. Make sure that you use thick deck screws or bolts for the job.
Hiring A Professional For Concrete Deck Posts
To be honest, installing deck posts can be a stressful job. That’s why most people hire a professional. If you want to eventually do things yourself then you can hire a professional and watch them work.
Use their tips, tricks, and methods to do things on your own next time. This is a great way to get started because things that are load-bearing are very important to get right. So keep your safety above everything else.
The post Concrete Fence Posts: The Two Methods Installation appeared first on Home Decorating Trends - Homedit.


0 Commentaires