Can you paint the bathroom tile? That is a question that is strongly debated in the DIY world. Although it was difficult, if not impossible, in the past, new paint formulas are making it easier and more effective to cover those dated tiles with paint and transform your bathroom into a space you’ll love.
In this tutorial, we’ll examine how to paint your bathroom tile, the pros and cons to doing so, what you need to know before you start, and the best paints for painting tile. We’ll also include a fun tutorial on how to paint your shower tile. So, stick around, and let’s talk tile paint!
Can You Paint Bathroom Tile?

There is a popular misconception in the DIY world that bathroom tiles cannot be easily or effectively painted over. While this may have been true years ago, it is no longer the case. Thanks to new and better paint formulas, painting over existing tile is now one of the most cost-effective ways to give your bathroom a fresh new look.
Along with being cost-effective, painting your bathroom tiles can be a much faster DIY project (depending on the level of detail) than removing and replacing the tiles, and certainly more environmentally friendly since there is no tile waste making its way to landfills.
There are steps that should be taken to ensure the success of your painted tile project, but when done with the correct paint and tools, painting your existing bathroom tile can be a viable option.

What Type of Paint Do I Need for Tile?
When painting tile it’s important to know what type of paint works best for the type of tile you have as well as that tile’s location. For example, oil-based paints are best for areas that see a lot of moisture, such as bathrooms or kitchens, while water-based paints are better in dry areas like floors or bathroom walls outside of the shower or tub area.
Ceramic Tiles
For any ceramic, porcelain, and quarry tile that’s unglazed found on bathroom or kitchen floors and walls outside of the shower area, a water-based latex paint will do nicely. But remember, water-based paints will wear quickly in heavy moisture so be sure not to use them near water sources.
Natural Stone Tiles
For natural stone tiles, you may want to consider an acrylic latex paint. These are still water-based so not ideal for super wet areas, but the acrylic resin gives them added durability to protect natural stone.
If you simply must use a latex paint in moist areas, look for one that is specifically designed for moisture and mildew resistance.
What About Epoxy Paints?
Epoxy paint is the type you want for ceramic, porcelain, and unglazed quarry tile in your “splash zones” – those areas that have more contact with water, such as countertops, backsplashes, and shower and tub surrounds. Epoxy paints dry to a harder and more durable finish and have a much higher resistance to heat, moisture, and everyday use. There are epoxy formulas that are two-parts and available which are designed for tub and shower surrounds, and tiles.
Enamel paint is similar to epoxy in terms of durability and resistance to moisture. It is another great option for ceramic and porcelain tile, and because it is oil-based it will stand up better in moist areas.
Most of the paints such as this are available in a wide variety of finishes that range from a simple flat all the way to super high gloss. It is important to keep in mind that that the glossier you go with the finish, then the slipperier the tiles will end up. When you are painting floor tiles or any other surface that has the potential to be walked on, consider using flat or matte finish as these offer more traction that semi-gloss or gloss.
To ensure the upmost success, choose a bathroom tile paint that is specifically designed for use on tiles and if you’re painting areas that receive a lot of water, make sure to get a product that is made for moisture-prone areas.
Should You Use Primer on Bathroom Tiles?
The type of paint you choose is vitally important to the project, but so is the type of primer. Make sure to choose a good quality primer with a high-adhesion value for best results. For ceramic and porcelain tiles, you’ll want an epoxy or urethane primer and for natural stone and unglazed quarry tile, you’ll want to go with a masonry primer.
Bathroom Tile Paint Tips: What You Should Know
You Can Paint Most Tiles
Except for glazed quarry tile–which won’t bond to paint regardless of what you do–you can use paint on most tiles including, ceramic, porcelain, natural stone, and un-glazed quarry tile, but there are a few things you should know before running out to the hardware store.
Do Not Paint Cracked or Damaged Tiles
You cannot add paint to tiles that are cracked, crumbling, or broken in any way. Even gluing the pieces back together, will not be enough. The damage and imperfections in the tile will show through the paint and eventually damage the finish as the broken tiles continue to wear down. If you have tiles in less than a favorable condition, it is best to just remove them.
Use Epoxy
As discussed previously, paint in high-moisture areas tends to wear much faster than paint in non-moisture areas. If painting tub and shower surrounds or tiles, tile backsplashes, sinks, tubs, etc., be sure to use an epoxy or enamel paint that is mildew-resistant and formulated for use in high-moisture areas.
Things to Consider Before You Paint Bathroom Tile
Painting your bathroom tiles is a project that can be broken down by five simple stages and the total time it will take depends on dry times for each of the products used, the scope or size of the projects, and the detail you put into any patterns or designs throughout the space.

Tile Preparation
In this stage, you will first sand all the tiles or surface area(s) to be painted. Sanding helps to scuff up the surface, giving the primer and paint something to adhere to. You will also be vacuuming away the dust left from sanding, but it’s a good idea to also scrub the tile as well as any grout lines in order to wash away any dust left behind.
Tile Priming
You never want to miss this step as it is crucial for making your paint stick to the tiles surface. For ceramic and porcelain tiles, remember to use a urethane or epoxy primer and for natural stones like granite and marble, or quarry tile that’s unglazed such as slate, use a masonry primer.
Tile Painting
If painting over a large area of multiple tiles, including the grout, a roller will be the quickest and easiest tool. Be sure to overlap in multiple directions and then “even” it out. If a more detailed look is what you’re going for or you want certain tiles to have patterns, use painter’s tape to tape off the edges of the tile you’re working on and then paint away. Although painting unique patterns can add beauty and personality to your bathroom, it does take considerably more time than just a solid color, so plan your project accordingly.
Remember, it will take two days or more for the paint to dry fully, so avoid traffic in these areas for the time indicated on the manufacturer’s label.
If Applying a Pattern
Use painter’s tape to tape off any surfaces you don’t want paint to reach. Using a stencil (taped to the tile) or by free hand, paint the pattern you desire onto the tile. Here you can choose a colour that compliments the tile color, or you can use the same color to achieve a more embossed look. You really are limited only by your imagination.
Sealing the Finished Tile
Once all layers of paint are completely dry, it’s time to protect your “new tile” with a coat of sealer. For ceramic and porcelain tiles use a urethane sealer and for natural stones or quarry tiles use a masonry sealer. It may be tempting to skip this final step, but do not! Sealing the painted tile will give it an extra layer of durability and protect it from daily wear-and-tear, keeping it beautiful for years.
Successfully painting your bathroom tile comes down to knowledge. Know the type of tile you have and what paint works best on that type. Learn about what primer you should use and what other important steps you can take to prepare your tiles surface. If you take the time to learn these few things your tile paint project will be a success.
What Is the Best Bathroom Tile Paint?
There are a lot of options when it comes to paint, even paint for tiles, so it’s very important to do your homework before choosing the best one for you. Customer reviews are always a great way to see if a paint you’re considering will stand up to the job it’s for. Later in this article, we’ve also listed a few options of bathroom tile paint we think are some of the best.
The most important thing to consider is where the paint will be used. Water-based paints will not hold up in areas with any amount of water, so they aren’t the best for bathrooms and certainly not for “wet areas”. For your bathroom tile paint, the best options are anti-bacterial, water-resistant epoxy paints and primers.
Pros And Cons to Painting Over Tiles
As with most things, there are pros and cons to painting bathroom tile. We’ve compiled some of them here:
Pros
- .You can customize your bathroom
- Lighten or darken the color of your tiles and, in turn, the bathroom.
- Apply custom patterns or designs.
- Well-painted tiles require little maintenance – a light cleaning with soap and water or a store-bought cleaner (make sure the tiles are sealed) is all they need.
- If a scratch or chip occurs, it can easily be touched up with left over paint.
- Just as durable as tile.
- More cost-effective than removing and replacing tile.
- Faster than removing and replacing tile.
- Prolongs the life of the tiles and ensures they don’t end up in landfills.
Cons
- Can take a long time depending on the complexity of the design and the scale of the work.
- Drying times mean your bathroom could be out of commission for at least a week.
- Paint may chip or peal if it was applied incorrectly or if prepping steps were omitted.
- May inadvertently cover grout lines. To avoid this, use painter’s tape to tape them off.
- Can be a lot of work.
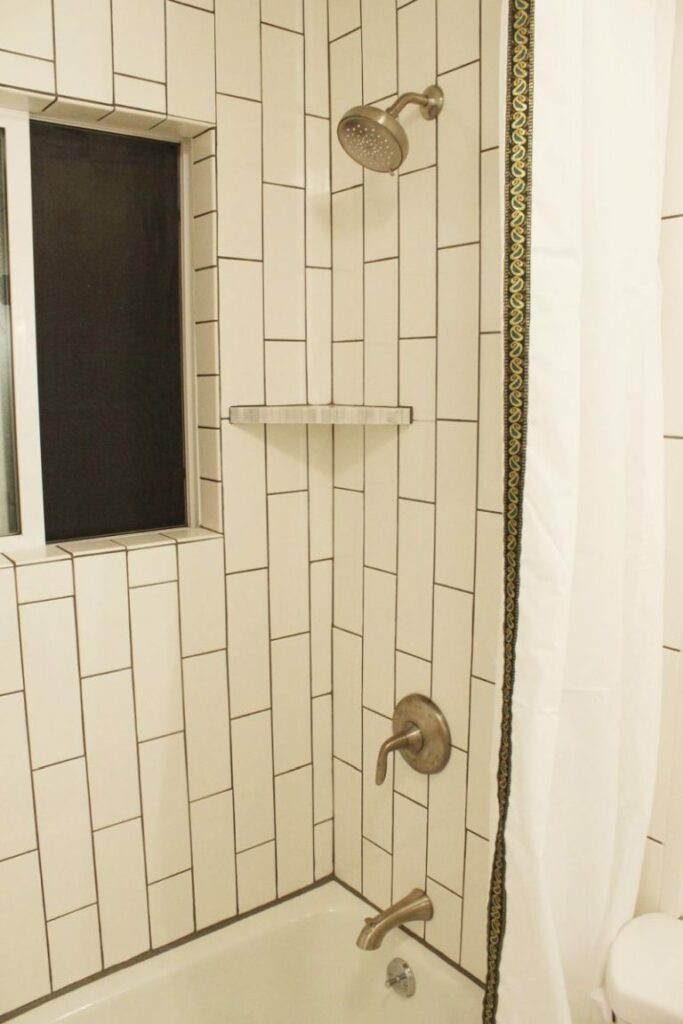
How To Paint Shower Tile – A Tutorial

And now for a fun tutorial! We thought we would walk you through painting tiles in a shower so that you can see just how easy and fun it can be! Before we begin, remember that you want to use a water-resistant epoxy or enamel paint since these tiles will get wet repeatedly and will often be in a high-humidity environment.
Are you ready? Let’s paint some shower tile!
Step 1: Prep the Tile and Wall
Prepping the tile involves cleaning, sanding, and taping off the areas that you don’t want paint to reach. As with every step in the process, these are critical for a successful project.
To clean the tiles, use a cleaner formulated to cut-though soap scum and anything else that may have built up over time. Just about any bathroom cleaner meant for mold, mildew, and soap scum will work in combination with a good scrubbing pad. Your goal here is to get rid of as much build-up as possible so the primer and paint will adhere to the tiles better.
Once you’ve cleaned the tiles, move on to sanding them. Use a 150-grit sandpaper and firmly go over the surface of each tile. This process will help to get rid of any embedded dirt you missed while cleaning and will also scuff up the tiles surface a bit more, ensuring again that the primer and paint will adhere. Make sure to give the tiles a good rinse to remove any dust left over from sanding. Then let them dry.
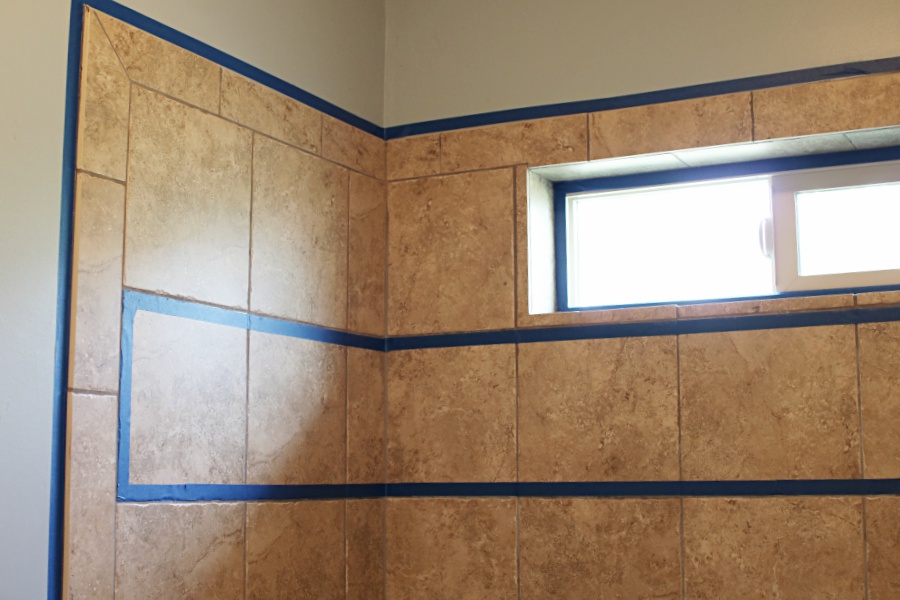
Once the tiles are dry, it’s time to apply painter’s tape to the areas or surfaces you don’t want the paint to touch. Tape around any windows or window casing as well as along the wall where the shower tile and wall meet. Tape along the tub edge where it meets the tile or the grout. If you are not paint the grout, tape to the tiles edge. If you are painting the grout, tape to its outer edge. Be sure to tape over any caulking that may be around the tub as well as faucets and fixtures around the tile. If you have tiles, or areas of tiles, that will be a different color from the rest, tape them off with painter’s tape as well.
The Preparation is Complete!
Step 2: Priming the Tile

For ceramic or porcelain tile use an epoxy or urethane primer and for natural stone or unfinished quarry tile use a masonry sealer. Remember that the right sealer is equally as important as the right paint.
Prime the grout lines and any corners using a small or angled brush, then roll on one coat of your chosen primer over all the tiles. Refer to the manufacturer’s recommendations for how many coats to apply and which roller is best to use.
Step 3: Paint the Tile

Once the primer is dry, it’s time to paint. Using the paint of your choosing (epoxy or enamel is best), carefully take a small or angled paint brush and apply the paint to grout lines, corners, and along the painter’s tape edges.
Once the finer details are complete, use a roller to apply the paint to the main areas of tile to be painted. When the first coat is dry to the touch, you can proceed with the next coat. Depending on the color of paint chosen, three or four coats may be required. Make sure to allow adequate drying time between each coat.
If you have any areas that were taped off as detail or accent tiles, remove the tape around them now. Let everything dry completely before moving on.
Once the tile paint has had at least twenty-four hours to dry, re-tape the accent tiles, this time applying the tape to the outside of the accent area (or on the newly painted tile). Using a putty knife or other smooth object, make sure the tape is adhered firmly to the tile paint along the edge that meets the accent tiles. This will ensure that no accent paint seeps under and will result in a crisp, clean line.
Paint the accent tiles in the same way that you painted the main tiles. Start with the grout and fine details, then roll on the main color. Apply as many coats as needed, leaving ample dry time between coats.
Remove the painter’s tape from around the accent tiles and allow everything to dry fully.
Step 4: Add Caulking Around the Tub

Make sure to caulk around the tub where the grout line and tub meet. This gives the finished project a cleaner look and added protection from moisture damage.
Step 5: Seal the Tiles
Taking the time to apply sealer to your finished project will ensure that it lasts and stands up to daily wear-and-tear. Use a urethane sealer when dealing with ceramic and porcelain tiles and a masonry sealer for natural stone types and quarry tiles like slate. With a foam roller, cover the entire surface of painted tiles with the sealer. Make sure to get into the corners and any hard-to-reach spaces with a paint brush. You may choose to apply multiple coats for added protection, but make sure to allow a minimum of twelve hours of dry time between each coat.

Step 6: Enjoy Your New Bathroom!
You did it! You transformed your shower tile into a thing of beauty! Pat yourself on the back for a job well done! You’ve earned it.
Best Paint for Bathroom Tile
Bathroom Tile Paint Majic Paints 8-9404-2 Diamond Hard

Majic Paints Diamond Hard RePurpose Interior/Exterior Acrylic Satin Paint boasts superior adhesion to most surfaces including wood, drywall, metal, steel, aluminum, copper, brick, masonry, plastic, vinyl, glass, and tile making it the ideal paint for most DIY projects.
Diamond Hard paint has a one-step application process and sticks to most surfaces without pre-sanding or priming required. This durable water-based formula has superior color retention and levels beautifully to a smooth finish every time.
Pros
- Available in 10 different colors.
- Available in 1- and 2-quart sizes.
Cons
- Not recommended for “wet” areas
- May not withstand heavy use on marble surfaces.
Rust-Oleum Store Bathroom Tile Painters Touch Latex Quart Gloss White

Rust-Oleum Painter’s Touch Ultra Cover Premium Latex Paint is ideal for indoor as well as outdoor applications plus a variety of different surfaces such as wood, plaster, masonry, metals, and even unfinished ceramic. With coverage of 120 square feet and a dry time of thirty-minutes to the touch, you’re able to thoroughly cover most DIY projects in a relatively short amount of time.
Painter’s Touch paint is a durable water-based acrylic formula that goes on smoothly and provides long-lasting wear and chip protection. Painter’s Touch is easy to apply and requires minimal surface preparation. Simply give the surface to be painted a light sanding and a gentle wash with a degreasing cleaner. Once dry, the surface is ready for the brush-on application.
Pros
- Low odor
- Indoor/Outdoor applications
Cons
- Not ideal for use on tiles with metallic details
Giani White Diamond Countertop Paint Kit

Giani White Diamond Countertop Paint Kit is a simple and cost-effective way to transform your existing kitchen and bathroom countertops – giving them the look of granite at a fraction of the cost. Ideal for covering laminate, butcher block, Corian, ceramic tile, cultured marble, and traditional granite, this paint kit can be used on countertops with drop-in or undermounts sinks and includes special instructions for one-piece countertop/sink combinations.
This countertop paint kit includes everything you’ll need to complete the three-step process in as little as one weekend and have you using your countertops fully in just fourteen days. The water-based acrylic paint covers approximately thirty-five square feet and hides existing stains, burn marks, and scratches. The automotive grade, clear acrylic topcoat gives durable protection against everyday wear and tear.
Included in This Kit:
- 12-ounce IronCore Primer Base Coat
- 6-ounce Greystone
- 6-ounce Quartzite
- 8-ounceWhite Limestone
- 3-ounce White Limestone
- 16-ounce Glitter Topcoat
- 6-inch Roller Arm with 2 Roller Pads
- 4-inch Paint Sponge
- 2-inch Foam Brush
- A Practice Board
- And Step-by-step instructions
Pros
- Low VOC
- Low Odor
- 5 colors that are adjustable to any décor
- 1-year limited warranty
Cons
- Will be dulled by harsh chemicals such as bleach and household cleaners
The Verdict on Painting Bathroom Tile
We’ve answered the question – can you paint bathroom tile? We’ve discovered what type of paint should be used, what you should know about painting tile, and its pros and cons. So, are you ready? We think you are! With the right paint, proper preparation, time, and a bit of patience you can take your bathroom from drab to fab in a DIY project that you’ll love for years to come. We hope you enjoyed this article. Please leave a comment or ask a question. We love hearing from you!
The post How to Paint Bathroom Tile to Give Your Bathroom an Affordable Makeover appeared first on Home Decorating Trends - Homedit.


0 Commentaires