An accent wall can make a space feel larger. The right colors or accents can create a wall that makes the room seem larger. Moreover, you don’t need to use a bold color to achieve this: Sometimes muted tones can do an even better job making the room feel spacious while pulling the eye across the whole space and to the accent wall.
An accent wall can make a space feel larger. The right colors or accents can create a wall that makes the room seem larger. Moreover, you don’t need to use a bold color to achieve this: Sometimes muted tones can do an even better job making the room feel spacious while pulling the eye across the whole space and to the accent wall.
Which wall is best for an accent wall?
Which wall should serve as the accent wall in any particular room will vary depending on a number of factors. You might already have a built-in accent wall like one that features natural stone or brick. Don’t fight any natural focal point you might already have in the space. Some of the things to consider before choosing which wall to paint or decorate include:
- Existing architectural elements in the space. Is there a fireplace, bay window or other feature that already draws attention? Build on any fixed elements that are already present to create the best accent wall.
- Built-in cabinets or shelves can help frame an accent wall.
- Dramatic furniture is perfect for adding an accent wall. This means that if you have a dramatic armoire, the wall behind it is a natural choice.
- An outstanding view is already a natural focal point so don’t detract from it. If you still want to create an accent wall, such as by using paint, use the wall that has the window with the view.
What can I do to create an Accent wall?
Use Paint
Paint is the most commonly used technique for adding an accent wall because it’s the fastest and easiest way to do so. It can be as vibrant or as muted as you like. It all depends on your taste and the style of the room. A painted accent was is also an inexpensive way to make a major change and best of all, it’s easy to change if you decide you want to switch things up or go with the latest interior color of the year. Speaking of which, some of the 2021/2022 paint color trends are perfect for an accent wall, including:
- Blue-green hues are big right now, Whether you opt to go for something as bold as a peacock or aim for a softer shade, the colors in this expansive category will never be boring.
- Earth tones are always a great choice and are particularly suitable for livening up a neutral palette. These colors are easy to use in creating a calm room with some added punch.
- You might not think of beige as an accent color but it can be especially effective if the other walls are a dramatic or more vibrant color. Just think of it as emphasizing negative space, if you’re into art terminology!
- Dramatic, moody colors are definitely in for the coming year and are perfect for adding drama to any room, but especially the bedroom. Use a dark blue or even a stormy gray color on the wall to instantly pull attention to a particular area.
Decorative or Textured Paint
Besides a specific hue, the texture of the paint or design that you make with it is an important factor in creating an accent wall. We’re not talking about the faux painting styles of the 80s and 90s, but fresh ways to use textures and decorative paint. The accent wall can be the same color as the rest of the walls, but with added texture, you can distinguish the wall. Or, adding texture to an accent color really ramps up the wow factor. Some of the more common texture techniques include:
- A concrete look lends a bit of raw beauty without having to install any type of real concrete. It’s also an easy way to add an edgy feature to a modern space.
- A suede-finish paint is a sophisticated addition to a space, particularly a bedroom or dining room. It creates the luxurious look that you’re after without the high maintenance of a real suede-covered wall.
- Chalk paint may be verging on the overdone, but using it for just an accent wall is a judicious and effective way to create an accent wall. Used in moderation, chalk paint will always have a place as an accent finish.
- Metals or a metallic look are a bold way to create an accent wall. A little bit of shine goes a long way in creating drama and it’s easy to give a wall anything from a slight metallic sheen to a very shiny surface that really reflects the light.
- A mural accent wall is a fabulous way to create an accent wall because it’s essentially a custom work of art. Whether you DIY it or have someone do it for you, a mural is an instant focal point that dominates a room.
Create accent doors instead.
For an out-of-the-ordinary look that’s just as effective, try painting the door or doors instead of the wall. Face it, most homes have standard white or wood doors throughout, so painting the door is a pop of unexpected colors that immediately creates an accent. It’s also a super budget-friendly option because it requires so little paint.
Create a gallery or collage wall.
If you have lots of images you love or a collection of small- to medium-size artworks, use them to create an accent wall. Whether you want a precisely sized and aligned gallery wall of identically framed works or a more freeform collage of varied pieces is up to you. Both options are highly effective. This can be combined with a painted accent wall for the background.
Use wood paneling.
This is not your grandfather’s paneling of yore. Today’s wood-paneled walls have an entirely different vibe. Assess the style of your home and then choose what works for you. Anything from shiplap or rustic, rough-hewn planks to reclaimed panels are all options. Don’t want to install wood? Opt for a realistic photo-print wallpaper that looks just like the real thing.
- Wallpaper is another easy-peasy solution to creating an accent wall that offers a huge range of options. From textural varieties to more traditional styles and photorealistic images, the choices are nearly endless. You can even find mural wallpaper, which can be a more budget-friendly option than a custom-painted wall mural.
- Tile has always been used in kitchens and bathrooms as an accent wall element but tile manufacturers have expanded their range to styles that can just as easily grace a living or dining room. The options include sculpted three-dimensional patterns or large-scale tiles with designer prints.
Showcase Collectibles.
Just about anything goes for creating an accent wall. Handwoven shallow baskets, silver platters, heirloom china or even unique silver flatware pieces can be used to create a wall display. Get creative with what you have!
As we said, painted accent walls are the most popular thanks to their low cost and ease of use. They can be super cheap if you opt for doing it yourself. If you haven’t done much painting before – or just need a refresher on the best way to paint an accent wall, we’ve pulled together a few tutorials for you.
30 Accent Walls Decorating Tips


An accent wall can be a perfect way to break up a large room, to emphasize a particularly great architectural feature, or to instill a sense of the extraordinary in an otherwise completely ordinary space. While some say this trend is waning, others note that it’s still going strong.
It draws the eye to a focal point. This can be really important in. a large, open-plan space because an accent wall can anchor the room and pull attention to a specific area. Accent wall ideas are great for defining a seating area, highlighting a sofa or visually pulling a space together.
An accent wall can highlight a focal point even more. If a room already has a focal point like fireplace, built-ins or a feature window, painting the surrounding wall or adding other accent features can strengthen the emphasis in the space.
An accent wall can make a space feel larger. The right colors or accents can create a wall the makes the room seem larger. Moreover, you don’t need to use a bold color to achieve this: Sometimes muted tones can do an even better job making the room feel spacious while pulling the eye across the whole space and to the accent wall.
This article contains 30 wonderful accent wall ideas – some you can do yourself, others might simply serve as inspiration. But we hope you enjoy the creative process of determining if and what type of accent wall will work best for you and your home.
Wall Lighting
Lighting can a really dramatic accent wall idea, especially when it’s artistic like these geometric wall lights by Contardi. Used in a corner seating area across both walls, the lighting elevated to dark corner to a highlight in the space, especially at night. This particular space combines the lighting with geometric wall panels for extra design flair, but you would get an equally dramatic effect with just the lighting.
Built Ins
Lots of homes have built-ins and they can easily be transformed into a major accent wall idea. This pair of bookcases features elegant rounded tops. In combination with the mirrored upper wall panels, central mural panel and sconces, what could be a mundane wall is elevated to a stunning accent. Small details like the sunburst accents hanging at the front of each unit add a special touch too.
Panels and Art
A similar strategy to what was used on the built-ins can also transform an entryway vignette. This console with two chairs and similar paneling and sconces makes a great accent wall for a foyer or lonely end of living space that could use a little extra love. If the existing wall does not include molding that defines the panel, that is easily added. Also, an alternative to the central panels is simply using a wall covering divided into two sections to mimic this design.
Collections
A collection can make a great accent wall idea if the pieces are of the type that can be hung or mounted on the wall. A deep, dark wall makes the perfect background for this collection of round discs that feature different designs, colors and metallics. Of course, you can do this with a light-colored wall too, as long as the pieces provide enough color contrast.
Sofa Wall
The wall behind the sofa is a prime location to transform into an accent wall. In this particular example it’s not the dark paint that creates an accent – the whole room is painted a deep green – but rather the large, dramatic painting installed over the sofa. Often, people will choose a rectangular piece that leaves more wall space vacant. That’s fine, but opting for an oversized painting will amp up the accent value.
Wood Cutouts
Gorgeous and unexpected, this accent wall idea is made of two layers of wood with cutouts in the top one. Stylized blossom shapes in both positive and negative space variations cover the entire wall and the varied wood grain helps emphasize the cut-outs. Even though the shapes are flowers, the look is not overly feminine, especially when paired with a leather headboard.
Unique Mirror
A hallway is less commonplace for an accent wall but it is a very effective way to add interest to this often overlook space. While this example also uses a bold graphic wall covering, the unique mirror is the real draw. Even on a plain wall, this type of mirror instantly turns it into an attention-getting space. It’s a great accent wall idea for the person who wants a one-and-done concept.
Textures
A wall clad in some serious texture creates an instant accent without adding color to the space. In this example, the bottom of the stairwell could easily be a dead space, but the deeply textured wall surface and lighting create a fabulous nook used for seating and a bar cart.
Drapes
You don’t need windows as a reason to install drapes! Wall-to-wall and floor to ceiling, drapes are an accent wall idea that instantly creates a special space with a bit of mystery. Is there a stunning view behind the folds? This tactic can also be used to elevate a mundane wall with a small window into a large feature. If you want some light peeking in around the edges, install strip lighting.
Green wall
Whether you opt for a wall-to-wall installation or choose panels like these, a green wall is an accent wall idea that helps bring the outdoors in. Green walls can be comprised of real plants, but that can be an installation and maintenance challenge. These days, lots of maintenance-free options that use specially preserved plants or moss are popular choices. It gives the whole room a feeling of the great outdoors without the hassle.
Bedroom Headboard Accent Wall.
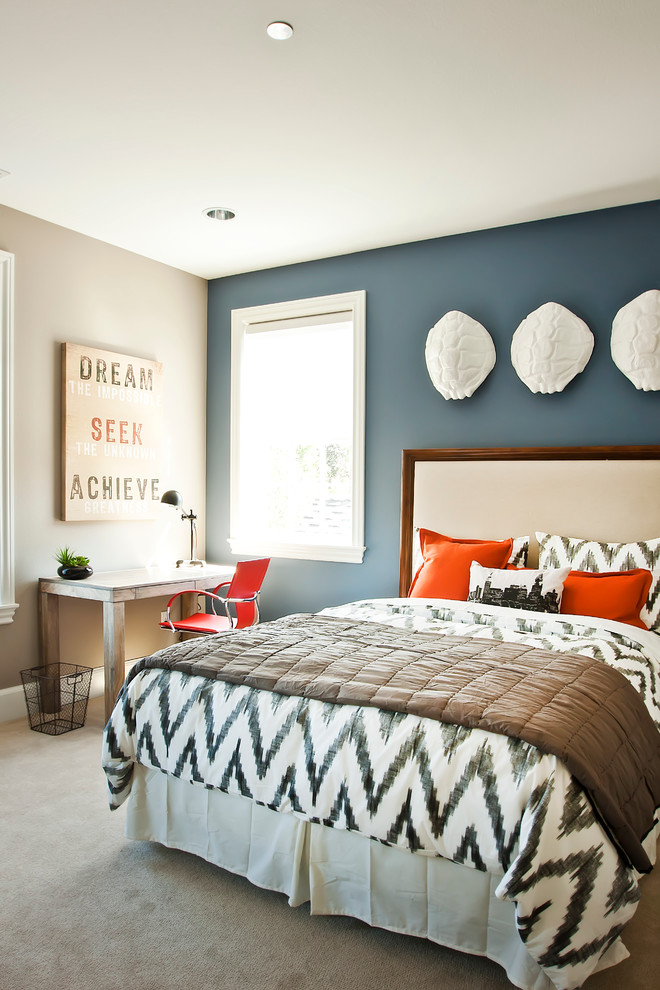
The head of the bed tends to be a bedroom’s inherent feature wall, so using color to make the accent wall obvious is a fun idea. Also fun? Three white oversized brains (is that what they are?) as wall art. Yes, please!{found on cyndiparkerinteriors}.
World Map Accent Wall.
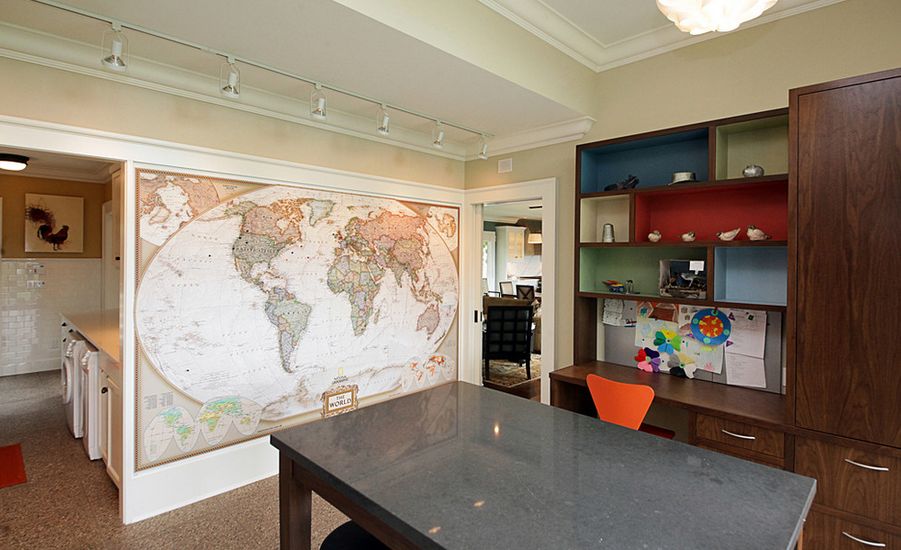
Oh, world maps, how I love thee. Particularly the full-wall versions. I’m having a hard time dreaming up a situation where a mammoth-sized world map as accent wall would NOT be perfect. Truthfully? I’m coming up blank.
Across-the-Room Accent Wall.
As an accent to a space, an accent wall provides an immediate draw. Choosing a wall that’s furthest from the room’s entrance to be the accent wall can be an unspoken invitation to “come in and make yourself comfortable.”{found on chrissnookphotography}.
Modern Geometric Accent Wall.
The geometric non-precision of this type of accent wall (DIY’d here with some painter’s tape and paint) makes it a perfect candidate for a funky, fun-loving space. Kids’ bedrooms, family rooms, even laundry rooms could easily benefit from this accent wall idea.{found on projectnursery}.
Accent Wall with Wood Pallets.
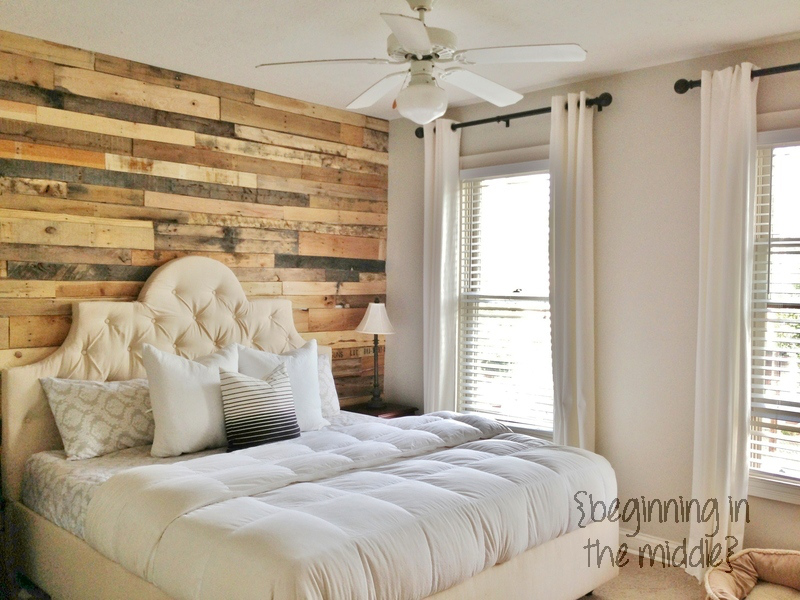
Sure, the wood pallet craze might be waning, but if rustic décor is still your M-O, this type of accent wall is unbeatable. Depth, character, visual interest, and warmth are all immediate results of a wood pallet accent wall. Bonus: DIY compatible.
Dark Accent Wall in a Light Room.
A dark accent wall adds presence and maturity to an otherwise light room. Consider tying in a few darker furniture or accent pieces for balance.
Stone Accent Wall.
It’s rich, sophisticated, and calming. It’s hard to go wrong with using natural materials like stone in décor, but as an accent wall, the effect is completely stunning. The wall choice here – tall and relatively narrow – is effective with flat cut stones.
Homemade (Sharpie) Accent Wall Wallpaper.
Sure, this idea requires plenty of elbow grease and something just shy of a lifetime supply of permanent markers. But the end result is stunning and filled to the brim with personality. Plus, it’s much more budget-friendly than actual wallpaper!{found on vintagerevivals}.
Wall Mural Accent Wall.
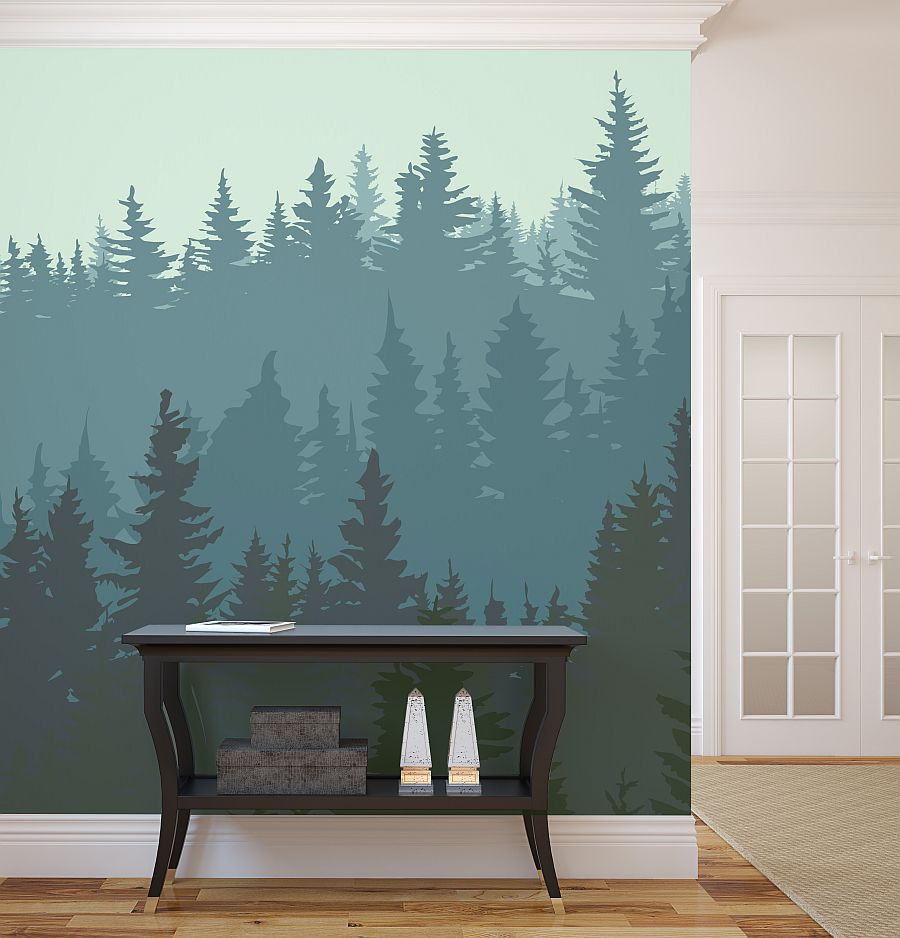
Not much to say about this fantastic idea, other than to choose a mural scene that speaks to you. This accent wall idea is wonderfully simple and full of charm and character.
DIY Faux Wallpaper Accent Wall.
Using a stencil and the combination of flat and high-gloss paint, anyone can achieve the look of luxe wallpaper for an accent wall. This is simultaneously subtle and impactful.{found on kfddesigns}.
Focal Feature Accent Wall.
In a living room with a focal feature, such as a fireplace, it’s not a bad idea to treat the entire wall as an extension of the focal feature by turning it into an accent wall. A different paint color, wallpaper, or even lighting layouts can transform this regular wall into the backbone of the entire space.
Hard-Working Chalkboard Accent Wall.
The chalkboard-iness of this wall is tastefully downplayed by letting it double as an art gallery wall. I love the mixture of formality and informality here.{found on inspiredbythis}.
Staircase Accent Wall.
The wall next to a staircase is often the tallest wall in the house, as it flows for at least two stories. It can be tricky to “decorate,” though, as eye-level is constantly changing, and it’s just so massive to begin with. Create an accent wall with a standout color on this wall. Bonus: No extra wall décor necessary.
Striped Wood Accent Wall.
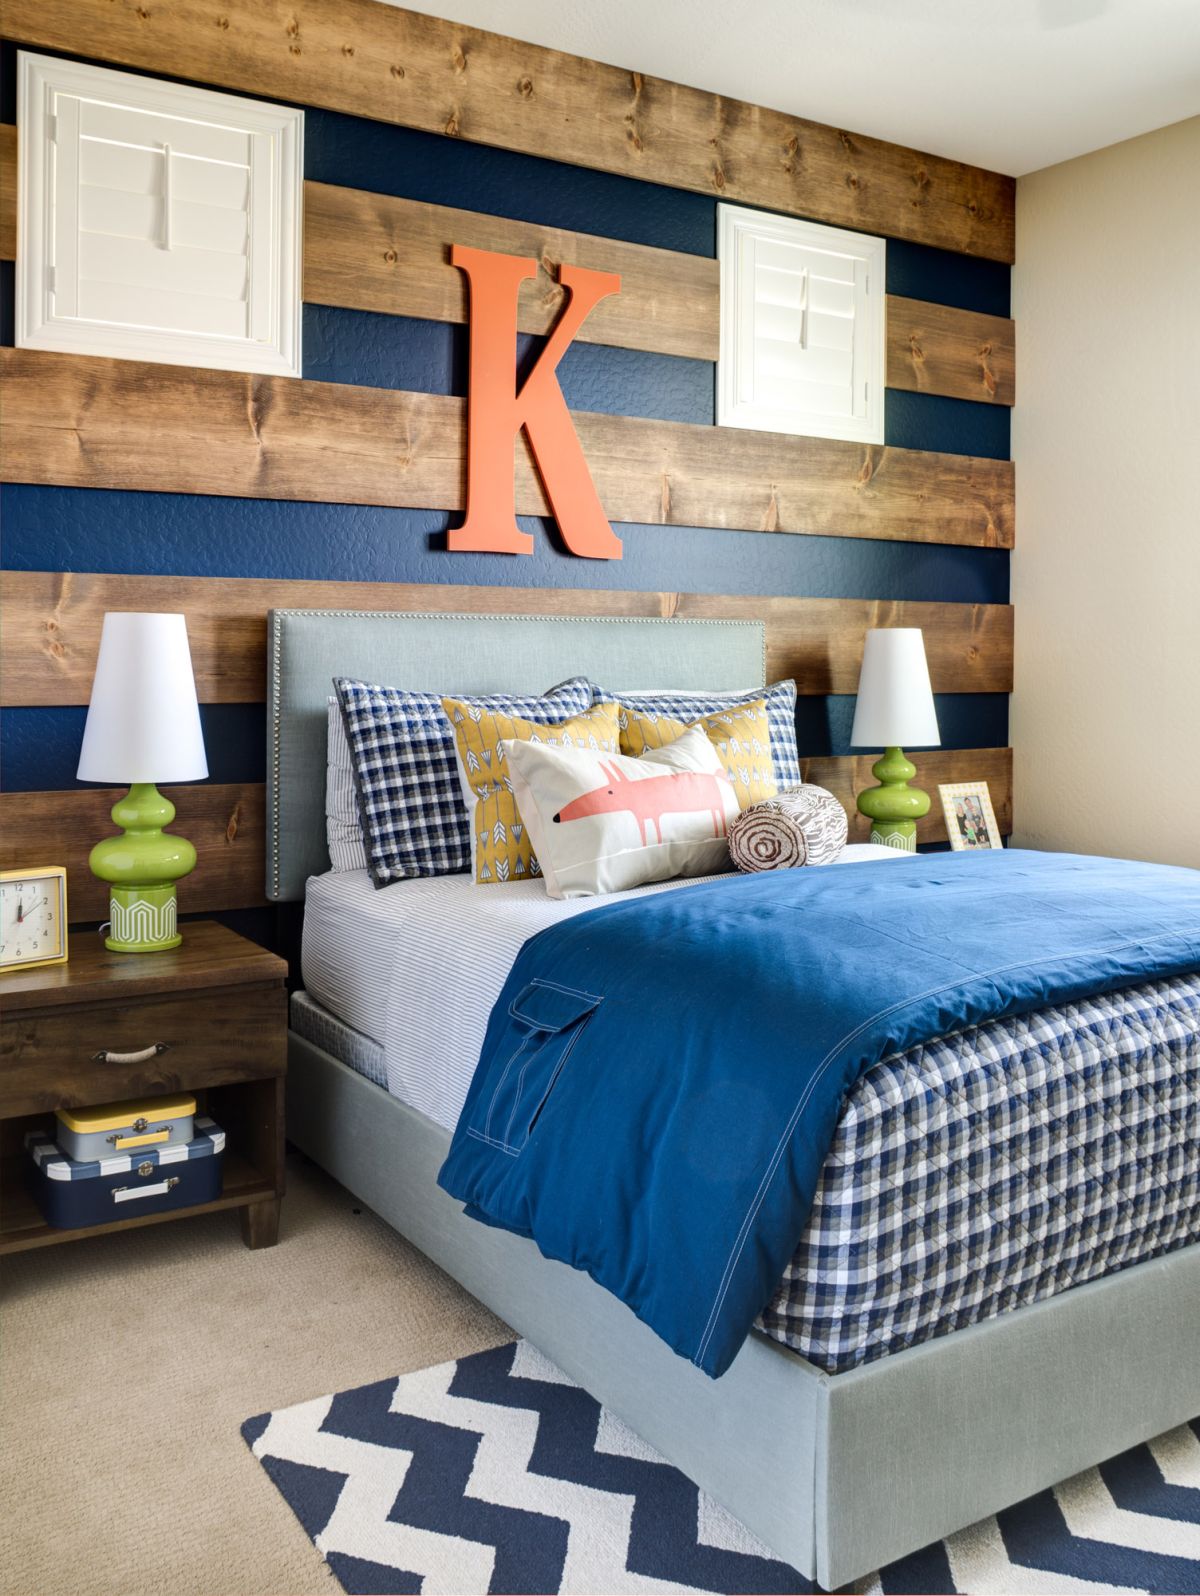
This is an accent wall that could be put together fairly quickly, once the knotty pine boards have been stained (and sealed?) to one’s satisfaction. I love the impact of the peekaboo paint between the boards, forming 3-D stripes.{found on projectnursery}.
Grasscloth Striped Accent Wall.
If you like the idea of a 3-D striped accent wall but aren’t feeling particularly rustic, here’s another take on the concept. Wrap 1×6 boards with metallic grasscloth, then mount them to your accent wall in horizontal stripes. So glamorous and chic.{found on beachchicdesign}.
Bookshelves as Accent Wall.
If your favorite feature in a room is the beautiful built-ins, emphasize this by transforming the shelves into an accent wall. Paint out the back wall, but leave the shelves as they are. The use of monochromatic pieces on said shelves will go a long way to emphasize the accent wall itself.
Wallpapered Accent Wall.
Despite the eclectic décor of this adorable nursery space, the blue wallpapered accent wall fully does its job. Furnishings against the accent wall are monochromatic, which further increases its visual impact.
Fabric-Covered Accent Wall.
Fabric can be used in a way similar to wallpaper to create an unforgettable accent wall. Bonus: In a Bedroom, an accent wall can even double as the headboard.
Ceiling as Accent Wall.
While it’s sometimes referred to as the “fifth wall,” the ceiling isn’t typically the first thing we think of in relation to accent walls. But it makes perfect sense to use your ceiling in this way, particularly in a window-heavy room where actual walls are minimal to begin with.{found on bengebo}.
Art-Displayed Accent Wall.
If you’re wary of committing to a permanent accent wall (although I blink at the idea of paint’s being considered “permanent”), remember than an accent wall can actually be the same form and color as the rest of the walls in your home; it’s what you DO with the wall that makes it stand out. If you take this approach, though, commit to it. Go big with your display – floor to ceiling, wall to wall. Make it an actual accent wall. Have fun with this!
How to paint a wall with a roller
A nice, smooth, evenly painted wall is the goal every time – but most people also want to do this in the most efficient way possible. The best way to save time on painting a wall with a roller is not cutting corners – it’s learning the right techniques to paint the wall faster and more smoothly.
What tools do I need to paint a wall with a roller?
Assemble everything you need ahead of time to make the job easy and efficient:
- Bucket
- Paint roller
- Paint scraper
- Paintbrush
- Putty knife
- Roller screen
- Good quality roller sleeves
- Threaded handle 48 inches long
- Paint
- Painter’s tape
- Primer (if necessary)
Prepare the Walls
- Tape off any trim or other elements you want to protect.
- Properly prepare the surface as needed to fill cracks, holes or dents, sanding smooth any filled spots. Sand down any bumps or lumps.
- Paint the surface with primer if necessary.
Prepare the Paint
Get your paint and equipment ready first. If you’ve painted with a roller before, it’s likely that you used a disposable paint tray and roller set. Don’t. It’s much easier and more effective to work with a 5 gallon bucket and paint screen that fits inside the bucket.
Using a bucket Is better than a paint tray for a number of reasons including:
- You won’t have to refill the bucket frequently like you do a pan because it holds more.
- It’s easy to cover the bucket with a damp towel while you take a break.
- Loading the roller in a bucket is much easier.
- It’s easier to avoid spills or stepping in the paint using a bucket.
Stir up your paint, add it to the bucket and put the screen inside.
Load the paint roller
In order to load the roller with paint, dip it about a half-inch into the paint and then roll it on the screen. If you’re starting with a fresh, dry roller cover, you’ll need to do this five or six times to make sure it’s fully loaded with paint. Don’t fully submerge the roller in the paint to load it because paint can get inside the roller and ooze out while you’re working, creating lines of build-up.
How to properly paint a wall with the roller
Most people have probably just loaded up the roller and started rolling willy nilly…I mean how hard can it be? It’s not rocket science! No, it’s not, but a good paint job involves more than just getting the paint on the wall. Ultimately, you want to quickly spread a smooth, even coat of paint on the wall. Here’s the technique for achieving this goal:
Paint on the wall with a sweeping stroke of the roller.
Start with the roller about a foot from the bottom and close to the corner – about 6 inches — and roll it up at a slight angle with light pressure. Sweep it all the way up until you’re a few inches from the ceiling. Next, using an up and down motion, roll back toward the corner to spread the paint. At this point, don’t worry if you’ve got an uneven buildup of paint or roller marks – perfecting the job comes a little later
Keep in mind that you never want to start right up against a corner or molding with the roller fully loaded with paint. This just creates a heavy buildup of that you’ll have a very hard time trying to smooth out.
Roll up and down.
Now start rolling from the floor to ceiling, overlapping the previous stroke by about a quarter of the width of the roller. Keep going until you get as close to the next wall as you can. This is the part where you smooth out any build-up you made along the way.
Roll and repeat.
Repeat these steps until the whole wall is painted.
Smooth the edges.
Depending on your skill with a paint roller, you may need to smooth the paint along the ceiling. To do this, don’t load any more paint on the roller and use a long horizontal along the top near the ceiling.
Assuming you’ve painted around the trim, ceiling and corners with a brush, that’s it!
Before you get started, make sure you take a look at these extra tips to make sure that your paint job achieves professional quality!
What’s a wet edge and why do I want one?
Painting instructions advise keeping a wet edge, which is critical for a good paint job. Keeping a wet edge means that you have a plan for your rolling and that you’re working fast enough so that each stroke of the roller overlaps the previous stroke of paint when it’s still wet. If you don’t keep a wet edge, you’ll probably see lap mark at the juncture.
Put it on, smooth it off
The biggest rookie painters’ error is taking too long to get the paint on the wall. The technique laid out above allows you to get the paint on the wall and then smooth it out. If you think you might not be speedy enough or if the paint seems to be drying really quickly, work on no more than four feet of wall area before soothing the whole thing off. Also, don’t press too hard on the roller when smoothing out the paint.
Get a little bit closer…
There’s no way to bring a roller all the way to the edge of a wall, but using a brush leaves stroke marks when you “cut in” the ceiling, corners and trim areas. To keep the wall looking its smoothest, us the roller to cover as many brush marks as you can. This involves carefully rolling as close to the edges as possible. A couple of tricks to make this work:
- Turn the open end of the roller toward the edge.
- Don’t use a fully loaded roller.
Pick out the lumps while the wall is wet.
Lumps happen – they can be random bits of debris or dried pieces of paint. It’s crucial to pick out any lumps on the wall while the paint is still wet to avoid mucking up your work. Use a wet rag to pick off lumps as you’re painting. There are also a few things you can do to help avoid lumps:
- Keep your roller away from the floor.
- Use a damp towel or cloth to cover the paint bucket with a damp cloth when you’re not taking a break for any reason.
- Partially dried paint can come off the screen. To stop this, remove the screen and clean it.
- Clean your roller properly by first scraping off any excess paint using a putty knife, or special roller-scraping tool. Rinse the roller until the water runs clear.
- Be sure to strain used paint through a mesh paint strainer to remove lumps before you reuse it or store it.
DIY Your Own Mural Wall

A custom-painted mural can cost anywhere from hundreds to many thousands of dollars depending on the artist, the design and the size of the wall. That said, if you have any artistic skills at all, it’s possible to DIY a wall mural yourself. Of course, you can paint a wall mural outdoors as well as indoors, but here we’ll focus on the indoors since we’re talking about accent walls.
Tools and equipment for painting a mural wall:
- Brushes (optional roller). You’re going to need a number of different types of brushes no matter what the style of mural you are painting: big ones, small ones, detail-oriented brushes and those that are flat-edged, chisel-tipped or fanned are possibilities. The type of paint you use — enamel or acrylic latex, for example – may require different types of brushes.
- Paints
- Rags/paper towels
- A bucket of water for cleaning brushes
- String for measuring or using as a guideline
- Stepladder
- Pencil
How to Paint a Mural on an Indoor Wall
Start with a prepped finish.
If the wall is not the right background color, or if it is not smooth, you’ll need to prep the wall and paint it with a base coat. You want a nice, smooth wall surface for your canvas.
If you paint a base coat of new paint, be sure that it is completely dry before you try to start painting the wall mural.
Scale the Design for Your Specific Wall
Few people if anyone can freehand a mural on the wall. Properly placing and sizing all the elements included requires planning and the first step is scaling the design for the specific wall you are painting. There are two ways to do this:
- The grid method involves drawing a grid across your design in a scale that matches your wall size. Next, use string to mark the same number of squares on the wall. Alternatively, you can mark light pencil lines on the wall that will be covered by the design or erased when you are finished.
- Using a projector is the fastest way to transfer a design onto the wall. All you have to do is project the design onto the wall and then trace all the elements using a pencil or chalk.
Work from big to small
After your design is on the wall, start by painting the largest shapes first. This will help set the main elements of the design and drive your detail work. Be sure to let the large areas dry before moving on to any smaller elements. While you are working, be sure to step to the other side of the room periodically to check you work from a distance to make certain that the elements have the right perspective..
Add the details
After you’ve painted all the larger elements of the design, it’s. time to start working on all the layers of detail, which will be the most time-consuming. This is also the point where you will need all of your specialized brushes.
Voila!
That’s it! Once the details are on the wall, you’re done! You can always go back and touch up anything that doesn’t look quite right. Also, if you can, wait a day or two before packing away all the painting supplies: taking a break from. Working on it and taking a fresh look might lead you to adjust a few details.
Painting stripes on a wall
Even if you don’t have an artistic bone in your body, you can still have a painted accent wall with stripes. These are easy to achieve because essentially all you have to do is mark lines, tape them off and paint. If this sounds like the DIY painting project for you, here’s a tutorial:
Decide on your you design
Do you want horizontal stripes or vertical stripes on the wall? Fat stripes or skinny ones? Maybe you want a pattern of both! Also, what colors do you want to use? Your stripes can be all one color or a mix of two or more. This project can be as simple or complex as you want.
Measure your wall
For horizontal stripes, you need to measure the vertical size of your wall from the floor or bottom molding to the ceiling to make sure that your stripes come out the proper size. For vertical stripes, you need to measure the horizontal size.
Pick a stripe width
The stripes on your wall can be as wide or as narrow as you like. To have them all the same size, you need to determine the proper width of the stripe, and how many stripes you want. To do this, divide the wall measurement by an odd number of at least five. The bigger the number you use to divide the wall, the thinner the stripes will be. If you want to vary the size of the stripes, you’ll still want to follow the same process. Draw the stripes on paper and then play with the width until you have the design you want. Keep in mind that stripes between 4. And. 12 inches wide look best.
Gather your painting tools
Before you get started, pull together all the tools that you will need. In addition to the usual painting supplies like a drop cloth and bucket or paint tray, you’ll need:
- Painter’s tape
- Paint roller and/or mini-roller
- Pencil
- Straight edge or ruler
- Level
- Paint
Prep the Wall
The existing wall color can be your base coat and if it is in good shape, you’re ready to move on to marking your stripes. If not, or if the wall has cracks, holes or dents that need to be repaired, you’ll have to fix those and paint a base coat first. Be sure that any base coat dries overnight before you proceed with the stripes.
Mark the wall
Using the measurements that you’ve planned out for the design you have in mind, use a pencil to mark the stripe lines. Use your straightedge to draw them and check them with a level to make sure that they are even.
Tape the stripes
Using your painters tape, apply it along the lines for every other stripe, just outside the lines, so that when you paint the stripe, you’ll cover the pencil or chalk lines that you made.
Use a roller to paint the stripes.
It’s best to paint the stripes using a vertical motion with your roller, making sure to go over the edge of the take to get a definite and well-defined line. If your lines are on the narrow side, you may want to use a mini-roller to do this.
Let them dry
Once the paint has dried for at least four hours, you can remove the painter’s tape. Pull the tape off, being sure to angle the tape away from the painted stripes as you pull it free.
That’s it! Sit back and enjoy your accent wall, whether it’s a single solid color, an artistic wall mural or a striped design that you did yourself.
The post Dare To Be Different: 30 Unforgettable Accent Walls appeared first on Home Decorating Trends - Homedit.












0 Commentaires