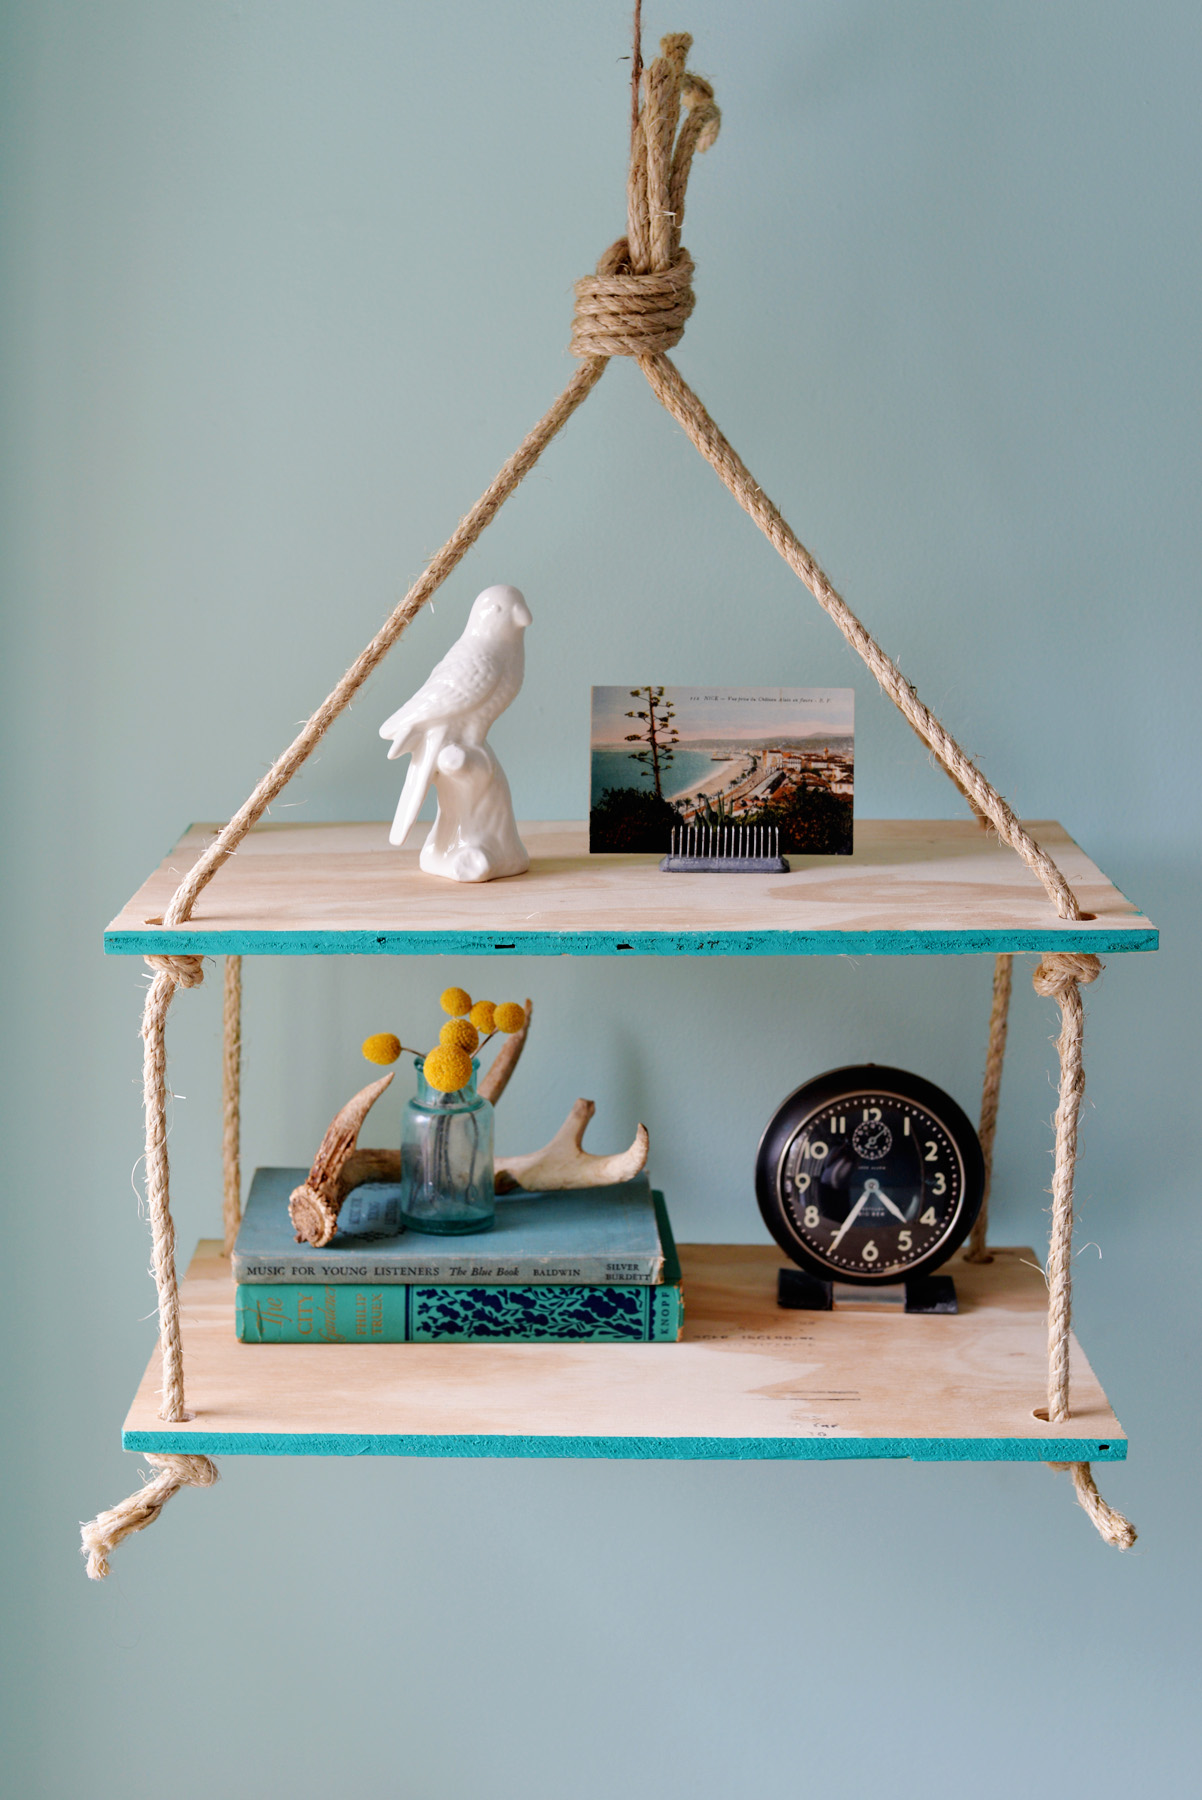
Add something extra to an empty corner or wall with this hanging rope shelf. Avoid multiple holes in the wall by hanging this from the ceiling from 1 simple hook against the wall to display your favorite items. Perfect for renters or those that like to change up their decor often and get tired of putting holes in the wall!

Supplies you’ll need for hanging rope shelf:
- drill or drill press
- 5/8 inch drill bit
- thick rope
- heavy duty scissors
- clamps
- paint
- paintbrush
- 2 rectangular pieces of plywood cut to desired measurements

Instructions to build the rustic hanging rope shelf:
Step 1: Preparing the shelf
Start by prepping your wood. The 2 pieces of plywood that you use should be equal in size. You can cut them down yourself with a table saw or have them cut down for you at the hardware store. Sand down the sides if needed.
Step 2: Attach wood
Stack the two pieces of wood on top of each other and use your clamps to clamp them together.
Step 3: Make holes
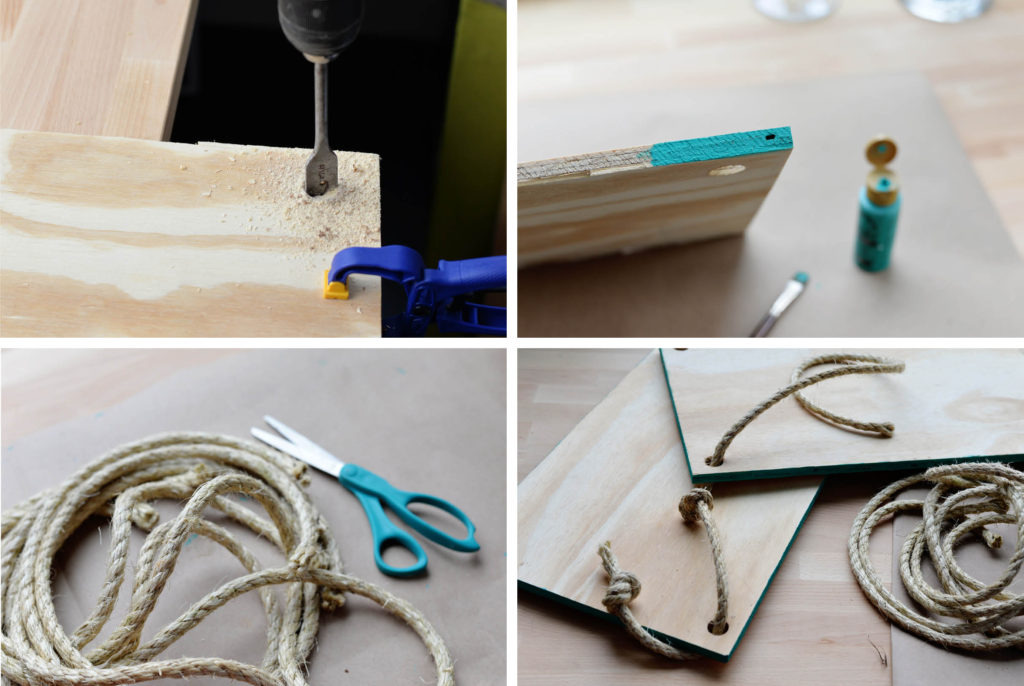
Once you have clamped your wood into place, use your drill with a drill bit large enough to accommodate the width of the rope that you are using to make a hole in each corner. Here we used rope that was approximately 3/8 inch thick so we used a 5/8 inch drill bit to make the holes.
If you find it too difficult to drill through both pieces at one time, carefully measure and mark all the holes in each corner for each board and drill them one at a time. You want to make sure that your holes line up closely one on top of the other so that your shelf is straight.
Step 4: Painting process
Once your holes are finished, paint the edges of the wood a bright and fun color. This part is totally optional and you can get creative here. You could paint the entire piece of wood, just the edges, or leave them plain. Totally up to you and what will look good with your decor!
Step 5: Cutting the rope
Next cut 4 pieces of rope equal size. You will likely want to cut them on the longer side, approximately 4-5 ft each to give enough slack for the knots and hanging down from the ceiling. This measurement will depend on your ceiling height and how far apart you want the shelves so determine this first before cutting.
Remember you can always cut the rope down if needed but you can’t add on any extra slack, so better to make it too long than too short!
Step 6: Assemble the pieces
To assemble the shelf, tie a knot at the end of each piece of rope and thread through the bottom shelf. Tie a second knot at the location where you would like your top shelf to lie. Measure this distance and repeat for the other 3 pieces of rope. Try to keep the knots spaced as evenly as possible to keep your shelf straight.
Step 7: Tie a know
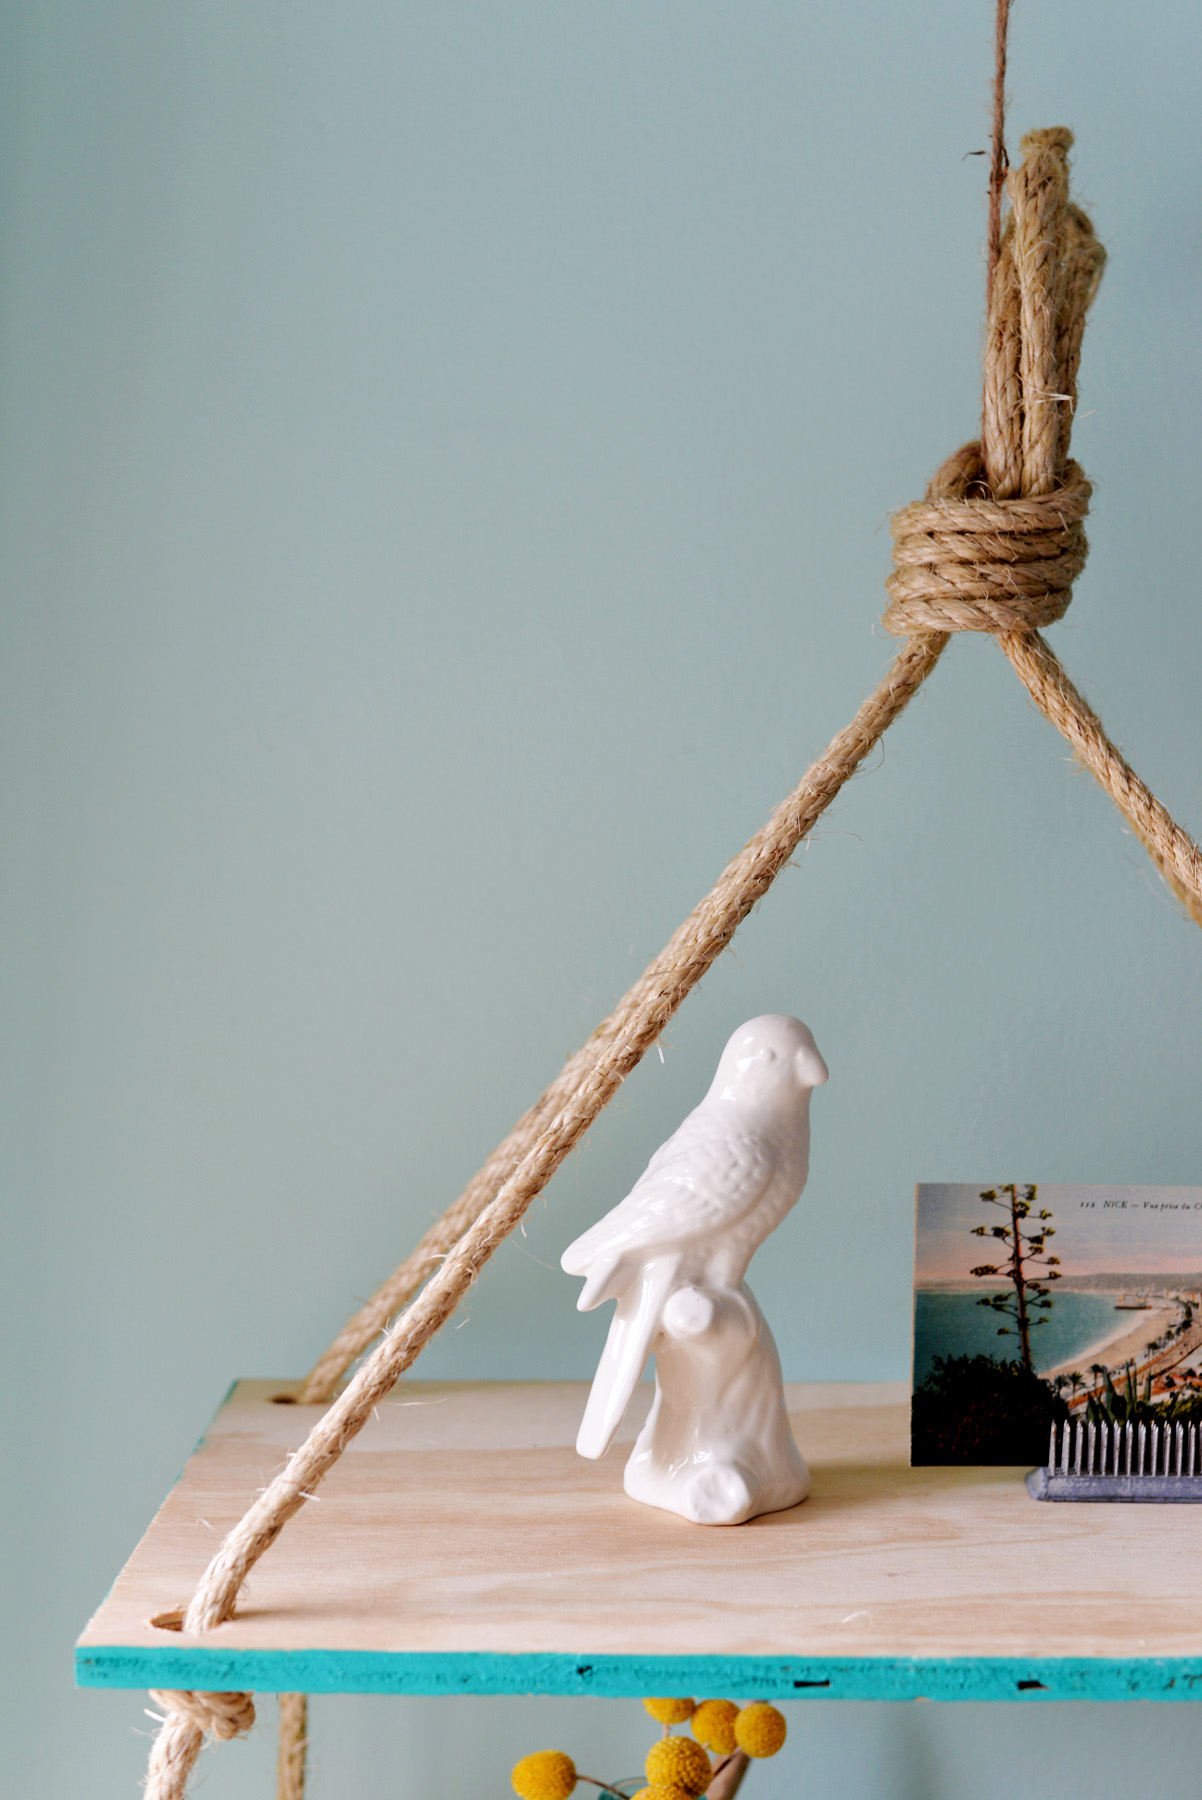
Lastly take all the excess rope at the top and tie a knot. If long enough, you can hang this directly from the ceiling for your shelf. If not, you may want to add extra rope or twine to hang.

When hanging your shelf hang close to the wall so that it does not spin around. Likely you will hang it from a hook in the ceiling. If you have a very long hook you can also try hanging it off the wall as well. Stage with the items you would like to store and your project is complete!


Other rope shelf designs you should give a try:
Farmhouse-style rope shelf

If you want something that’s a bit more boho or farmhouse-inspired as opposed to just rustic, check out the rope shelf tutorial from apieceofrainbow. You can use either jute or sisal rope for a more rugged texture or cotton rope if you prefer a particular color. Also, acrylic paint can be used to color both the shelves and the rope.
Simple double shelf

A small and simple hanging rope shelf like the one featured on listinprogress can fit in all sorts of spaces like that empty wall section above the toilet in the bathroom. It’s a perfect spot for something like this and this a lovely way to make an area like the bathroom feel more welcoming while also keeping it functional.
A multi-tier hanging rope shelf

Because of how this and other rope shelves are designed in general, you can create them with as many tiers as you want. This allows you to customize a project like this based on your storage needs or the space available. Looking at the design featured on mrkate it could even be easy enough to leave room for future additions of more shelves at the bottom.
Natural wood and rope as shelves

Hanging rope shelves are really easy to make and it doesn’t really matter how many shelves you want to include. Once the first one is level and secured in place, adding the other ones is simple. To make it easy to align your shelves, make sure you drill the holes in the same spots. You can just stack the boards and get it done in one motion. Check out hearthandvine for more tips.
Minimalist and modern rope shelves

When it comes to hanging rope shelves you have a choice between all sorts of different types of rope and various types of wood with different finishes. This allows you to design these shelves in a way that suits a particular style. For a minimalist and modern look for example check out the design featured on whydontyoumakeme.
A rope swing shelf

It’s entirely possible to only hang a single shelf instead of two, three or several as we’ve seen thus far. A single board will give you the look of a retro rope swing in the form of a shelf. It can be a cute and also useful accessory that you can add to spaces like the bathroom, kitchen, office or entryway. Check out the tutorial on deeplysouthernhome for more details.
Rope shelves made from an old tabletop

When crafting a hanging rope shelf you can either go buy some wood from your local hardware store or you can use salvaged and reclaimed wood pieces, like a tabletop from an old piece of furniture for example. You can clean it and cut it into pieces or if the size and shape are just right you can just drill some holes in the corners and call it a shelf. The idea comes from salvagedinspirations.
Tiered rope shelf using cable locks

A little detail that you can focus on when making a hanging rope shelf is how you want the shelves to be held in place by the rope. As we’ve seen earlier this is easy enough to do by just tying a knot in each corner. Another solution is to use cable locks instead. Check out the process on collectivegen for more details.
Height-adjustable hanging rope shelf

What’s nice about hanging rope shelves and this one in particular is that you can usually pretty easily adjust their height and configuration just by playing with the rope and the knots. In the tutorial shared on burkatron you can see how easy this is to change the height or level of the shelf by adjusting the two top knots.
Hanging shelves using thin rope

If you like the texture and rustic vibe of jute or sisal rope you should definitely use one of these types when making your hanging shelves. On the other hand, if you want the rope to hold the shelves without standing out too much, use thin cord or cotton rope instead. It will still be very sturdy but it will give the shelf a more modern and simple look. Check out this look on lizmorrowstudios.
The post DIY Rustic Hanging Rope Shelf appeared first on Home Decorating Trends - Homedit.


0 Commentaires