A good quality front door paint will protect your door for years to come and make it easy to maintain. Read on to learn how to paint a front door like a pro and the best way to choose the best paint for your front door.

These helpful step-by-step instructions will save you a lot of money, time, inspiration, and frustration.
How To Paint A Front Door in 10 Easy Steps

Painting front doors is one of the fastest, easiest, and most cost-effective ways to transform your home. Enjoy this how-to complete with front door paint color pictures to guide you on this project.
Step 1. Choosing the best front door colors
First things first: If you’re wondering “What color to paint my front door?” or “What paint to use on my front door?”, here’s how to decide.
Look at the color(s) of your house and the style of your home. You’ll want to choose a color that goes with the rest of the house. For example, the below shows a warm tone house with a bold nature brown-tan-orange rock face (not a very welcoming hue nor does it have massive curb appeal.) The last thing it would need is a layer of brown front door paint!
That said, it’s important to know that there is no ‘best’ front door paint colors, it is a matter of personal interest!
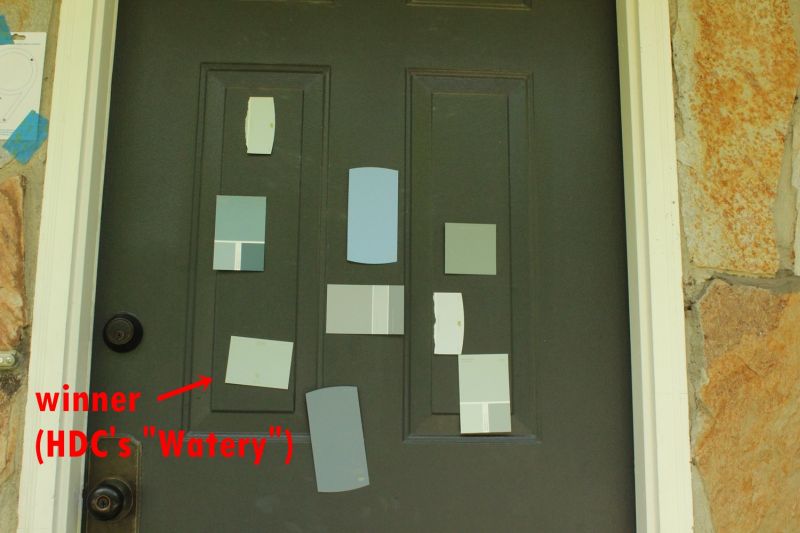
Visiting a Sherwin Williams or paint store near you is a start. You can gather paint chips in varying shades and tape them to the door to review.
Step 2. Sanding away the old door finish
Take a bit of 220-grit sandpaper and start sanding your door face, keep your hand loose.
Start by gently sanding the grooves – if your door has any.
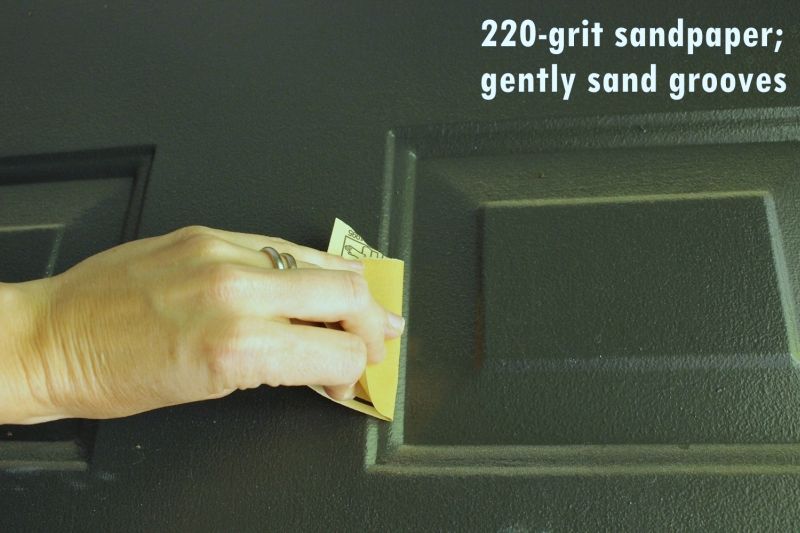
Tip: You want to scrape away major imperfections, but you don’t need to spend forever sanding.

Then move on to the flat surfaces.

When performing a quick sanding, it’s helpful to keep in mind that you’re not necessarily out to achieve a uniform color in the sanding. Some sections are bound to need a bit more sanding.
If you find yourself looking at an area that seems to need more sanding, go by feel instead of by look – stop sanding every few seconds and run your fingers over the area. If it feels smooth, no matter what it looks like, you can move on.
Another tool that you can use in removing the existing door paint is the putty knife. While it is designed to apply putty to fill in cracks and nail holes, a 2-edged putty knife also makes an ideal tool in scraping off old door paints.
But be careful not to apply too much pressure or you might risk gouging the surface of your door.
Step 3. Cleaning up the dust after sanding
Sanding the door can result in dust accumulation. Wipe cleaning the door is thus an essential step in prepping your front door.
You can use something as simple as a baby wipe.

Step 4. Protect those precious door hardware by taping the exposed hinges and doorknob.
When your wipe-down has dried completely, it’s time to mask off with a high-quality painter’s tape those knobs, hinges, and hinge pins- these are the door hardware that you don’t want to be painted over.

Covering the hardware with tape avoids removing the doorknob and lock because those pieces often had to be rather trickily installed by a locksmith.

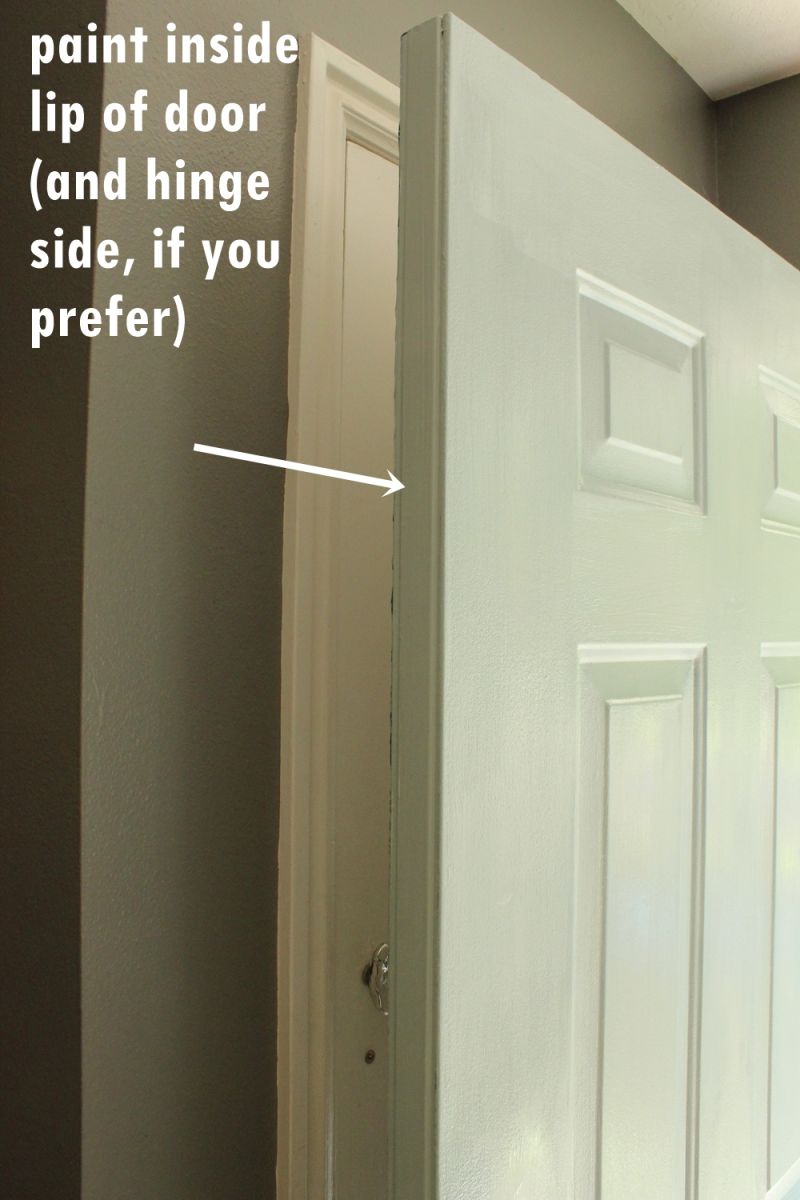
Also, because you will be applying paint to the inside lip of your door (the face that touches the doorjamb), it’s a good idea to run a piece of painter’s tape down the edge of the other side of the door.

Pro Tip: It’s a good idea to simply remove all hardware before applying a coat of paint if covering up the knobs, hinges, and hinge pins don’t work for you. That way, you can get an even sanding done, and you don’t run the risk of paint dripping on your doorknob or keyhole.
And while you’re at it, you can also try spray-painting your door hardware to spruce it up.
Step 5. Choosing the primer
Grab your exterior paint.
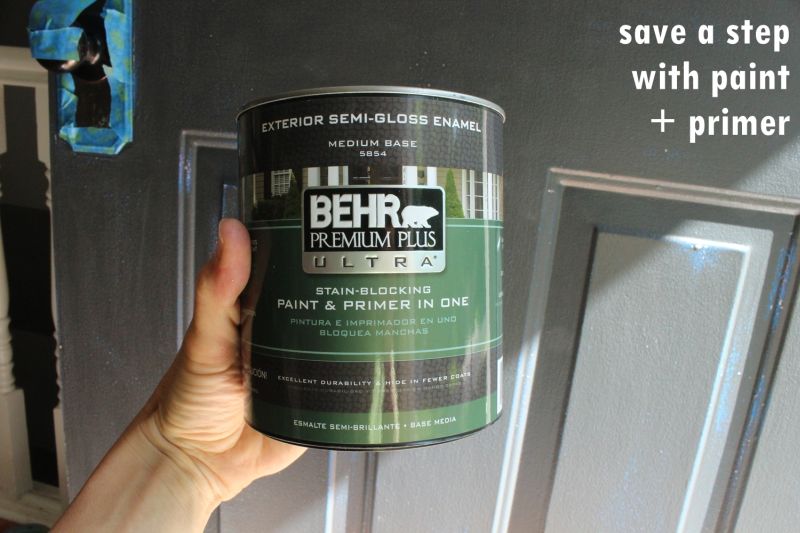
A combination of exterior paint + primer is recommended to save yourself a step while achieving a uniform paint coat. Otherwise, use two coats of primer and then exterior paint on top of that.

There’s a method to painting your front door that makes it look great at the end further discussed below.

The best way to paint front doors is to paint the angled perimeter of a top panel first(one of the six rectangular panels on this door) with a brush.
This first coat should be a light one. Don’t worry if some of the old paint colors show through in parts. You’ll get it covered soon enough with the following ones.
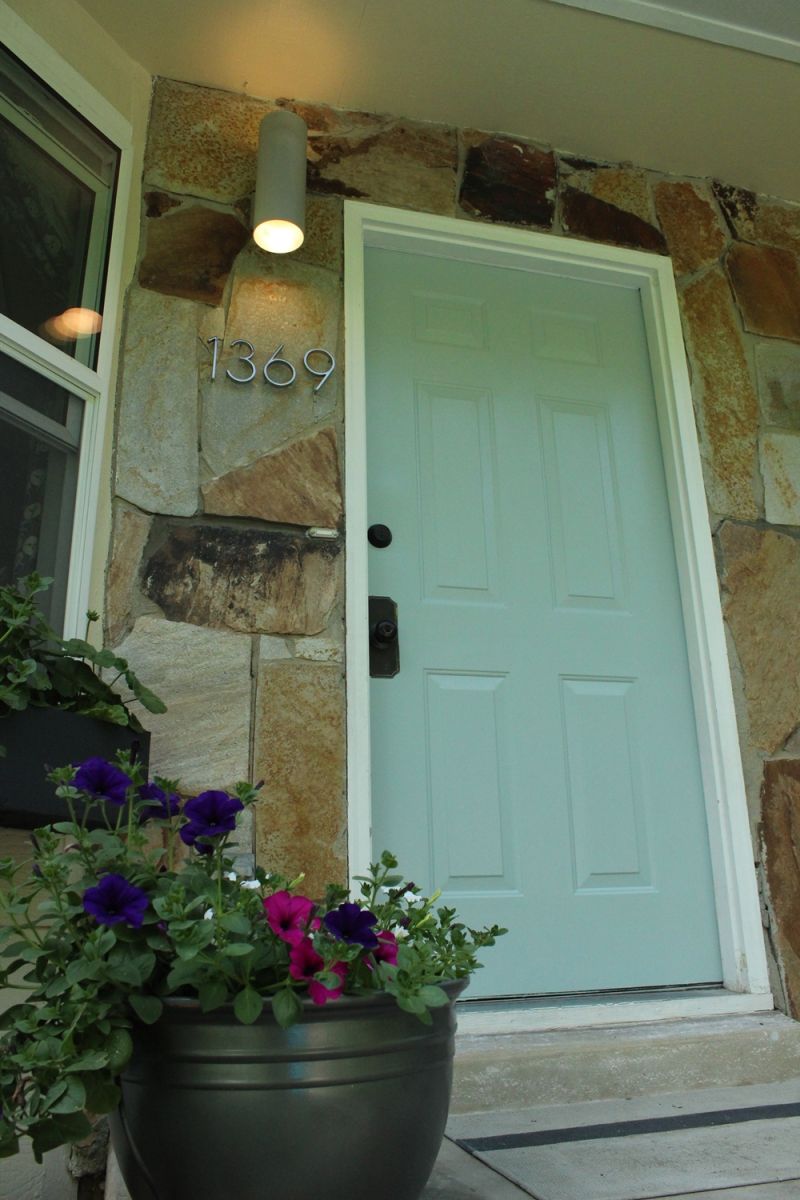
Step 6. Add the color (This example has light blue!)
Paint the entire panel, then move on to the neighboring panel, still with a brush.

Make sure, as you’re going through those panels, that the edges of any new paintbrush strokes are smoothed out immediately. If you leave them, even for 30 seconds, those strokes can start to set making for a very uneven result.
Also, be on the lookout for paint drips and drops! As soon as you notice one, immediately brush it out with your handy-dandy paintbrush.

Step 7. Apply the first coat of your chosen paint color
Next, for the first coat, you can take a high-density foam roller and paint the flat parts around the two panels you’ve just detailed.
Again, watch the edges of your new paint swipes. If there is even a small bit of excess paint that is left to sit there, it will start to set up and make an ugly bump or line when you paint over it later.

Don’t forget about the inside of the panels, if applicable.
Continue this order – brush grooves, check paint edges, roll perimeter, check for paint drips, roll interior, watch out for weird paint globs – for every panel on your door and trim.
Let everything dry (typically for about four hours, if you did as you were supposed to and kept the first round of paint a light one).

Step 8. Sand after applying a fresh coat of paint
Grab your 220-grit sandpaper, and do a very light sanding all across the door.
You’re not trying to sand through this paint layer, you simply are sanding away any slight paint bumps if they came up because you forgot once or twice to smooth out the edges of your new paint swipes.

Step 9. Apply the second coat of your chosen paint
For the second coat, continue the same paint application method I shared with you when you did the first coat of paint.
Paint as though you’re following a wood grain, even if there isn’t one on your door, or if it’s buried under 28 other coats of paint.

The only exception to this is the horizontal lines created by the top and bottom angled edges of each panel; paint those sideways. (Or, really, however you prefer).
Step 10. Removing the protective tape
Carefully remove any tape after your last coat, whether that’s the second or third, while it’s still wet.

Let it dry.


Stand back, give space, and close your door so you can see it with the rest of the house.
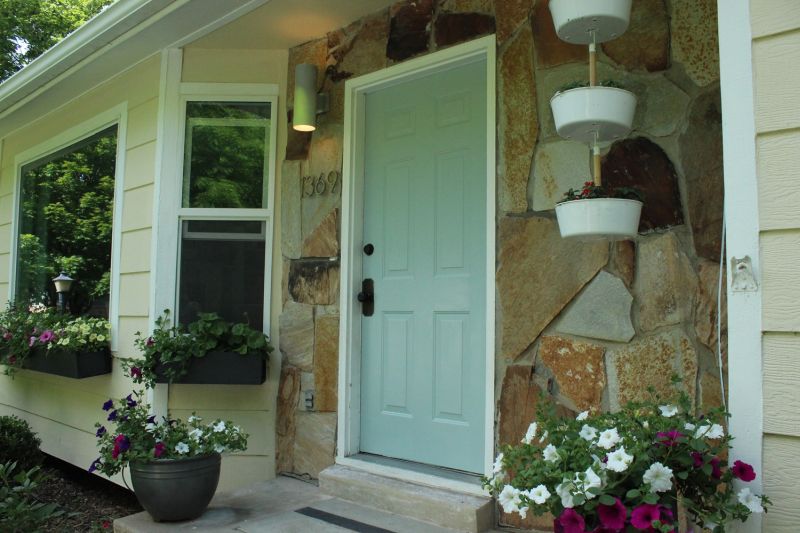
The color always looks a bit different when actually painted on. We love this example, though, because the door frame adds a cool, contemporary element to the surrounding (dated) rock face and shutters.

The color always looks a bit different when actually painted on. We love this one, though, because it adds a cool, contemporary element to the surrounding (dated) rock face.
Frequently Asked Questions (FAQ)FAQ
What paint color should I paint my front door?
Colors set the mood for a home’s interior and exterior spaces, so before deciding on what paint color to use on your front door project, the first thing you have to do is to consider the following:
– the architectural style of your house and front entry
– the atmosphere you’d like to create
– the kind of first impression you want to give.
Recently, gray has taken over as the new neutral paint color. But if you’d rather choose not to be too trendy with the gray door color or simply want a classic look, opt for blue front door paint colors instead. There are plenty of front door paint ideas to explore.
But with all these tips, choosing the right paint color for your front door all boils down to what you truly prefer for your project.
You can stick to choosing your favorite colors and go for nature-inspired front door paint colorslike green or if you’re a bit extra, you can even go for a vibrant red front door. Or visit Sherwin Williams to ask a specialist on what paint will match your home decor best.
What type of paint for the front door should I consider for my next project?
While choosing the type of paint for the front door depends on your style and preference, we highly suggest the use of high gloss paints. This type of finish is the most preferred option for doors and trim, simply because high gloss paints boost the curb appeal of these pieces and the home’s exterior as a whole.
What color to paint the front door of a beige house?
The beauty in having neutral paint color for the exterior of a house like beige or even white house is that it’s relatively easier to choose the right color that would go well with it.
For a beige house, instead of choosing bold Sherwin Williams front door paint or Benjamin Moore color paint, a soft shade like light blue and a darker shade like dark brown are the ideal choices. But if bold is your taste, try painting the front door black or an orange and dark green! (Find inspiration online for the best black paint for a front door, Pinterest is full of this!)
How to paint a steel front door and screen door? (Or how to paint a metal front door?)
The steps and materials needed in painting a steel front door or painting a metal front door are the same as the steps outlined in this guide. You can even use the same steps in painting a screen door. Pro tip: If you have rails, you can match them to your door and even your shutters! Try a fun, nature-approved green.
Conclusion:
Here’s the grand takeaway: painting your front door is easy. It can actually be extremely rewarding, challenging, and fun. Plus, you save lots on DIY than paying for services (after all the cost to paint a front door can be a few hundred!) and provide your neighbors some inspiration. After all, it’s your front door and you can do whatever color or look that you want to give it.
Hopefully, this guide has shed some light on some of the finer details in creating a gorgeous front entrance.
The post How To Paint A Front Door Like A Pro appeared first on Home Decorating Trends - Homedit.
0 Commentaires