Window treatments (especially custom ones) can certainly get pricey, so why not find some cheap fabric and make your own? Roman window shades are an excellent alternative for window or door coverings.

How to make roman shades that make sleek and functional windows or doors coverings and are relatively easy to DIY (although they may take a while depending on the number you are creating so make sure to set aside enough time for this project!). Although there are a lot of steps to this one time cost savings will definitely be worth it when you have your own custom window treatments!
What are roman shades?
Roman shades are a combination of drapery and blinds. They can fold up with a cordless lift. And can add the right amount of texture and style to any room.
It can make for the perfect DIY project you can do at home to customize roman shades into any fashion you desire. You can use various fabric types and color patterns. And easily control how much light and privacy you’d like.
Different Roman Shade Styles

There are various styles of roman blinds to fit your needs for window treatments. You can use different fabrics, patterns, and fold style to create a unique and customized shade.
First, the different folds for your roman blinds include:
- Flat Fold
- Rolling style
- Folding style
- Cellular Construction
- Batten Front
- Batten Back
Then there are different styles of shades you can choose from:
- Blackout shades
- Bamboo
- Cordless
- Faux
- Relaxed
- Pleated
- Greek Key
How to Measure for Roman Window Shades

You’ll want to consider a few factors for measuring roman shades.
First, determine if the window is deep enough to mount the shades inside the window frame. Then measure the width of the window from left to right on the top corners.
Next, measure the height of the window starting at the top all the way to the bottom.
Repeat this process for every window you’ll make a shade for.
How to Clean Roman Window Shades
If your shades are looking dingy, it’s probably due to a build-up of surface-level dust and dirt. There’s a simple process you can follow to clean your window coverings.
First, use the hose on the vacuum to suction all the top-level dirt and dust off the shades. It’s important to use a brush attachment. Otherwise, you might risk damaging the fabric.
If the shades have splatter or stains, you can use a microfiber cloth with warm water and mild dish soap to gently spot clean the areas. Be sure to dry the shade with a different microfiber cloth to prevent any water damage to the fabric.

Supplies You Need For Roman Window Shades:
- fabric (here we did 3 windows using approximately 60 inches each of fabric so we used 5 yards total)
- tape measure
- small plastic rings (quantity depends on size of project and number of shades made)
- inside mount
- nice string for shades (4x the amount of fabric you used)
- 3 pieces of wood (rectangular and fitting to size for the tops of your shades)
- needle
- thread
- pins
- sewing machine
- eye hooks
- cord cleats
- screws
- drill with phillips head bit and thin drill bit
- staple gun
- dowel rod (optional)
How to Make Roman Window Shades: Step by Step Guide
Step 1: Measuring
Start by measuring for your entire project. Measure the interior of the window and cut your wood for the top of the shade to size length-wise. Cut your fabric down to size leaving plenty of room for seam allowances (we used a 2-inch seam allowance to each side of the shade, 2 inches for the top and 6 inches for the bottom).
For light control, you can double or triple the fabric layers if you want to block the light out. Or you can do the opposite and keep the layers thin so natural light can still leak through the shades.
Step 2: Sew up
Sew up the side seams of your shade by using a 1-inch double hem. Pin up both sides and run through the sewing machine with a basic straight stitch.
Step 3: Think on a dowel rod
For the bottom of the shade, measure and pin a 3-inch double hem and sew across. This will leave plenty of space for an optional dowel rod if you decide to use one.
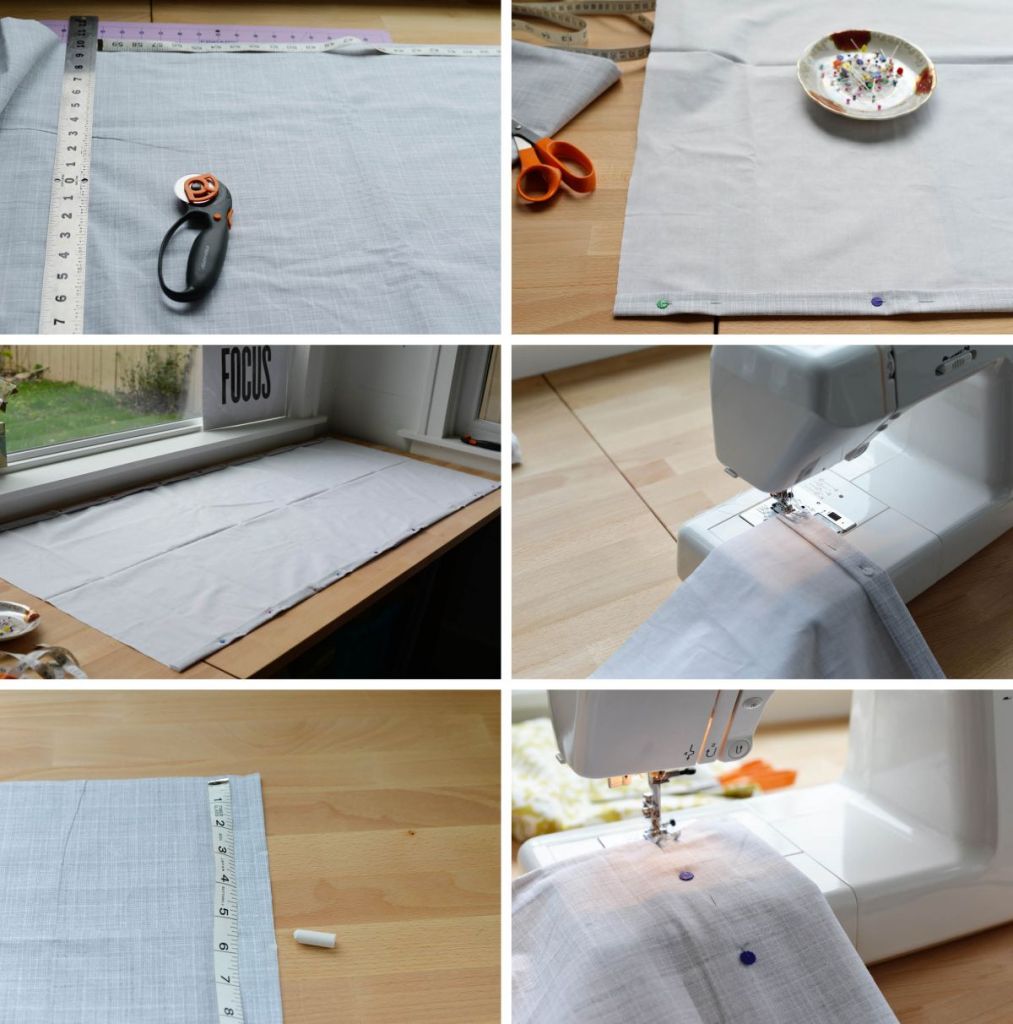
Step 4: Add plastic rings
Once your shade is sewn up, you will need to add your plastic rings that will hold in the string for your shade. Measure and mark where you want your rings along each side of the shade and middle of the shade (3 rows total).
Each ring should be spaced evenly from the bottom up to the top. Here we used 10-inch spacing between each ring and used 5 rings on each line (for a total of 15 rings per shade).
You do not need a ring at the very top of the shade as that part will be attached to the wood to drill into your window. You can use more or less depending on how far apart you would like your pleats (closer together means tighter and more pleats, further apart will mean looser and fewer pleats).
Step 5: Sewing process
Once you have measured, marked and placed each ring in place (you can use pins to hold them in place), sew them on. You can hand sew them or drop the feed dogs on your sewing machine and use a zig-zag stitch to attach each ring.
Step 6: Distance between rings and columns
Once the rings are attached, measure the distance width wise between your columns of rings. Mark this distance on the wood and pre-drill 3 small holes. Insert the eye hooks into the holes.
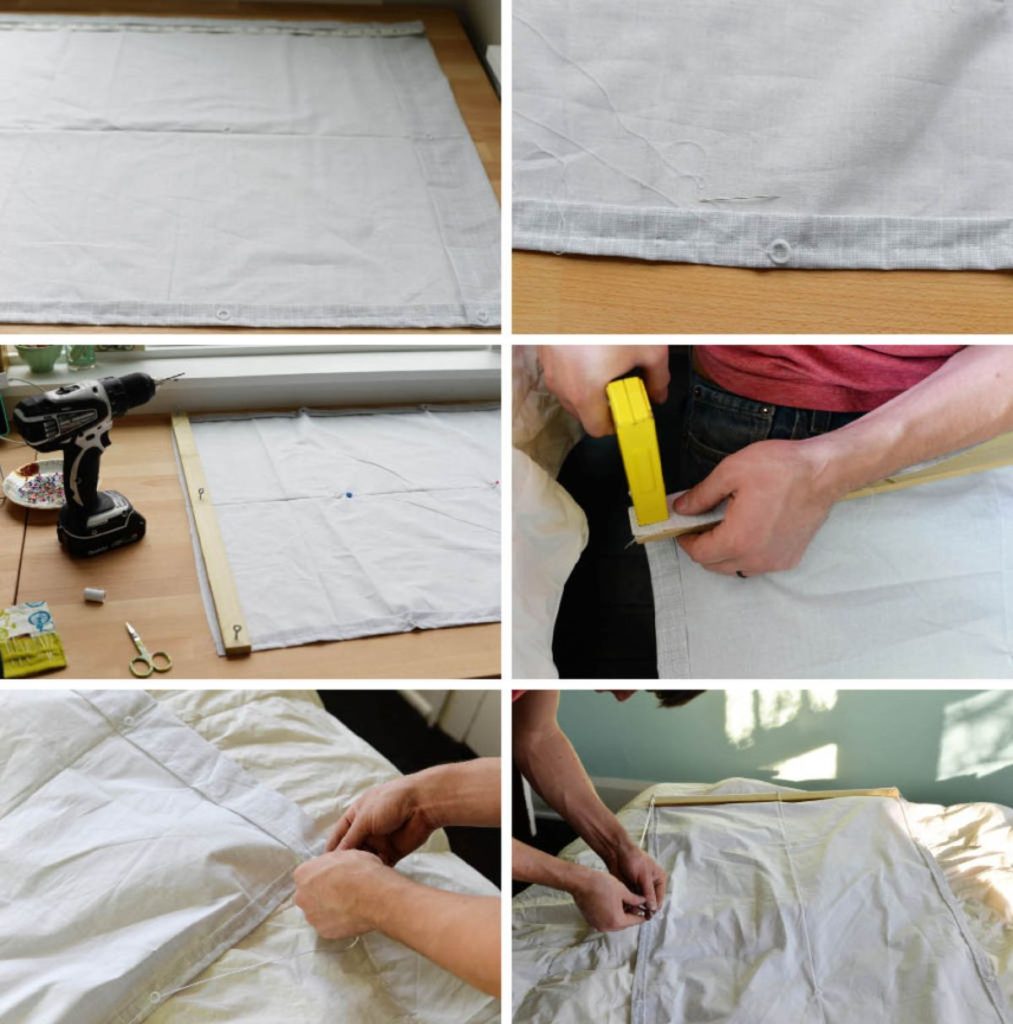
Step 7: Top fabric
Staple the top of the fabric to the top of the wood (other wise of where you placed the eye hooks).
Step 8: String up the shade
String up the shade by tying the string at the bottom of the shade to the plastic ring. and feeding it up through each ring until you reach the top and string through the eye hook. Pull off to the side and halfway down the shade. Cut there. Continue with each column of rings, but with each column feed through the beginning rows eye hook to have your string end at the same spot at the end of the previous column. Once all 3 columns are strung, tie the ends of the string together to create your pull.

Step 9: Drilling
Pre drill your shade and screw it to the top of the window (on the inside border of the window).
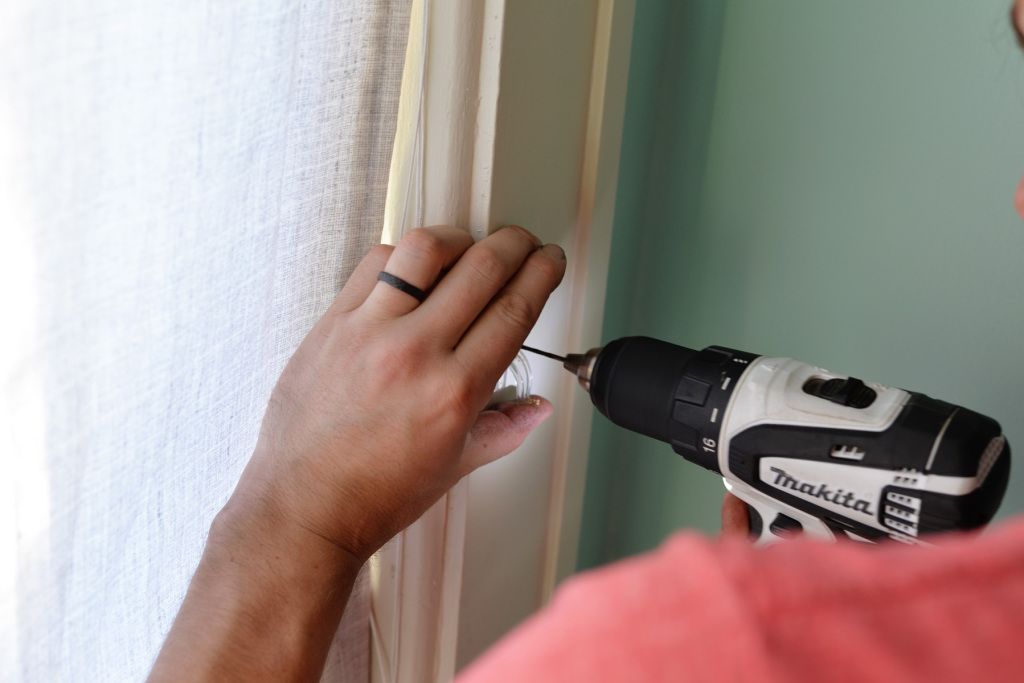
Step 10: Add cord
Lastly, screw the cord cleats into the side of the window. Pull on your string and wrap around the cord cleat to pull up the shade! You may want to add in a dowel rod to the bottom of the shade to provide weight on the shade when you are pulling up and down but this is optional (but may keep your shade more straight).

Frequently Asked Questions (FAQ)FAQ
Are roman shades in style?
Fabric shades are still a popular and stylish choice for many homeowners today.
Where to buy roman shades?
You can find them at most home improvement stores or online retailers within any budget.
How much are roman shades?
These shades vary in price based on the fabric, style and size. The more intricate and custom, the more expensive they are. However, you make your own with this DIY project for reasonably cheap.
How do roman shades work?
These shades fold into themselves as you lift them and stack together at the top of the window or door frame. Then, they unfold as you pull them down to cover the glass.
Roman Window Shades: Conclusion
Make your own custom window treatments with this DIY project. Roman window shades are an excellent way to add texture and style to any room in your home.
The post How To Make Roman Window Shades – Easy DIY Project For Your Home appeared first on Home Decorating Trends - Homedit.


0 Commentaires